Welcome to Moda Fabrics!
Granny Windermere’s Placemats
Granny Windermere’s Placemats
Published:
Nov 1 2015 - 23:00
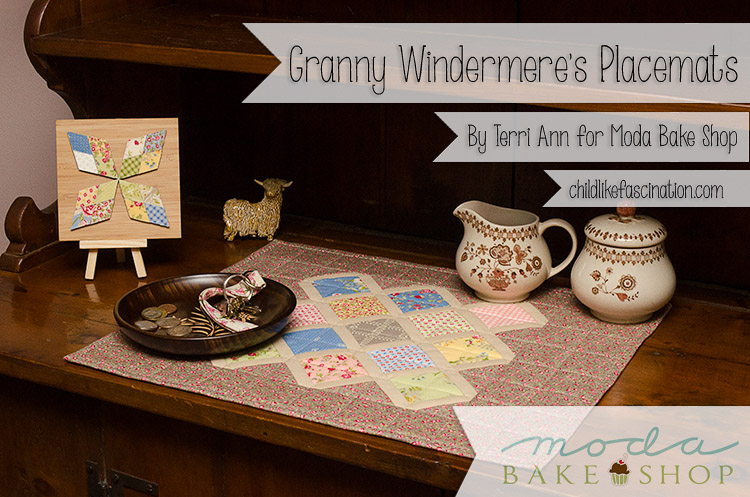

I’m excited to bring you my second Moda Bake Shop tutorial today! These placemants are a great way to spruce up your table setting and this simple design could be used for holiday fabric or an everyday print like the lovely Windermere by Brenda Riddle Designs for Moda. I’m neither one for floral nor am I usually one for mini charm packs but the scale of this print is perfect for a sashed granny squares design I'm calling, Granny Windermere’s Placemats.
These placemats finish at 18” x 14” and the ingredients listed will yield 4 placemats!
![]()
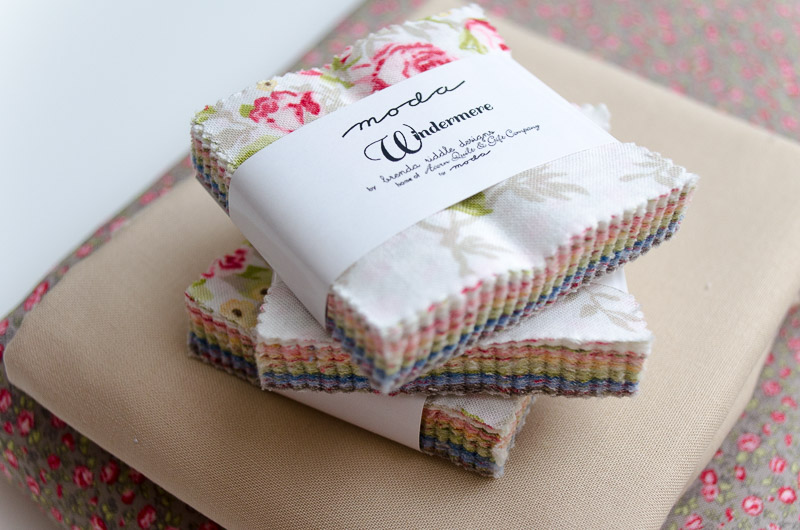
2 Mini Charm Packs (I used Windermere)
2 ¾ yards for background, backing and binding (I used the Cobblestone brown ditzy flower print from the Windermere line)
½ yard Sashing (I used Bella Solid Tan)
* Will yield 4 placemats
![]()
Step 1.
From your solid sashing cut 3 strips 1” x WOF
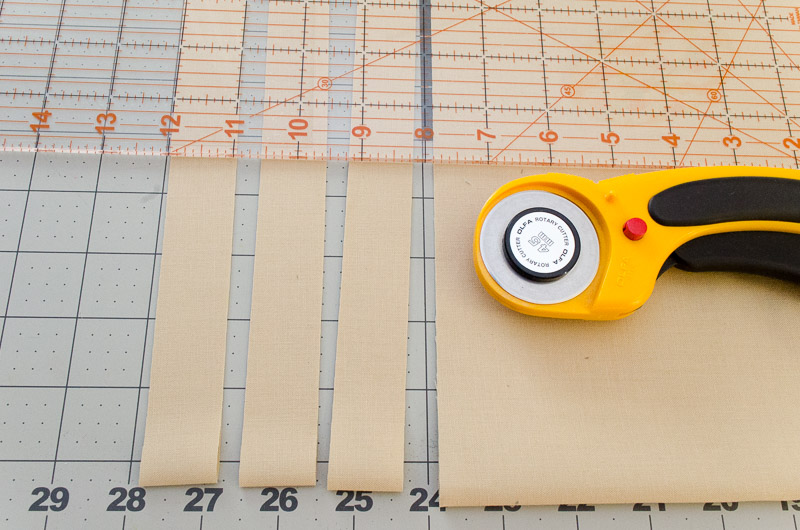
Step 2.
From those 3 strips sub cut
- 18 @ 1” x 2 ½”
- 2 @ 1” x 3 ½”
- 2 @ 1” x 8 ½”
- 2 @ 1” x 13 ½”
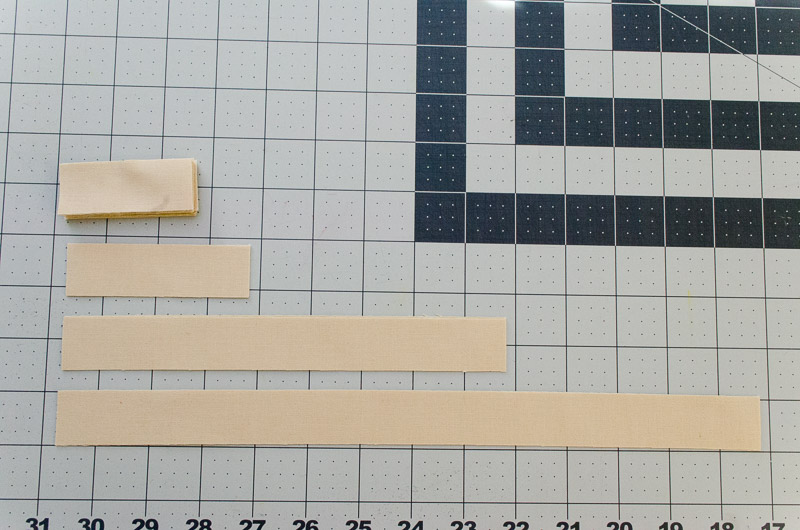
Step 3.
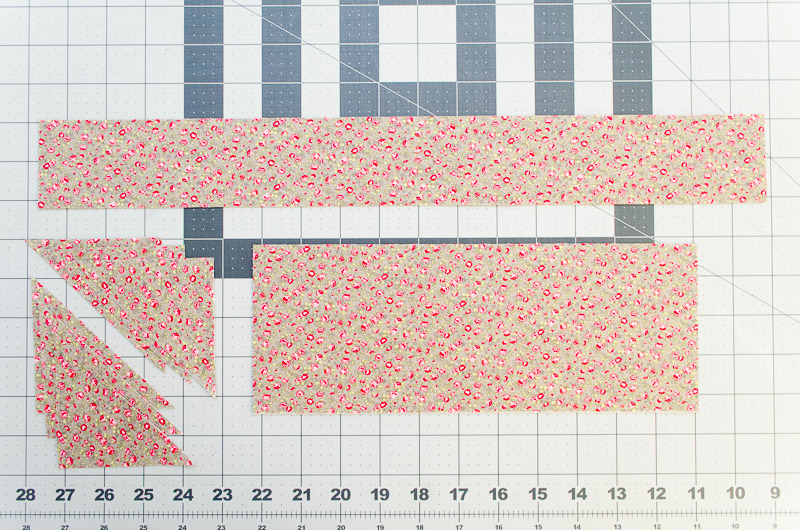
From your background fabric cut:
- 1 @ 3 ½” x WOF
- 1 @ 2 ¼” x WOF
- 1 @ 4 ¼” x WOF
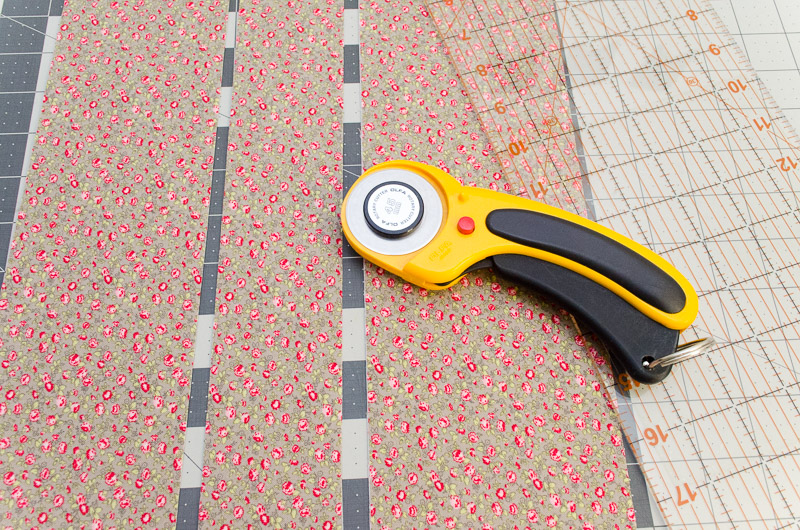
Step 4.
Sub-cut the 3 ½” strip into 6 @ 3 ½” squares and cut them in half diagonally to yield 12 triangles.
Sub-cut other strips into 2 @ 18 ½” x 2 ¼” and 2 @ 11 ¼” x 4 ¼”
Step 5.
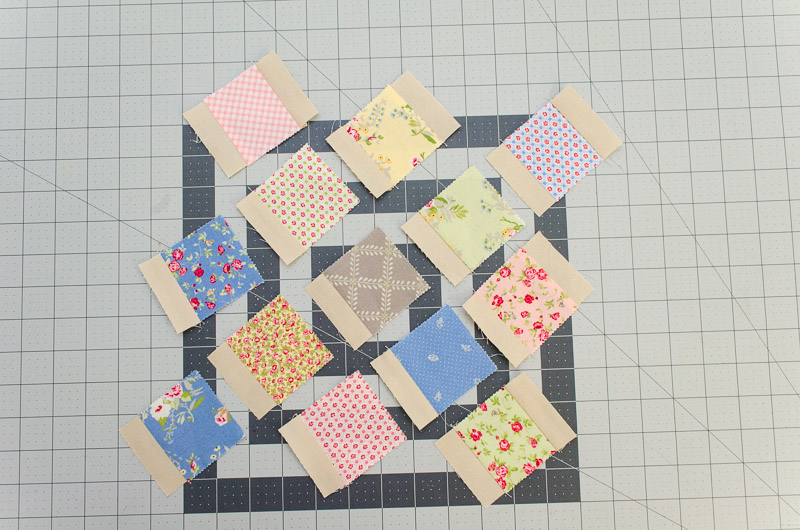
Selecting the mini charms and an arrangement for your placemats, use your digital camera or phone to snap a photo of your final layout!

Step 6
Sew the 1”x 2½” sashing to the mini charms as shown in the photo below. One of the end pieces will need a strip sewn to two (opposite) sides of the mini charm
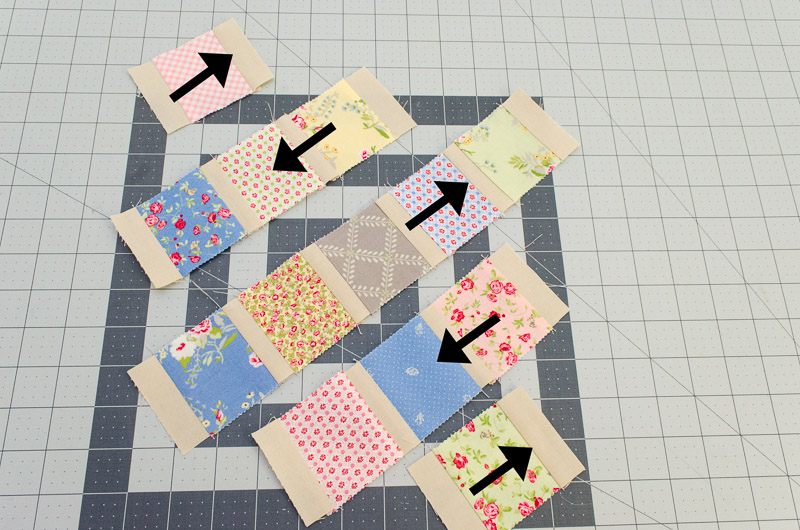
Step 7.
Sew those diagonal rows together and press seams in alternating direction as indicated.
Step 8.
Sew the triangles to the ends of strip 1, 2, 4 & 5 as shown below. Line up the 90 degree corner
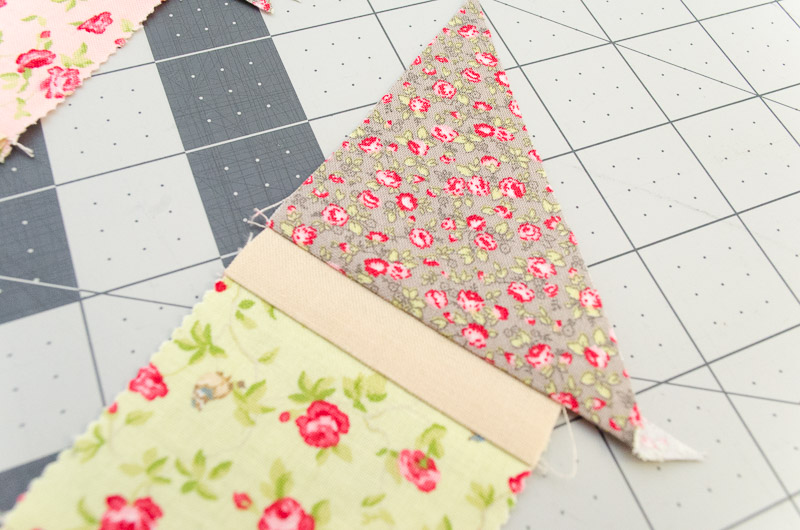
Step 9.
Trim the excess on all rows
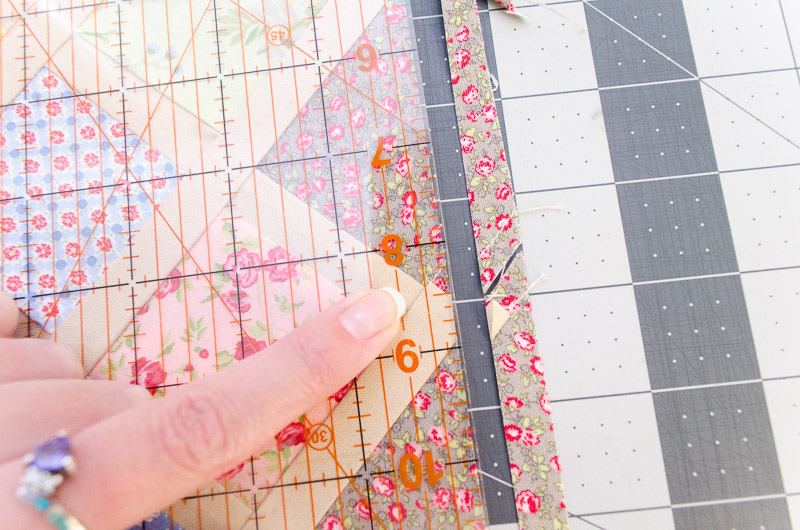
Step 10.
Sew the remaining sashing in place by matching the centers then gently smoothing sashing out.There may be some overhang on the edges but its most important that you centers line up as shown (you'll be trimming the edges off later)
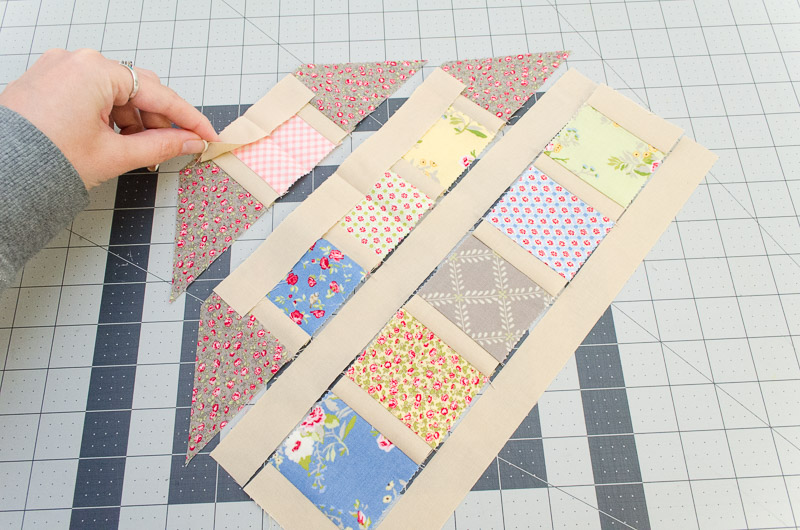
Step 11.
When it comes to sewing the rows together, if your seams were press as shows in step 7 you can nest the seams past the sashing to line them up. Match your seams then smooth out the sides
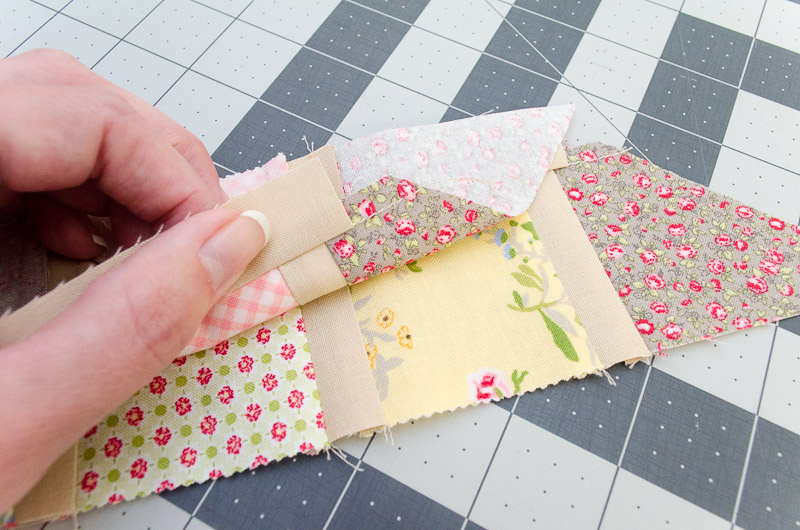
Step 12.
Trim excess overhang on corners (top left and bottom right as shown)
Step 13.
Match centers again and sew triangle to corners
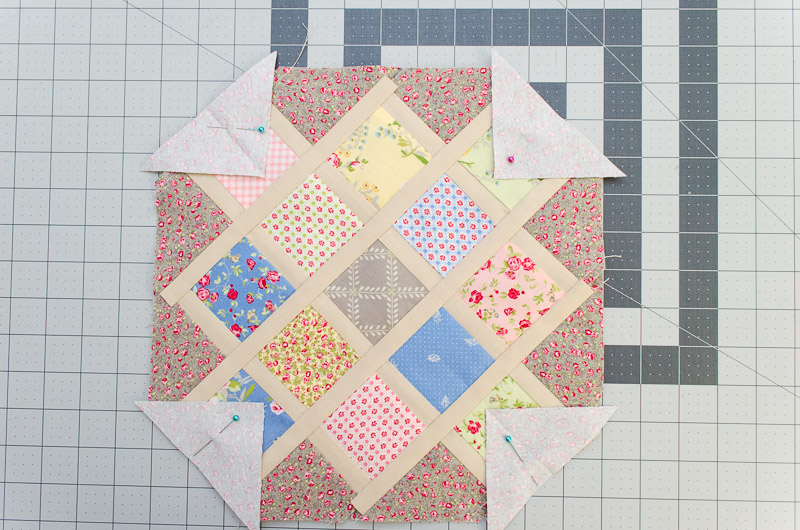
Step 14.
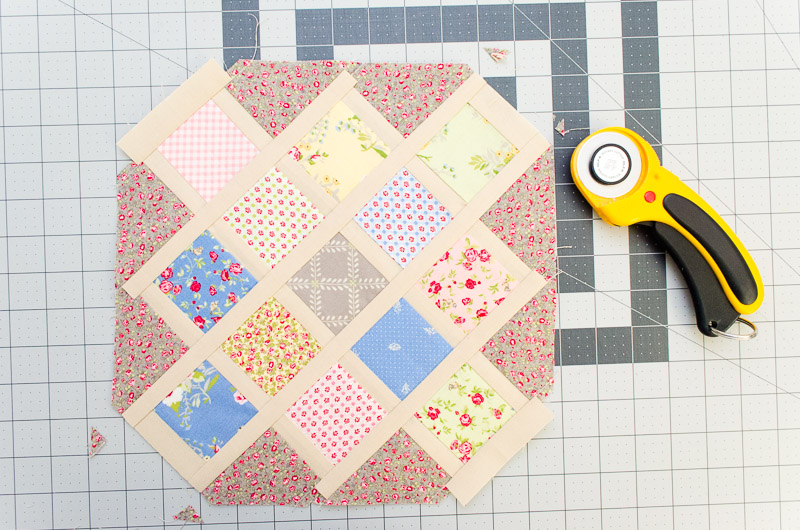
Trim sashed granny square leaving ¼” from the middle of the sashing (where the corners meet as shown below)
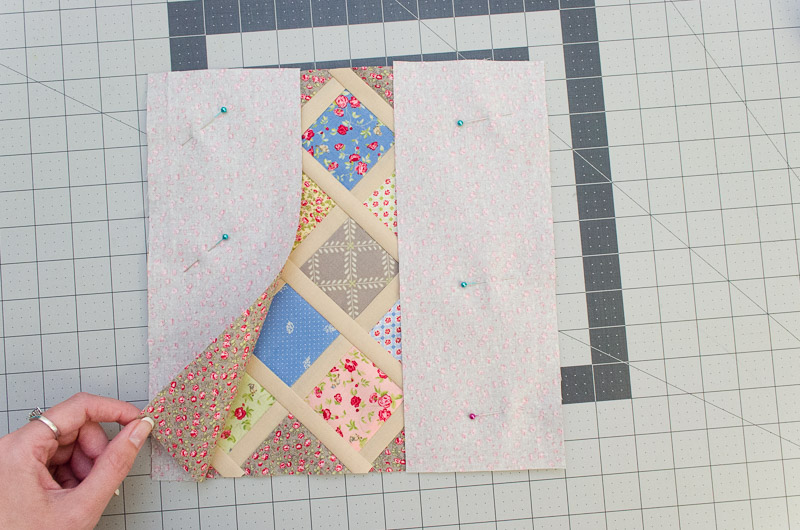
Step 15.
Sew 11 ¼” x 4 ¼” background to the sides
Step 16.
Sew 18 ½” x 2 ¼” background to the top and bottom
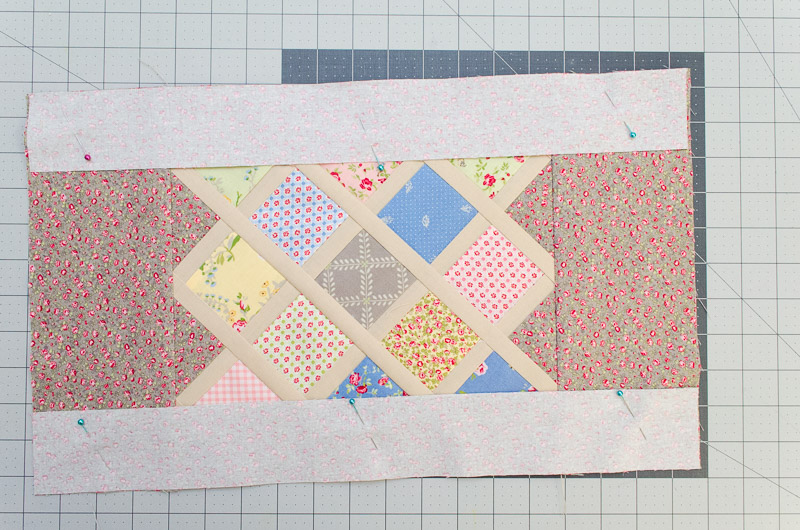
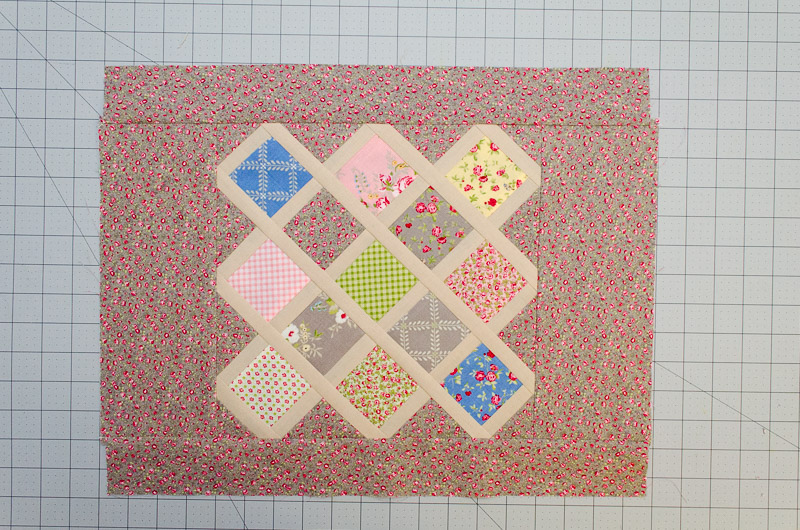
And now the top to your placemat is complete!
Finishing
Baste, quilt and bind as you see fit!
![]()
This tutorial will yield 4 placemats at 14" x 18" each. I love having this placemat on the antique hutch I inherited this past year, it's a perfect way to brighten up the space and protect the finish.
I even put together a sample of this placemat with the sashing and background reversed and a version of a bleached-out background. I'll be posting more about the bleach process I used on my blog next week!
Alternate looks for this pattern:
I hope you enjoyed this tutorial and I cannot wait to see what beautiful placemats you create with these designs, be sure to tag me on Instagram @terriann and share it in the Moda Bake Shop Flickr group!
Terri Ann
Childlike Fascination
![]()
Posted in: