Welcome to Moda Fabrics!
Countdown to Christmas: Gift Wrapped Star
Countdown to Christmas: Gift Wrapped Star
Published:
Dec 2 2017 - 23:00

![]()
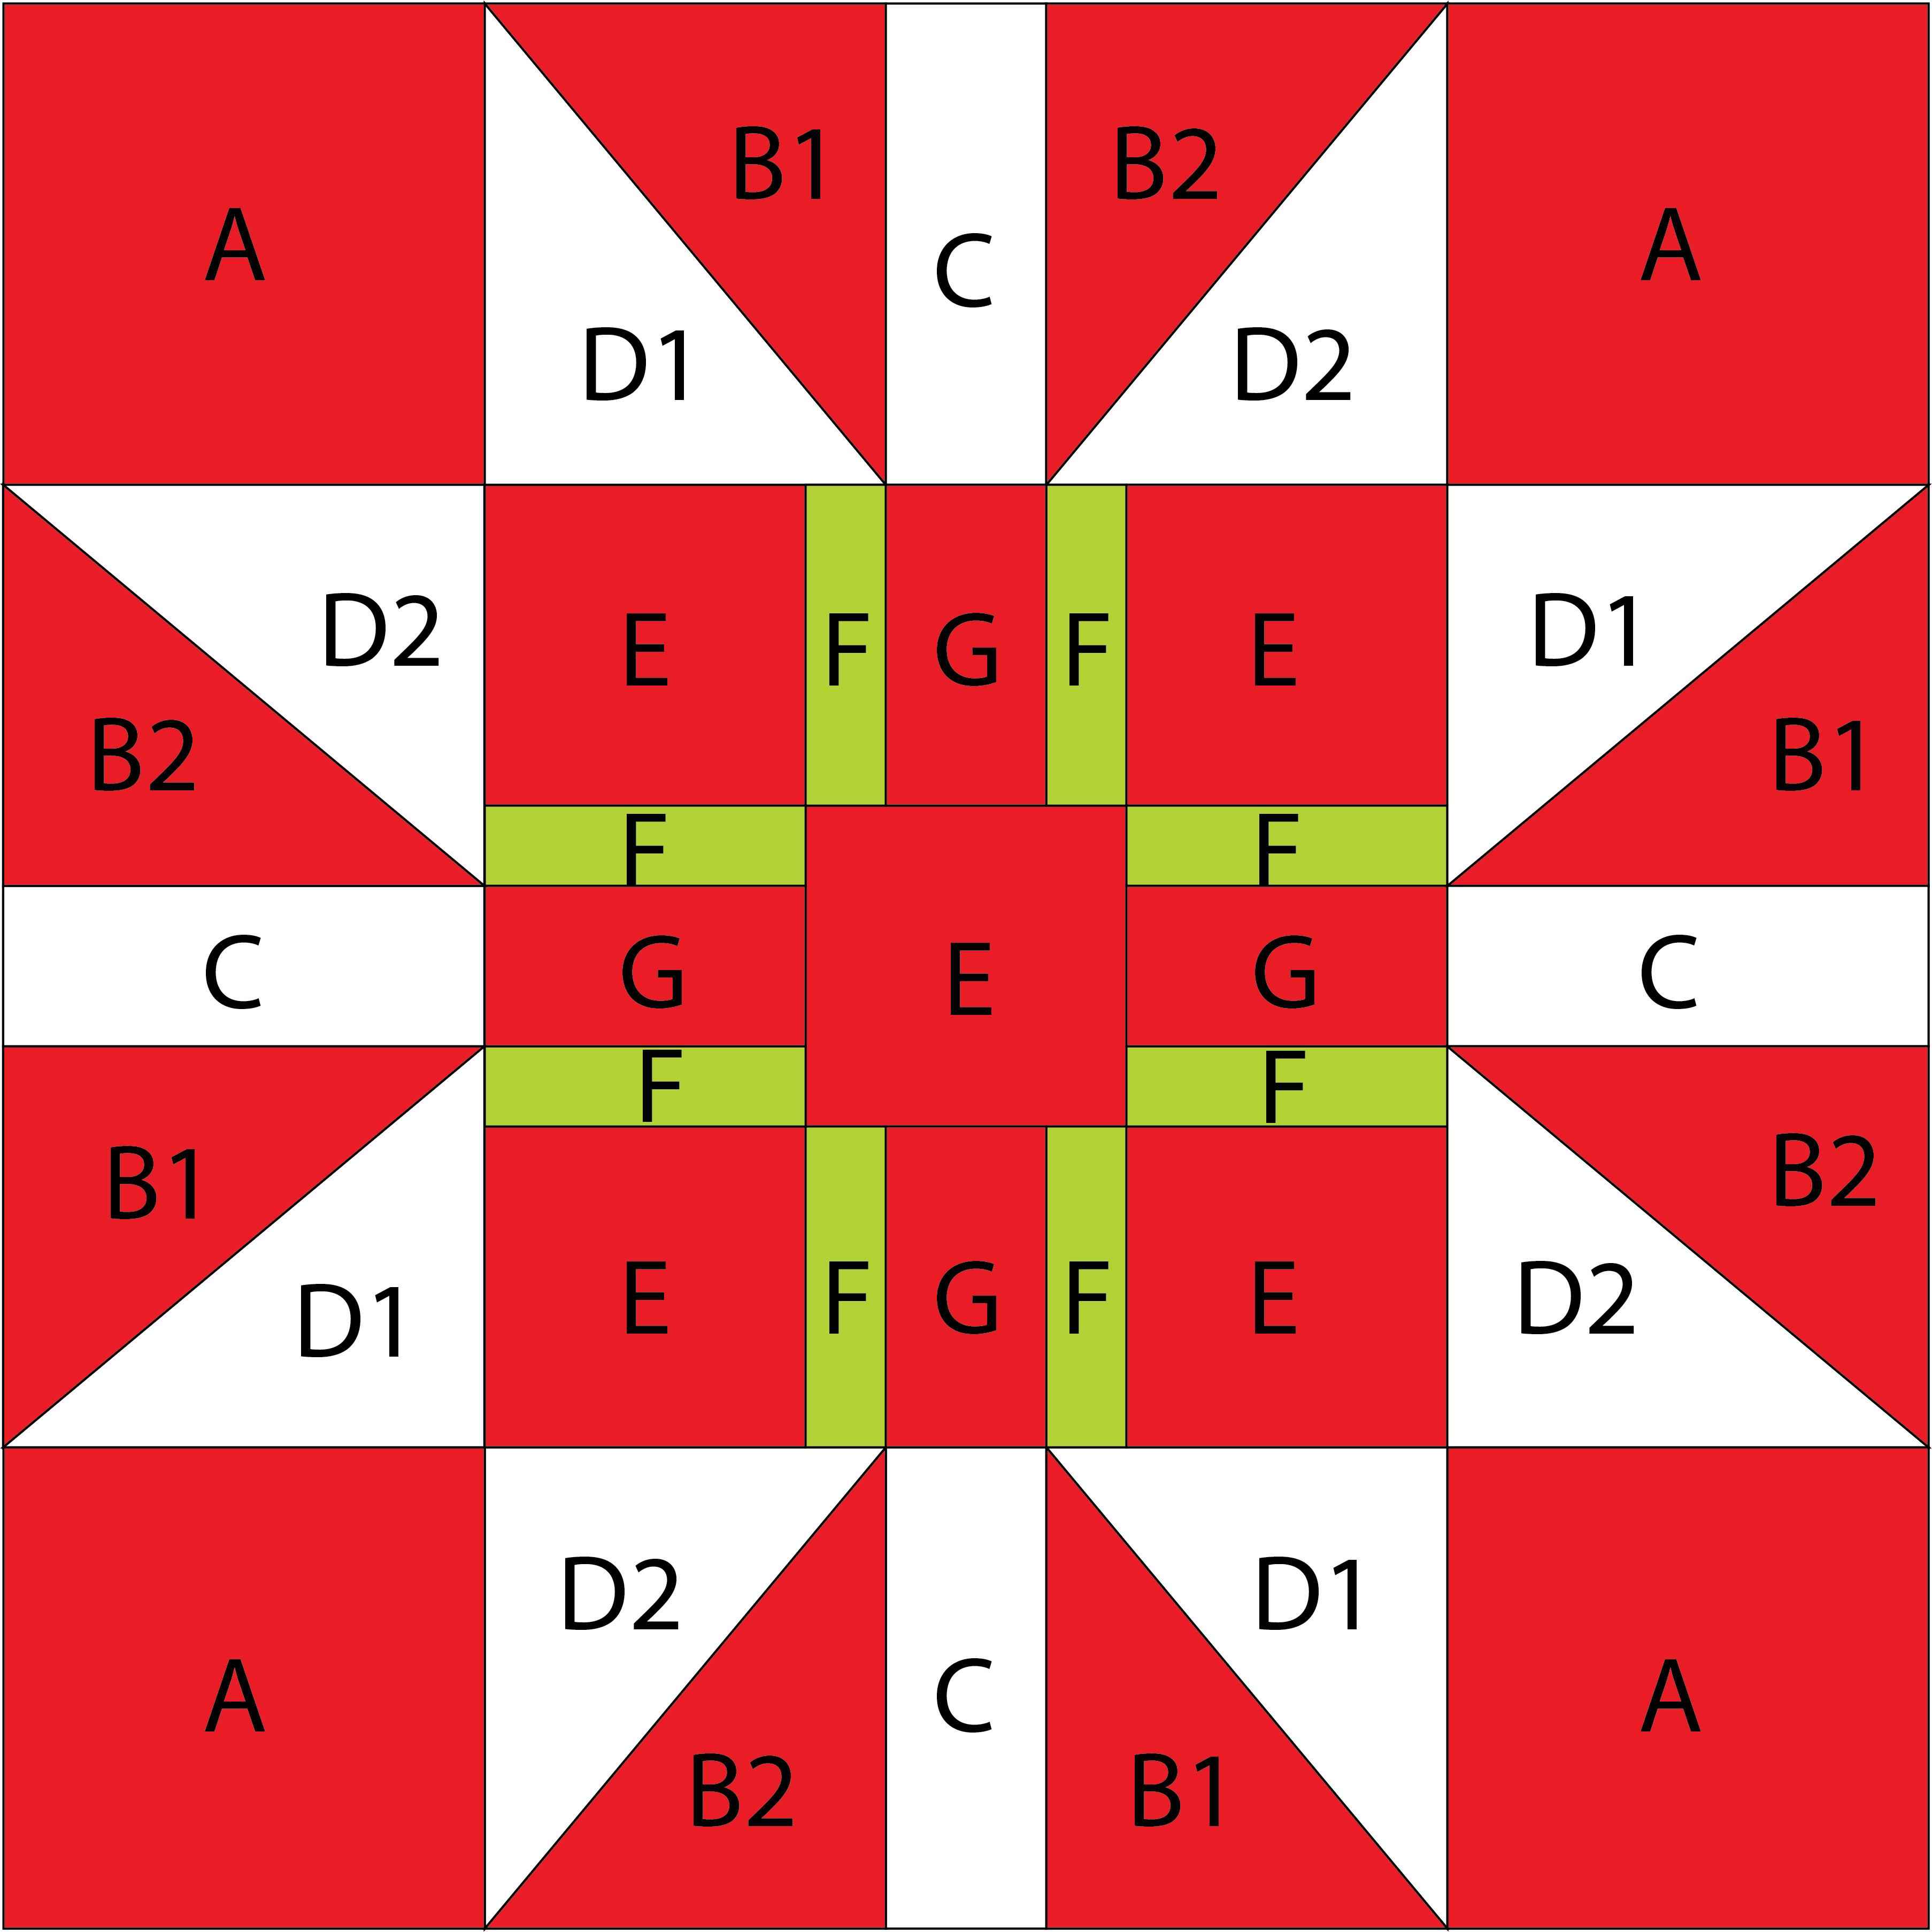
I love this time of year and especially all the festive projects on the Modabakeshop. It's time to break out the seasonal fabrics and make your favourite quilts and gifts. Today it's my turn on the Countdown to Christmas sew-a-long and I will be showing you how to make this cute block - Gift Wrapped Star. The block is made with a combination of piecing and an easy paper pieced unit (the star points are an odd shape so it makes it easier and more accurate to piece).
This block finishes at 6" x 6".
![]()
1 - 5" x 5" square of green print
1 - F8 (9" x 22") each of red and white print
![]()
Cutting
From the green 5" x 5" square cut:
- 8 - 3/4" x 1 1/2" strips (F)
From the red 9" x 22" F8 cut:
- 4 - 2" x 2" squares (A)
- 8 - 2" x 3 1/2" rectangles (B1 and B2)
- 5 - 1 1/2" x 1 1/2" squares (E)
- 4 - 1" x 1 1/2" rectangles (G)
From the white 9" x 22" F8 cut:
- 4 - 1" x 2" rectangles (C)
- 8 - 2" x 3 1/2" rectangles (D1 and D2)
Preparation
- Print one copy of paper piecing templates. Cut out each unit on the outer solid line.
- (Optional) templates are provided for cutting.
Assembly
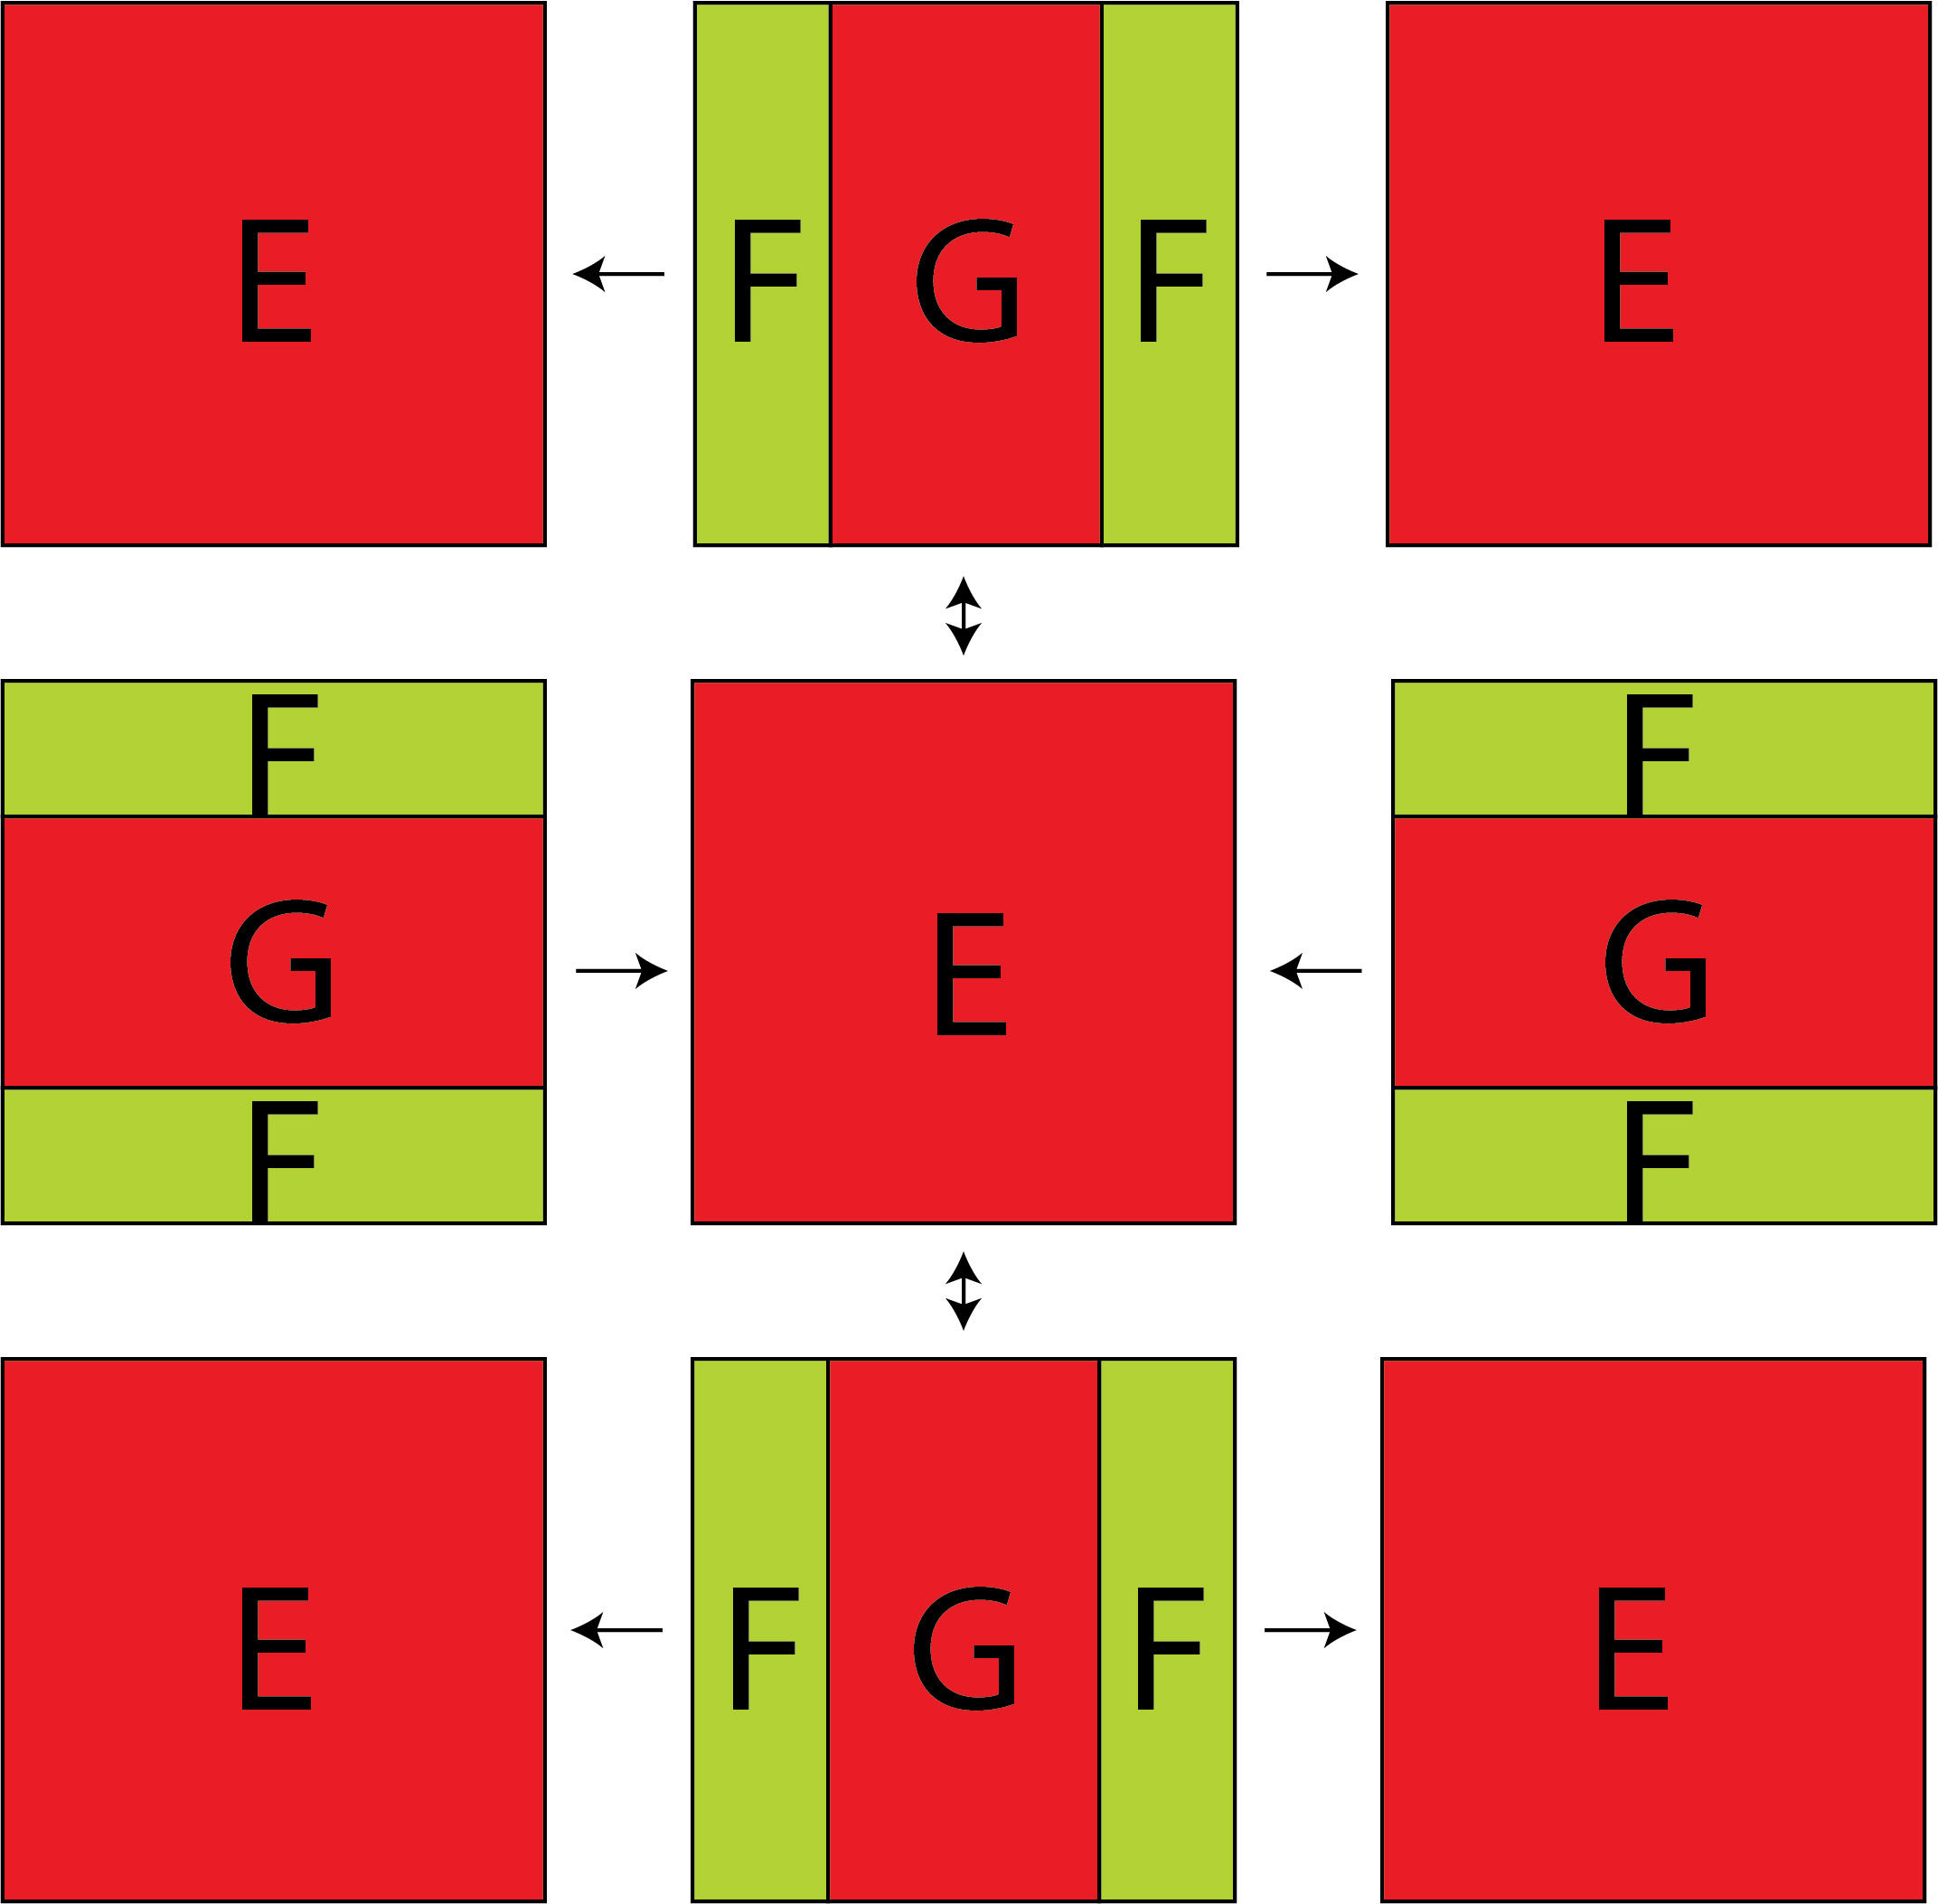
Block Centre
- Lay out the block centre.
- Sew a 3/4" x 1 1/2" (F) strip to both sides of a 1" x 1 1/2" (G) rectangle. Press seams towards G. Make 4 - F/G/F units.
- Sew a 1 1/2" x 1 1/2" (E) square to both sides of an F/G/F unit. Make 2. Press towards E.
- Sew an F/G/F unit to both sides of a 1 1/2" x 1 1/2" (E) square. Make 1. Press towards E.
- Sew the rows together. Press seams open.
Block Border
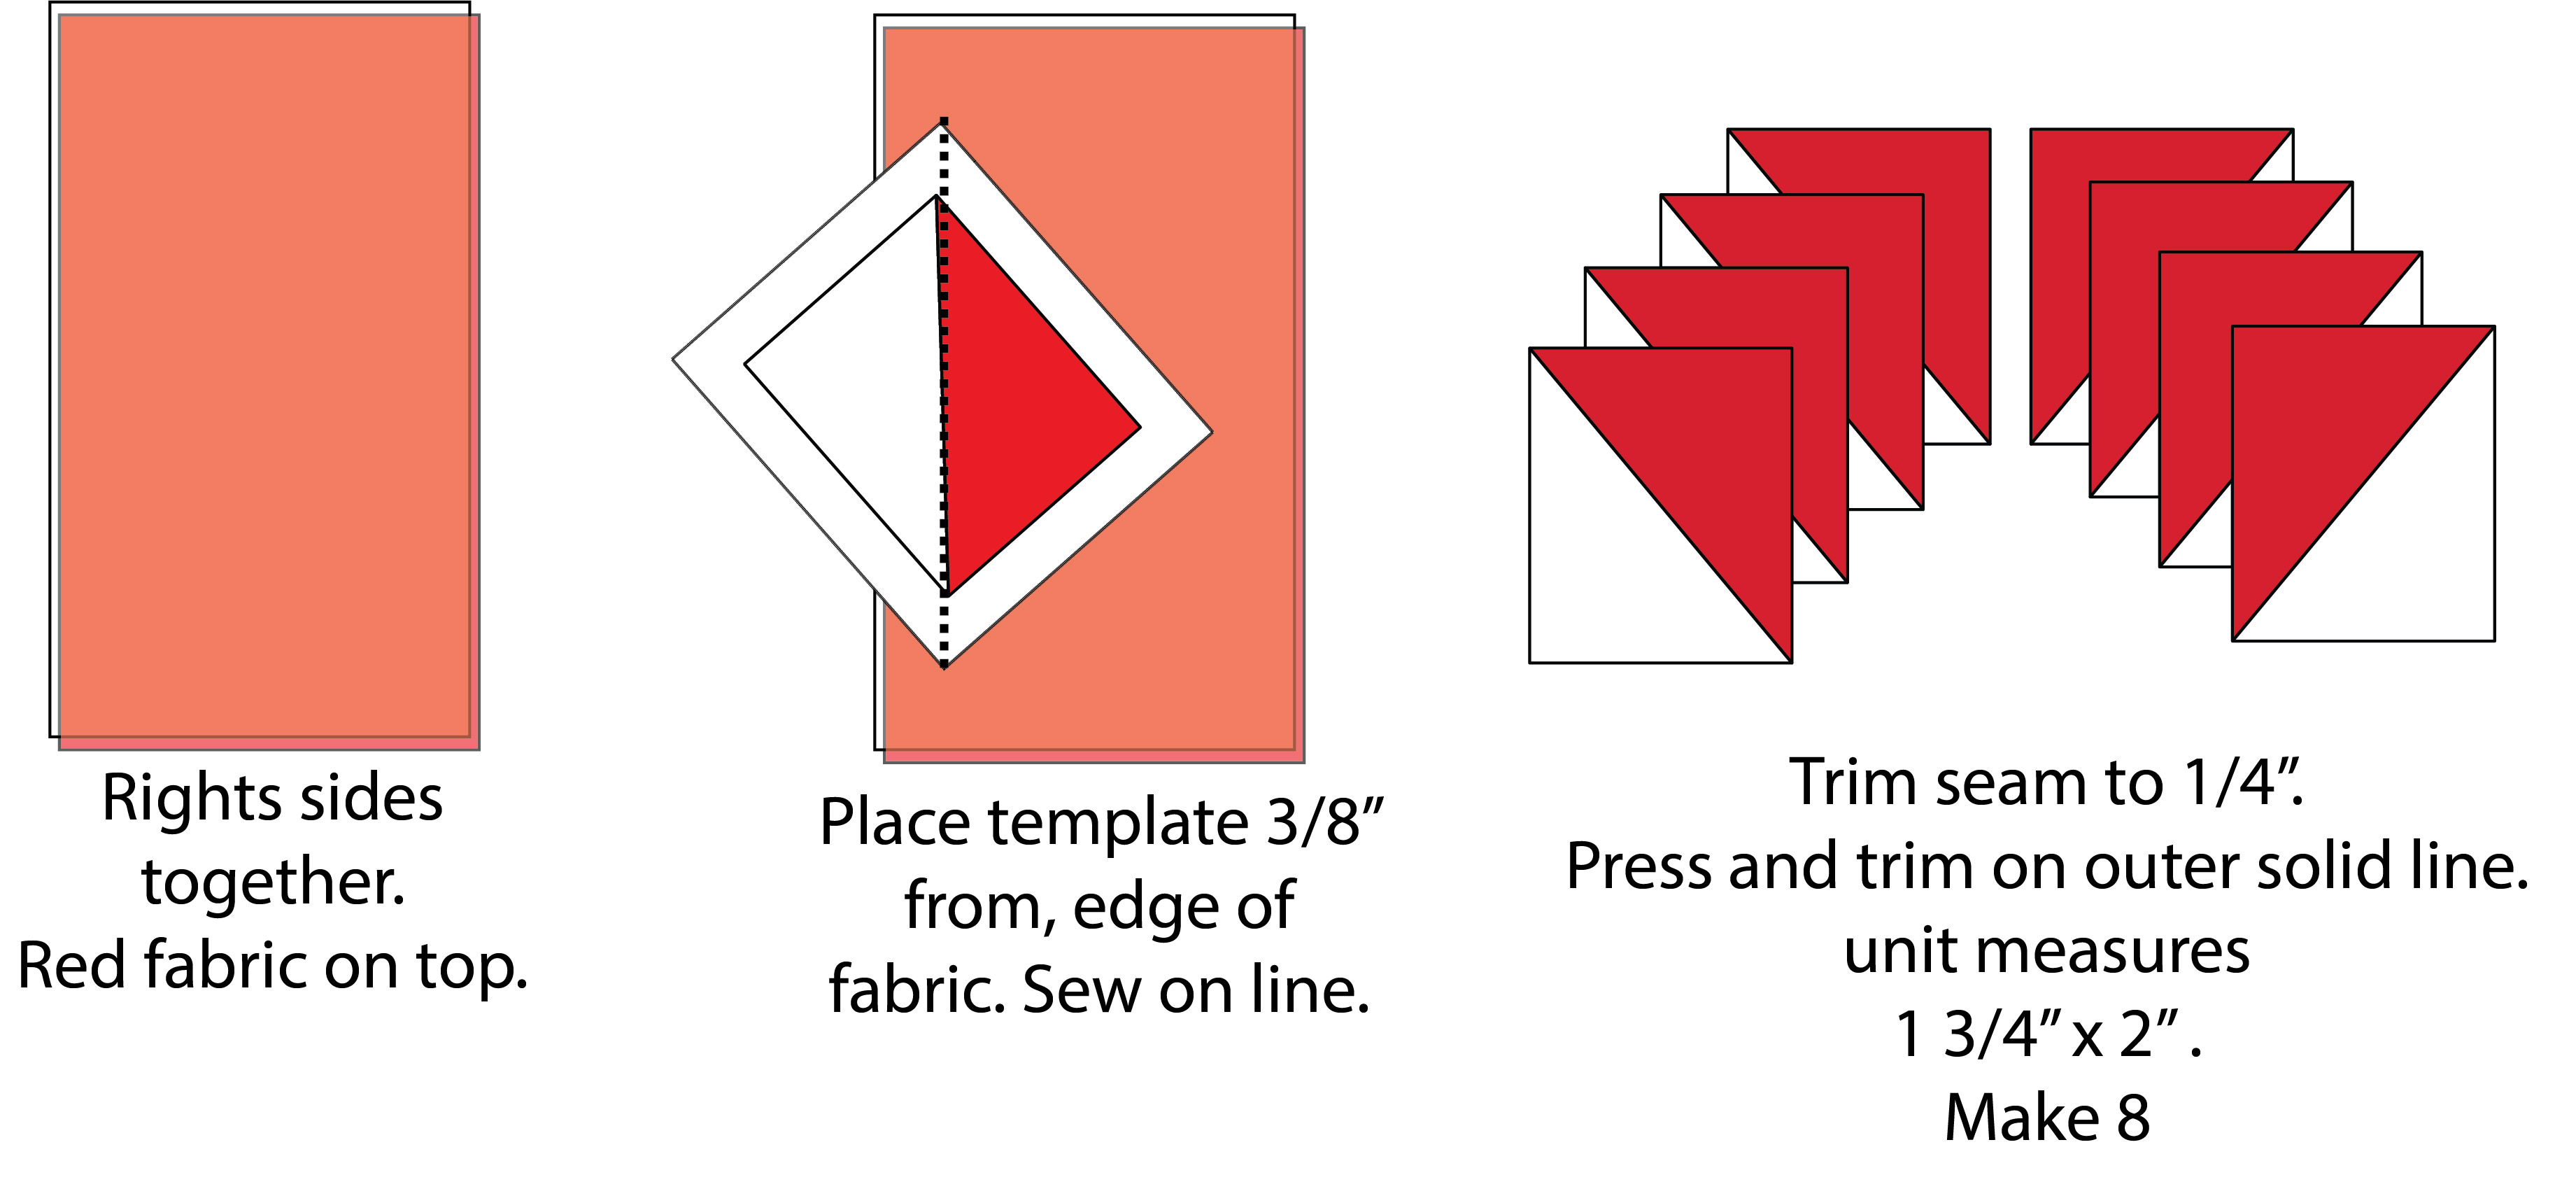
- Paper piece 8 - half square rectangles.
- Place a 2" x 3 1/2" red print and a 2" x 3 1/2" white print, right sides together.
- Place a paper template on the back of the red piece, leaving 3/8" seam allowance. Pin in place. Note the position of the red on the template.
- Reduce stitch length to 1.5 (makes tearing the paper off easier). Sew on solid line between red and white triangle from top to bottom of paper template.
- Trim seam back to 1/4"
- Turn unit over and press.
- Trim unit to 1 3/4" x 2" by cutting on outer solid line.
- Gently remove paper.
- Make 8 units in total.
- Sew a paper pieced unit to both sides of a 1" x 2" (C) rectangle. Make 4 - D/B/C units.
- Sew a 2" x 2" (A) square to both sides of a D/B/C unit. Make 2. Press towards A.
- Sew a D/B/C unit to both sides of the block centre. Press seam open.
- Sew rows together. Press seams open.

![]()
This block finishes at 6" x 6" (unfinished 6 1/2" x 6 1/2")
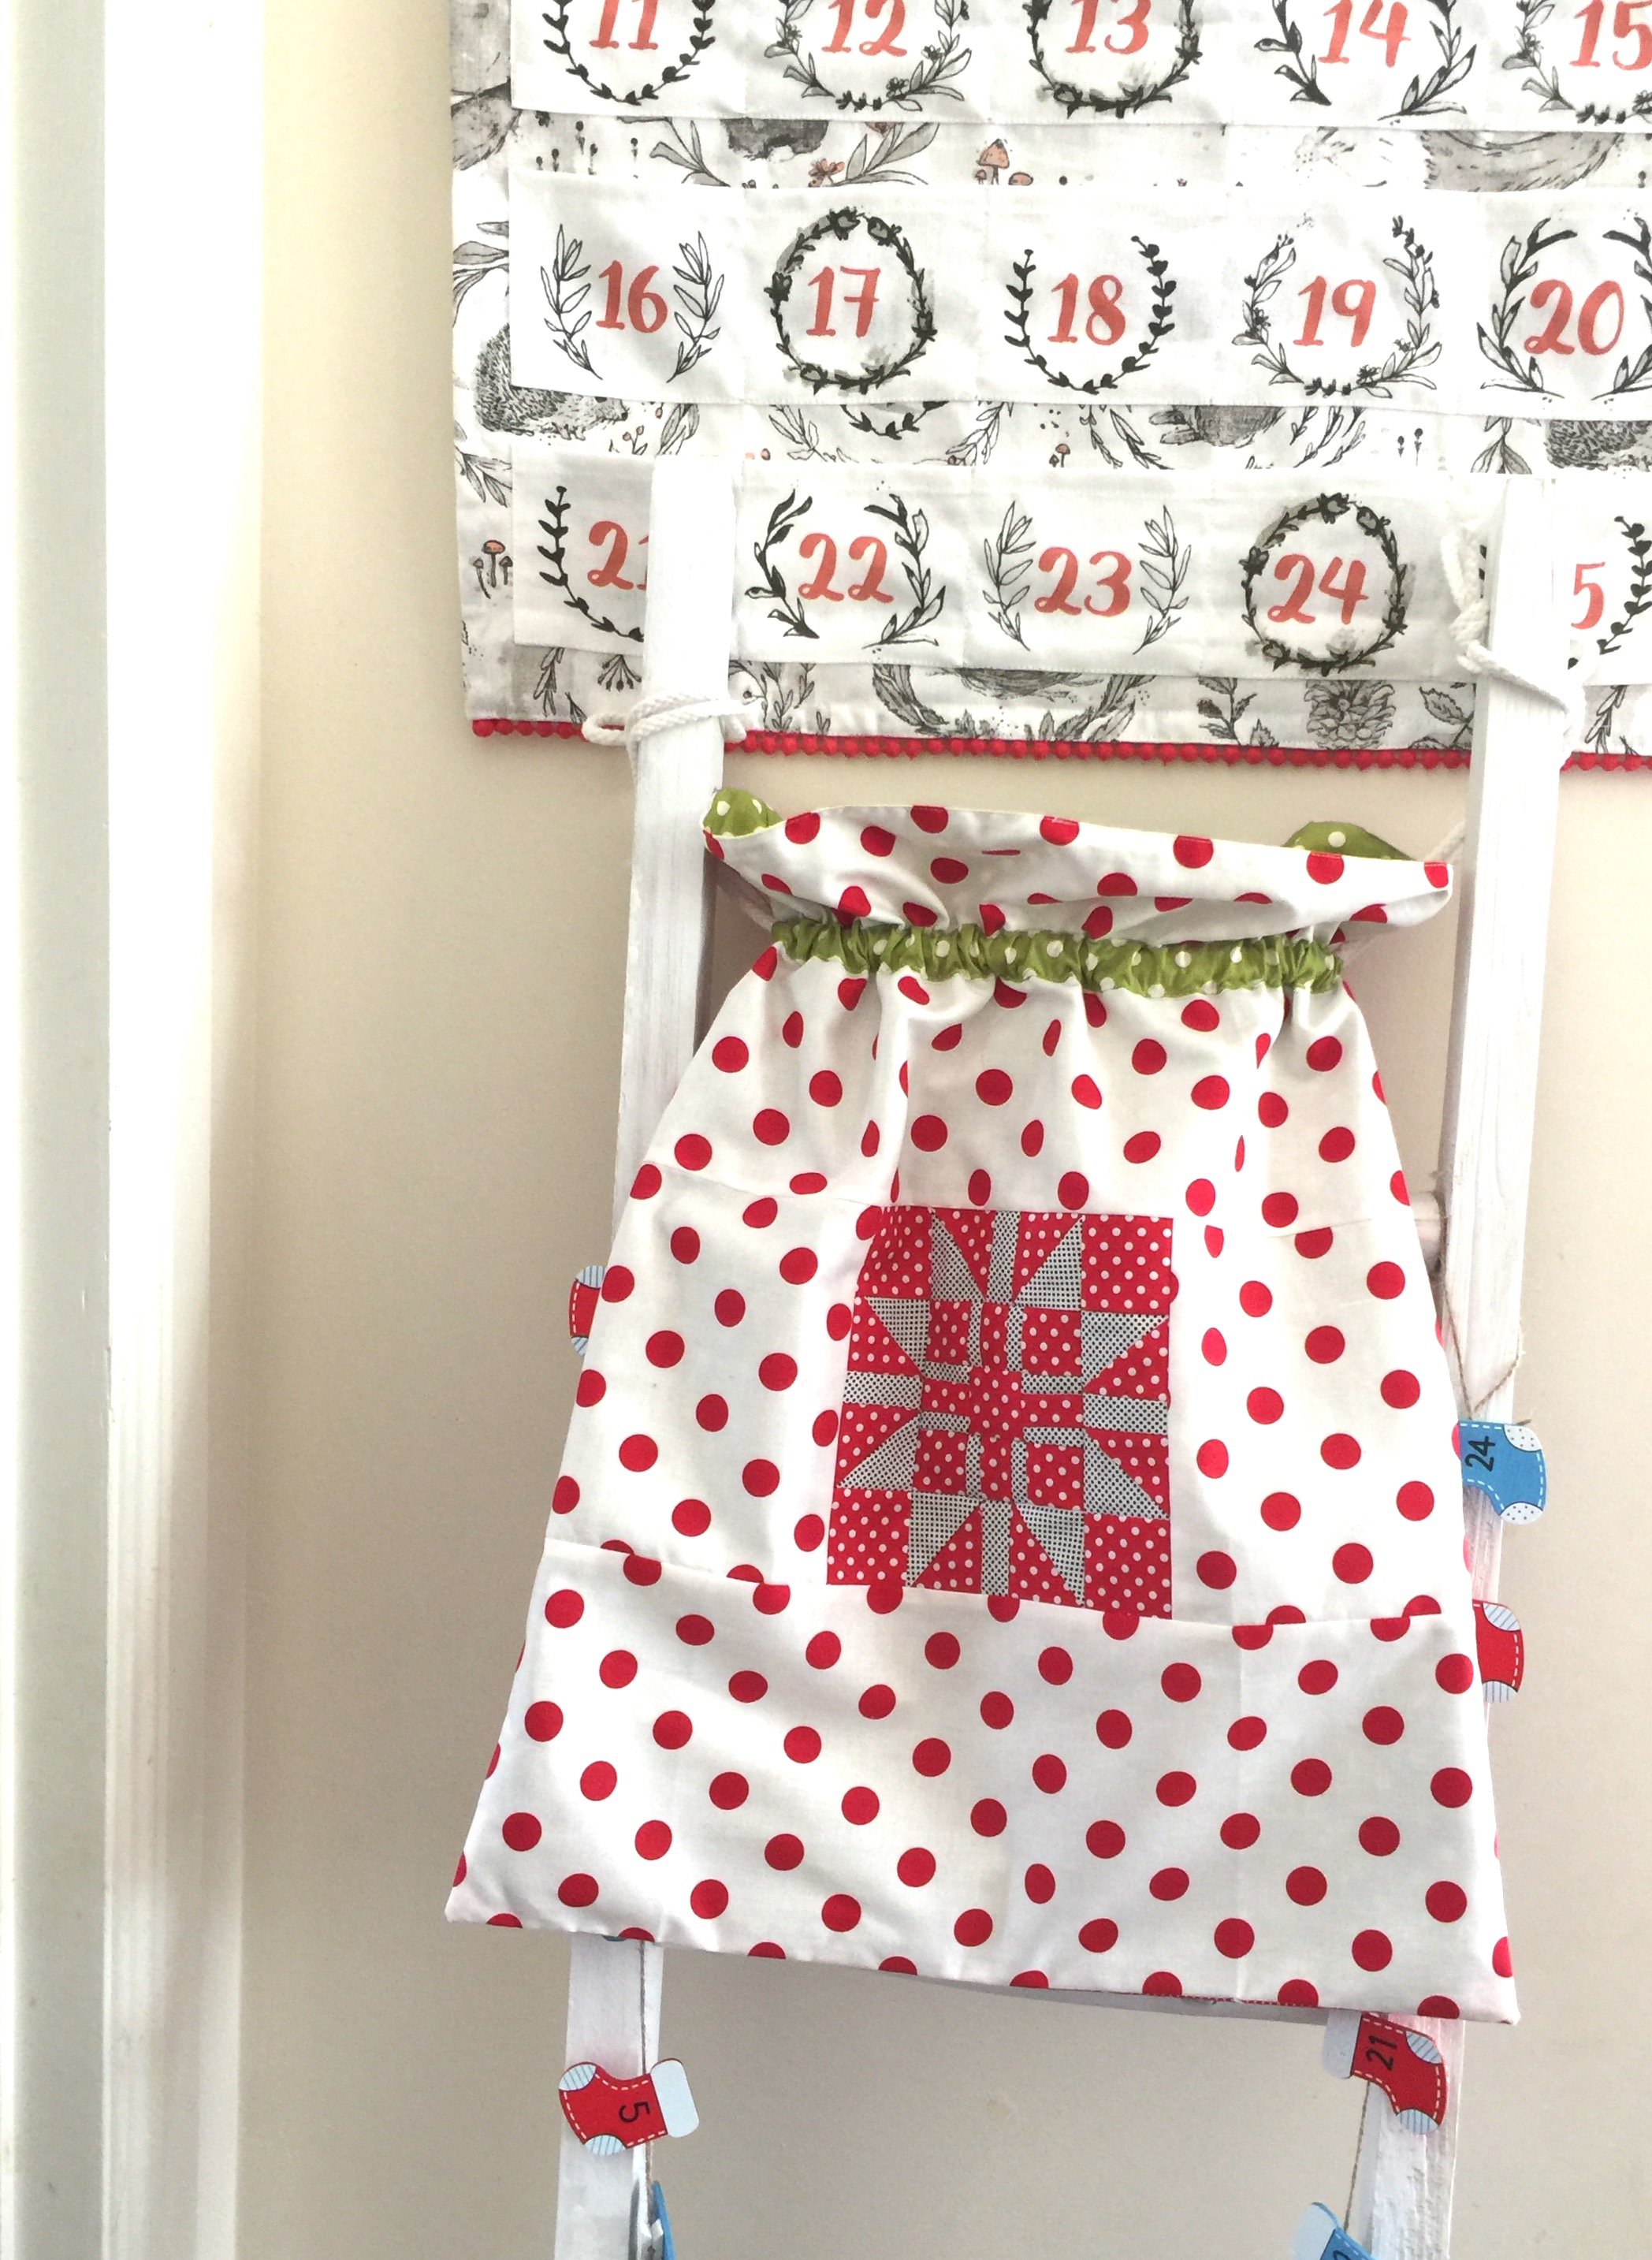
Make 9 and create a mini quilt or table topper.

I added a block to a drawstring back to fill with presents.
Jane Davidson
![]()
Posted in:
Comments