Welcome to Moda!
Dec 8: Special Gift
Dec 8: Special Gift
Published:
Dec 7 2018 - 23:00

![]()
Hello! It’s Lisa Jo of Neverlandstiches and I am very excited to be a part of this year’s Countdown to Christmas! The blocks are being made with a variety of red prints, solid red, solid white and low volume whites. Below you will find the ingredients for both a 12” block and a 6” block. Continue to check back each day between now and Christmas for a brand new block by another of the talented Bakeshop Chefs!
Today’s block is called A Special Gift. To me, it resembles a beautifully wrapped special Christmas gift you may find under a Christmas tree.
This block finishes at 6" or 12" square.
![]()
You will want either two red prints or a red solid and a print for this block in addition to your background fabric.
| 12" Block | 6" Block |
|---|---|
| White or Low Volume White Fabric | White or Low Volume White Fabric |
| 8 – 2 inch squares
8 – 2 ½ inch squares for flying geese 8 – 5 x 1 ½ inch rectangles |
8 – 1 ¼ inch squares
8 – 1 ¾ inch squares for flying geese 8 – 2 ¾ x 1 inch rectangles |
| Red Fabrics | Red Fabrics |
| 12 - 2 inch squares4 – 5 x 1 ½ inch rectangles
2 – 4 ¼ inch squares for flying geese 1 – 3/1/2 inch square for center |
12 - 1 ¼ inch squares
4 – 2 ¾ x 1 inch rectangles 2 – 2 3/4 inch squares for flying geese 1 – 2 inch square for center |
![]()
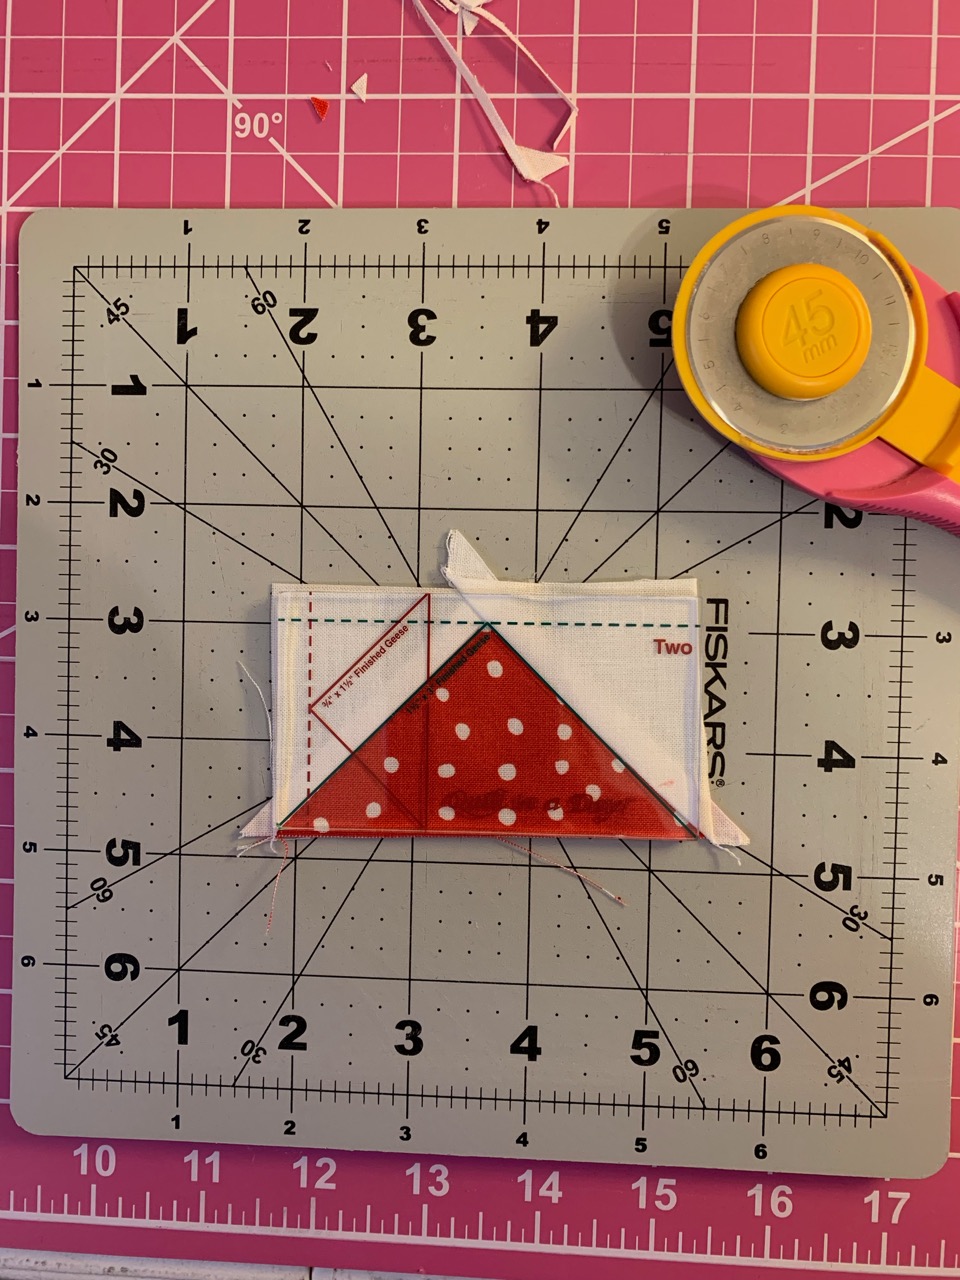
Your favorite ruler to trim the flying geese
![]()
The following instructions are for the 12 inch block. The 6 inch block is made exactly the same way, but the 6 inch block patch sizes are listed in the brackets [ ].
All seams are ¼ inch and seams are pressed to the darker fabric.
Make 4 Four Patch Squares for the corners
Begin by making the 4 four patches for the corners. For each four patch corner use two 2 inch [1 ¼ inch] red squares and two 2 inch [1 ¼ inch] white squares.


Make 8 Flying Geese
Use the 4 at a time no waste method to make the 8 flying geese.
For each set of 4 flying geese uses 1 - 4 ¼ inch red square [2 3/4 inch red square] and 4 - 2 ½ inch white square [1 ¾ inch white squares].
Draw a diagonal line across the back of each of the 2 ½ inch [1 ¾ inch] white squares.
Place 2 white squares on the right side of the red 4 ¼ inch [2 ¾ inch] square diagonally.
Stitch ¼ inch on each side of the diagonal line through both of the white squares.
Cut along the diagonal line and press open.
On each of the new pressed open halves place a 2 ½ inch [1 ¾ inch] white squares on top aligning the edges with corner.

Sew a ¼ inch seam on each side of the drawn line. Repeat with the other half.
Cut along the diagonal line and press open.
Trim to 2 x 3 ½ inches [1 ¼ x 2 inches].
Repeat with the additional red 4 ¼ inch [2 ¾ inch] square and 4 -2 ½ inch white square [1 ¾ inch white squares] and make 4 more flying geese.
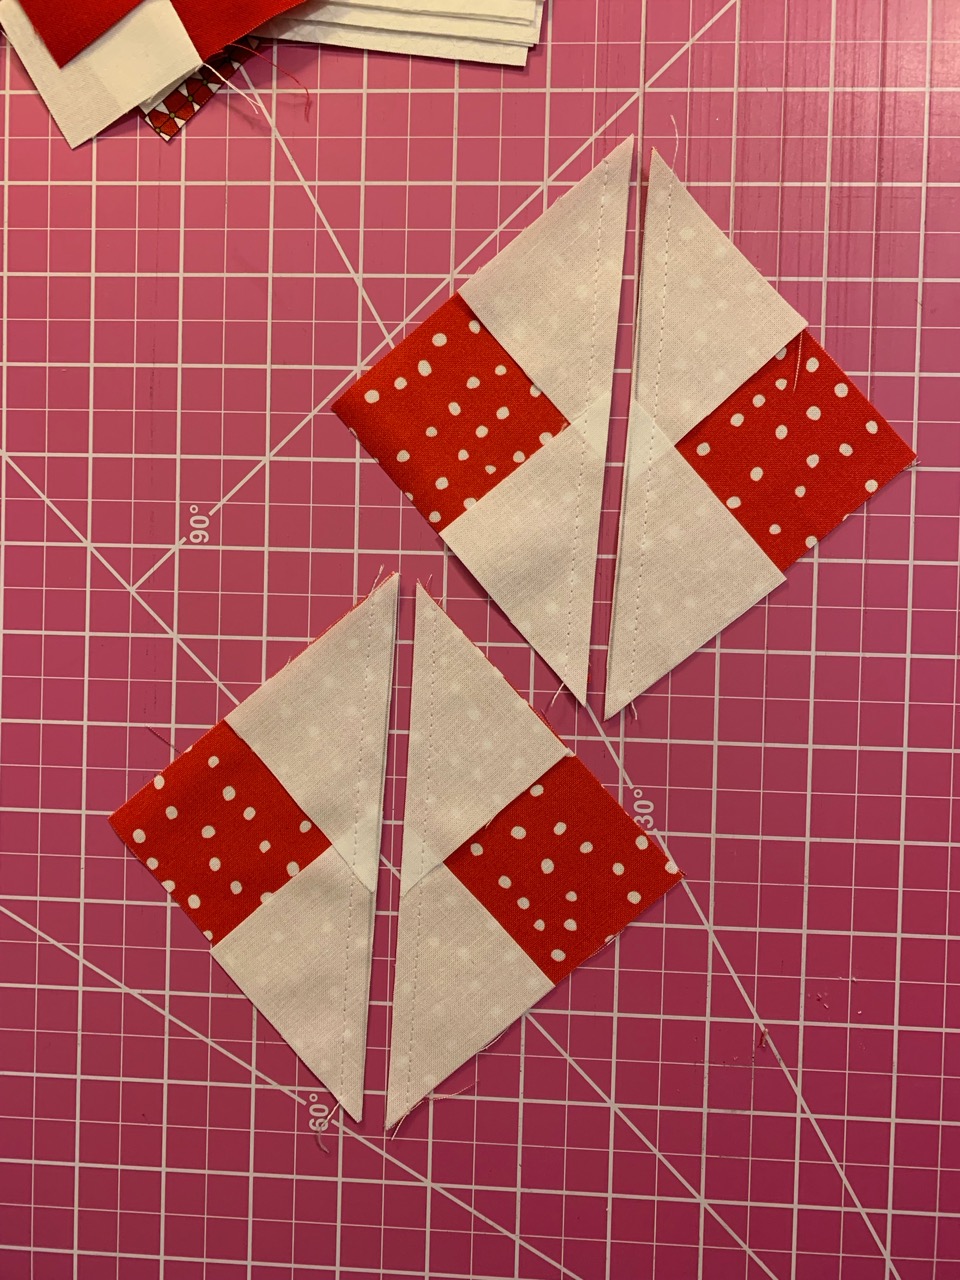
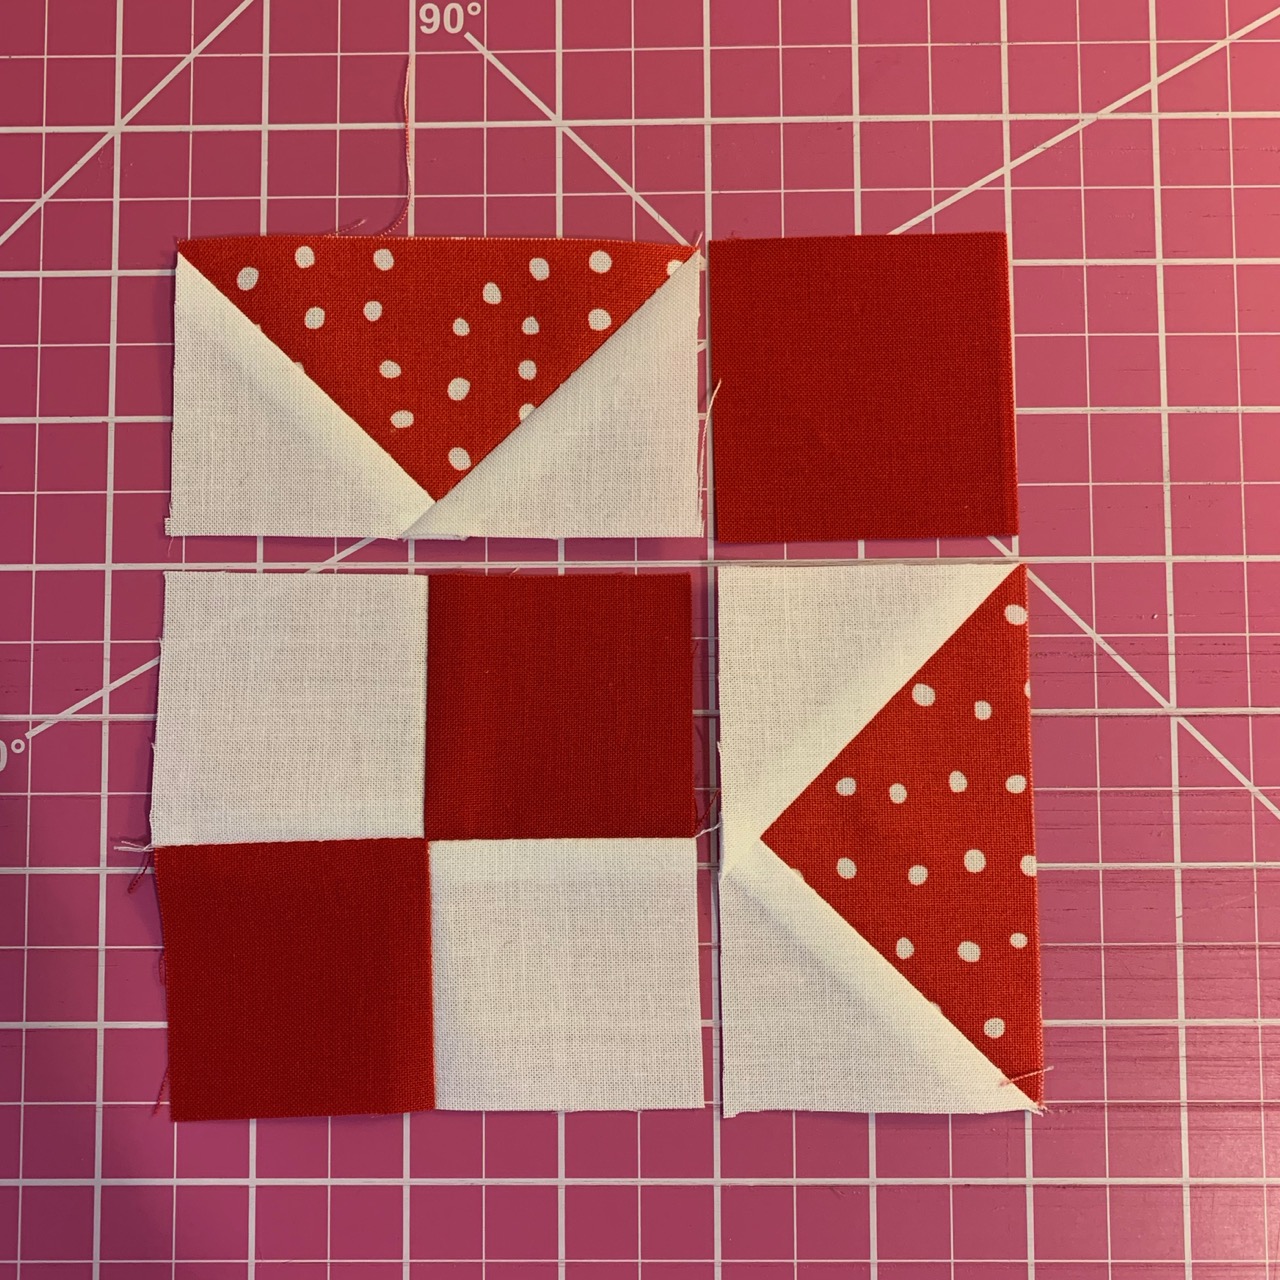
Assemble the corners
Sew a flying geese with the point pointing to the four patch on the top of one four patch and press
Sew one 2 inch [1 ¼ inch] red square one the side of another flying geese. Press. Repeat until the four corners are assembled.

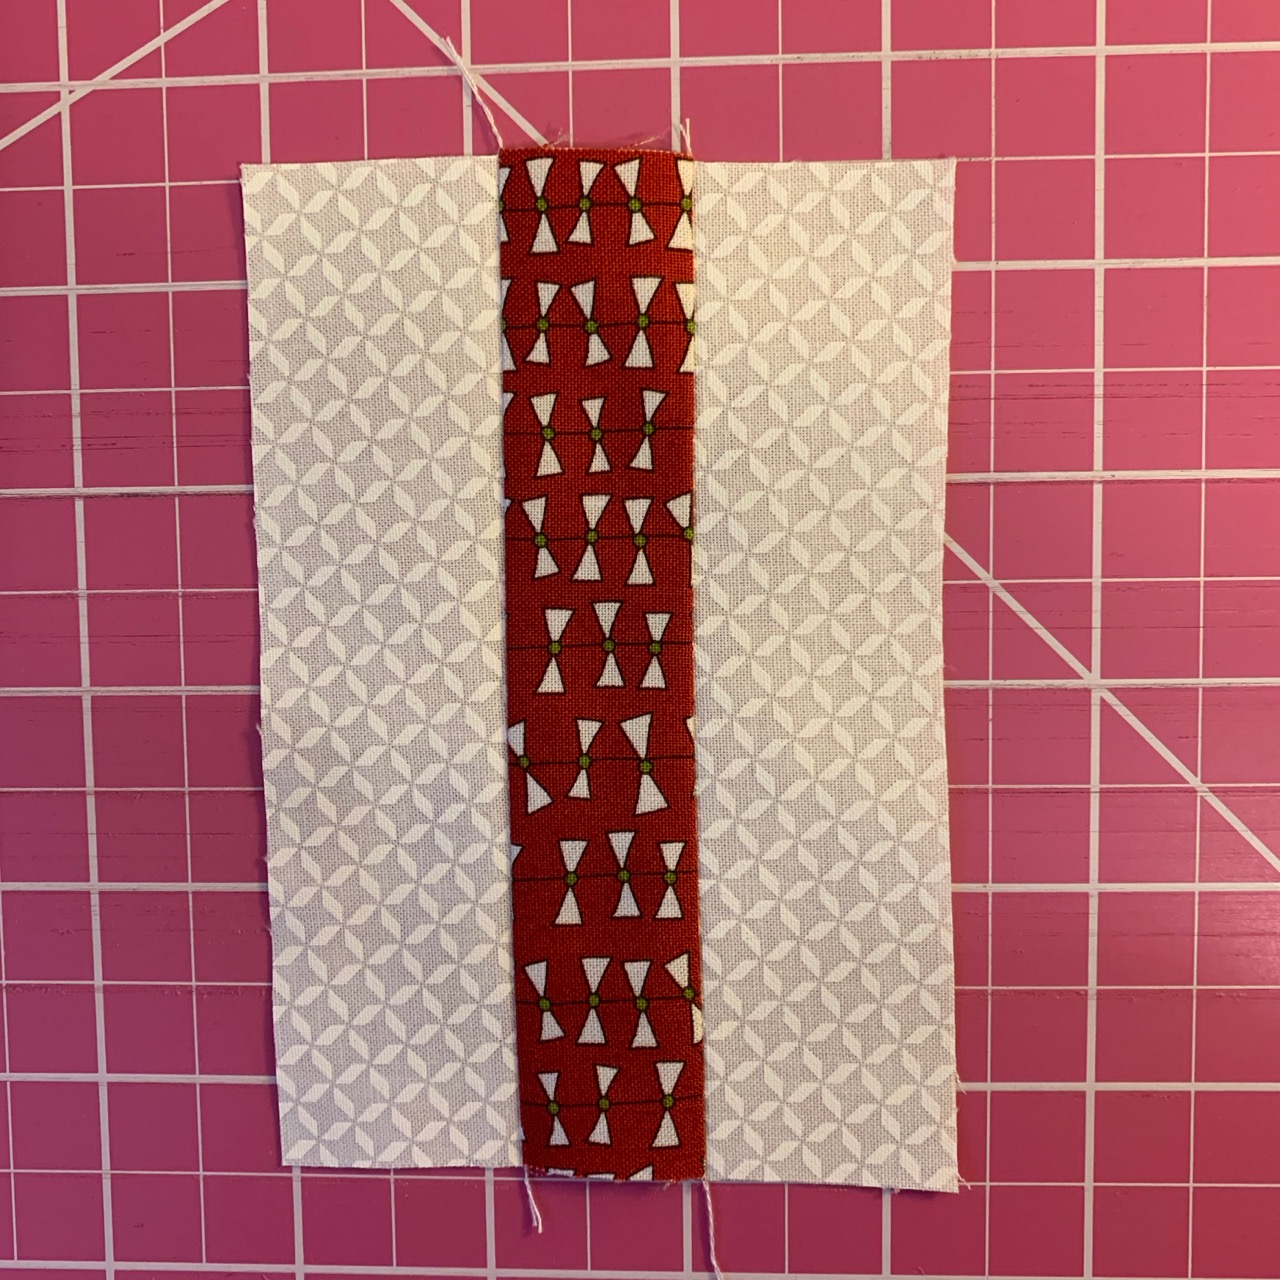
Assemble the center pieces
Sew a 5 x 1 1/2 inch [2 3/4 x 1 inch] white strip on each side of a 5 x 1 1/2 inch [2 3/4 x 1 inch] red stip. Press
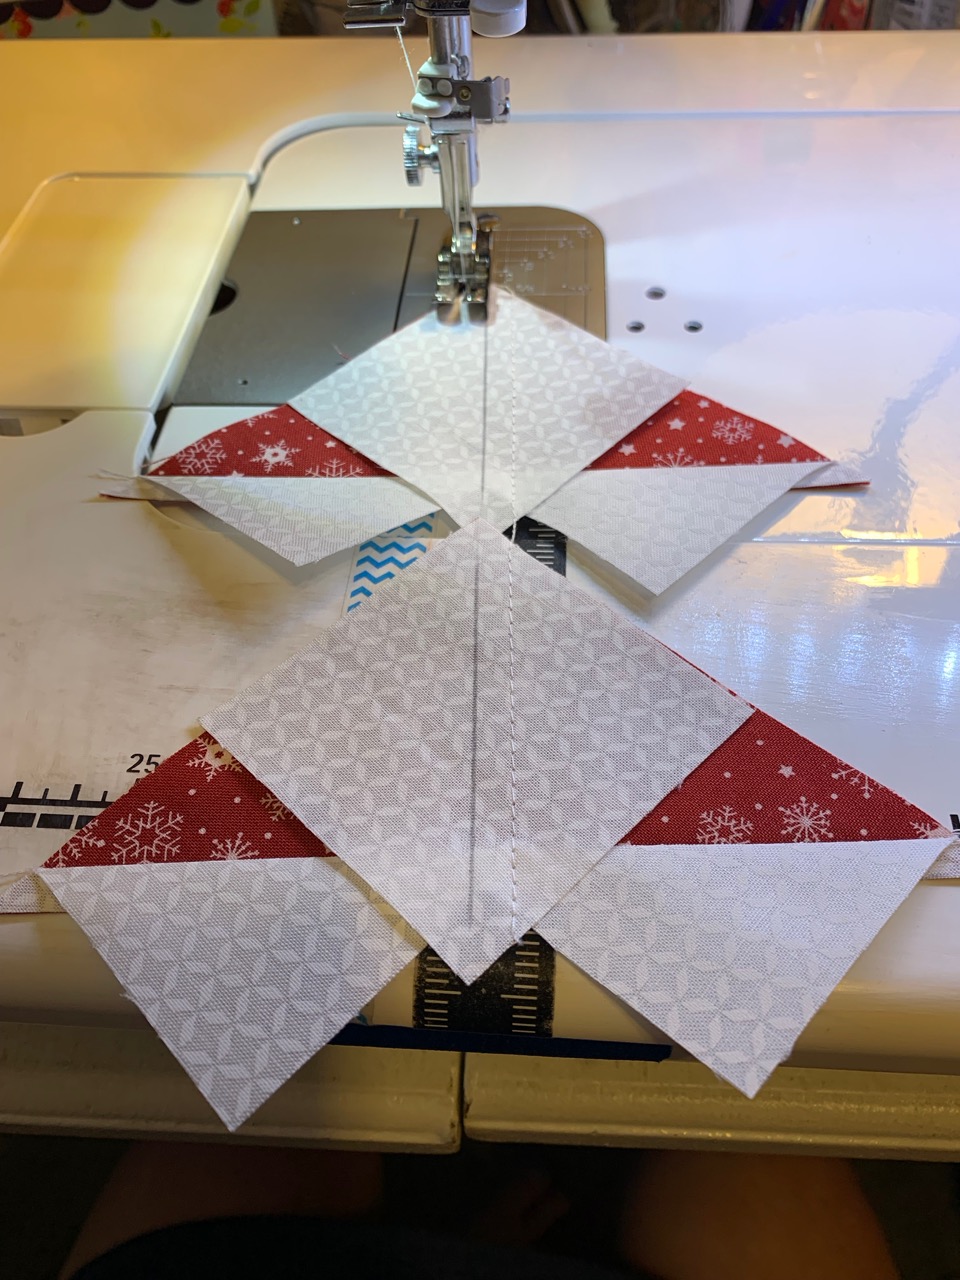
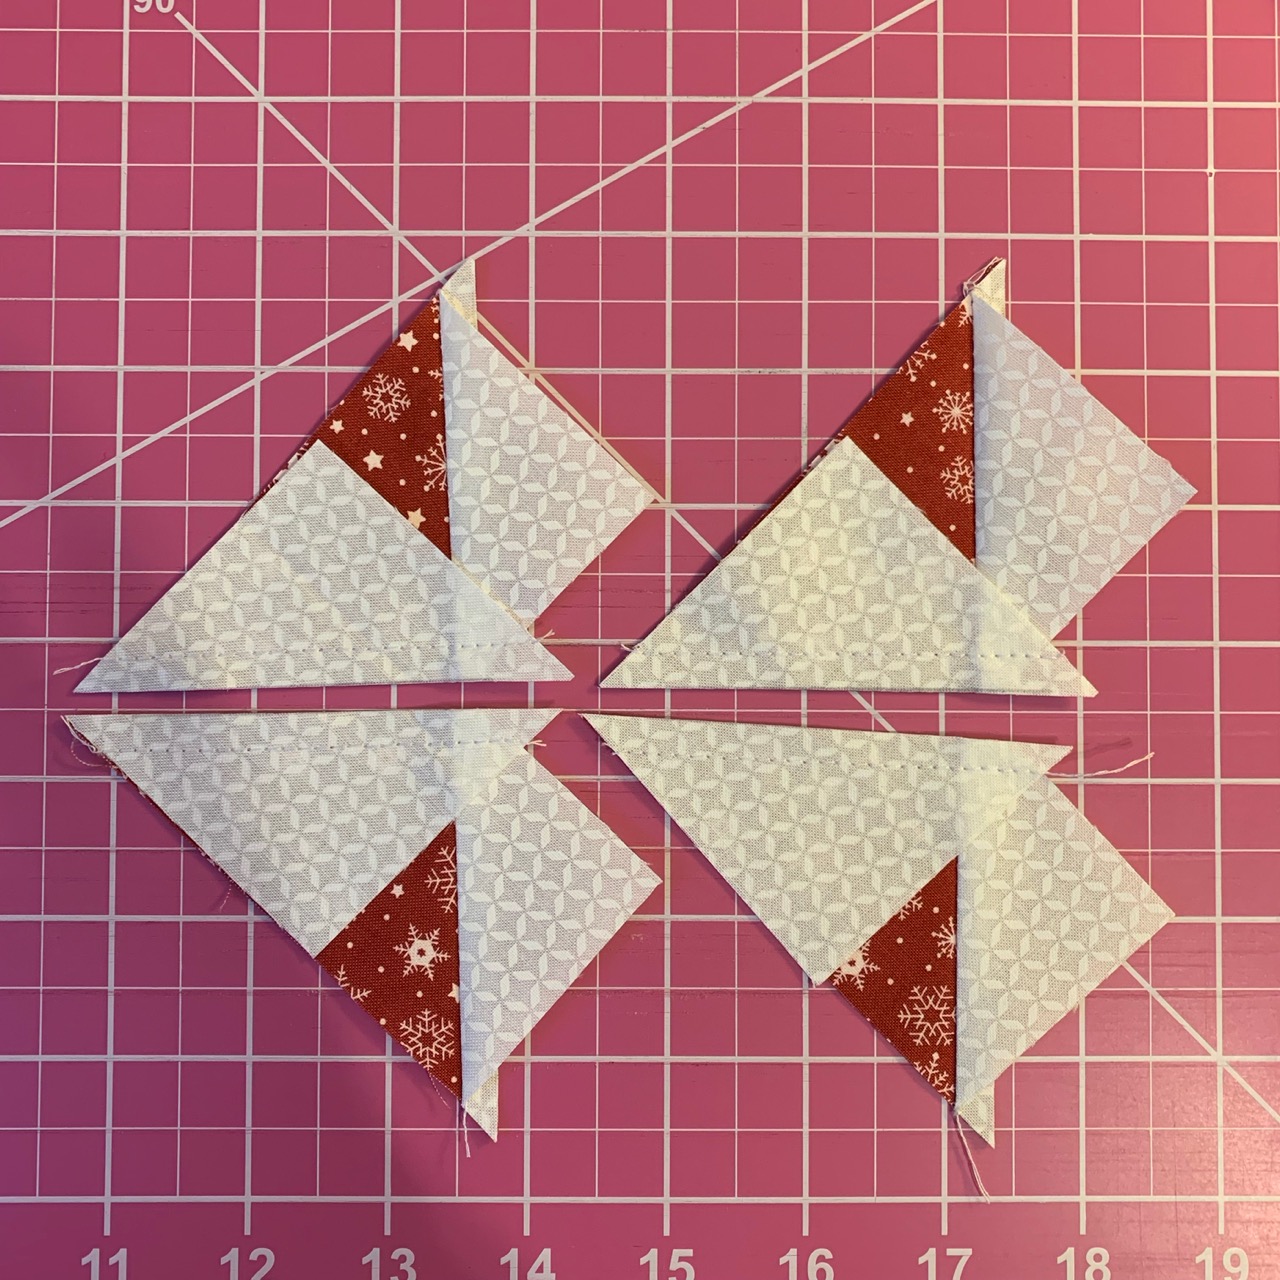
Assemble the block as shown below:

Note: be sure to align the red blocks so that they point toward the center.
![]()
This block finishes at 6" or 12" square.
Thank you so much for joining me today! I hope you enjoy this block and that you think it will be a beautiful addition to your countdown to Christmas collection of blocks. If you make this block, I would love to see your version, so please feel free to tag me on Instagram (@neverlandstitch).
Be sure to check back here tomorrow for the next Countdown to Christmas block by another Moda Bake Shop chef!
Lisa Jo Girodat
{blog: Neverlandstitches}
{instagram: neverlandstitches}
![]()
Comments