Welcome to Moda Fabrics!
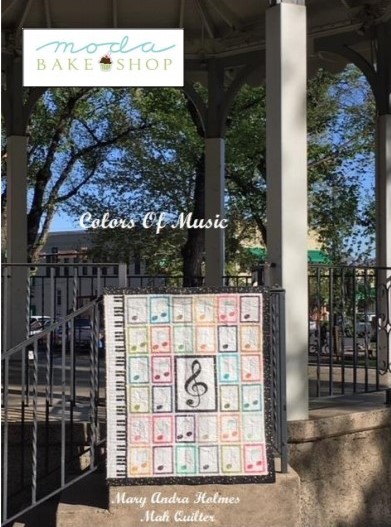
Colors of Music Quilt
Colors of Music Quilt
Published:
Jan 6 2019 - 23:00
![]()
My quilt designs start out as a design thought where I design a quilt then look for the fabric or a fabric collection by itself. Colors of Music design came from the complete fabric collection of Vanessa Christensons, Ombre Confetti Metallic. As soon as I saw those gold dots it was like music notes jumping all over the page. This quilt/project finishes at 36.5" x 42.5". ![]()
- 1 Jelly Roll® of Ombre Confetti Metallic by VandCo.
- 1 1/2 yards white Bella solid {9900 - 200} for background, sashings, first borders.
- 1 yard Black Ombre Confetti Metallic {10870 222M} for center musical note, piano keys, last border and binding.
- 1 1/3 yards backing fabric.
- 40" x 48" Batting
![]() 3/8" bias maker for making piano keys. Black Aurifil thread 28wt. for embroidery.
3/8" bias maker for making piano keys. Black Aurifil thread 28wt. for embroidery. ![]() Background fabric: NOTE: It is important to cut the longest pieces of background fabric first. All cuts were cut on the straight of grain. Everyone's 1/4" is not the same. Measure you quilt as you go along to make adjustments that may be needed. If you are not sure you can stick to exact measurements, add 1/2" or so to length now, before you cut. Cut 1 - 5" x 42" for background piano keys. Cut 4 - 1" x 30" for sashing between each musical note row containing 6 notes. Cut 2 - 1" x 40.5" for first border. Cut 2 - 1' x 31 1/2" for top and bottom first border. For two - four section notes on either side of center block, Treble Clef, cut 2 - 1" x 10" connecting two rows of two notes each together. Cut 1 - 10.5" x 13.5" for center block Treble Clef applique. Cut 2 - 1" x 13" for each side of center block, Treble Clef. Cut 32 - 5" x 6.5" for musical notes. Cut 24 - 1" x 6.5" for sashing between each musical note. Black Ombre Confetti Matellica fabric: Cut 3 - 1" x 36" for black piano keys and make bias strips using 3/8" bias maker. NOTE: these are not on the bias. Sub cut 37 - 2 3/8" pieces to applique on piano key strip. Cut 1 - 2 " x 40" for right side border. Cut 2 - 2 " x 38" for top and bottom border. Using your method of applique, cut Treble Clef pattern piece. Cut 5 - 2" to 2 1/2" strips to equal 173" of binding when strips are sewn together. Ombre Confetti Metallic Jelly Roll cutting instructions are listed below in instructions. There are 6 different musical notes. I did not repeat a note in each row, vertically or horizontally. Using a pencil, trace all embroidery lines on front side of each note you choose to use. Use center line on pattern to center all tracing lines on background fabric.
Background fabric: NOTE: It is important to cut the longest pieces of background fabric first. All cuts were cut on the straight of grain. Everyone's 1/4" is not the same. Measure you quilt as you go along to make adjustments that may be needed. If you are not sure you can stick to exact measurements, add 1/2" or so to length now, before you cut. Cut 1 - 5" x 42" for background piano keys. Cut 4 - 1" x 30" for sashing between each musical note row containing 6 notes. Cut 2 - 1" x 40.5" for first border. Cut 2 - 1' x 31 1/2" for top and bottom first border. For two - four section notes on either side of center block, Treble Clef, cut 2 - 1" x 10" connecting two rows of two notes each together. Cut 1 - 10.5" x 13.5" for center block Treble Clef applique. Cut 2 - 1" x 13" for each side of center block, Treble Clef. Cut 32 - 5" x 6.5" for musical notes. Cut 24 - 1" x 6.5" for sashing between each musical note. Black Ombre Confetti Matellica fabric: Cut 3 - 1" x 36" for black piano keys and make bias strips using 3/8" bias maker. NOTE: these are not on the bias. Sub cut 37 - 2 3/8" pieces to applique on piano key strip. Cut 1 - 2 " x 40" for right side border. Cut 2 - 2 " x 38" for top and bottom border. Using your method of applique, cut Treble Clef pattern piece. Cut 5 - 2" to 2 1/2" strips to equal 173" of binding when strips are sewn together. Ombre Confetti Metallic Jelly Roll cutting instructions are listed below in instructions. There are 6 different musical notes. I did not repeat a note in each row, vertically or horizontally. Using a pencil, trace all embroidery lines on front side of each note you choose to use. Use center line on pattern to center all tracing lines on background fabric. 
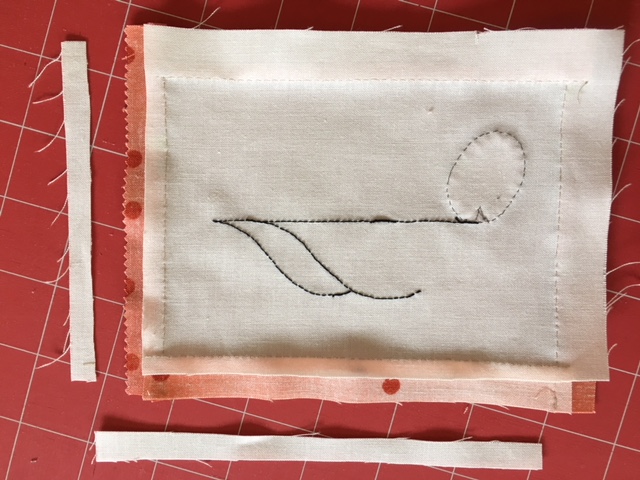
 Complete the embroidery using Aurifil 28 wt. black thread or floss of your choosing. I used an outline stitch also called a stem stitch for all embroidery. Use center drawn line on pattern for oval note placement.
 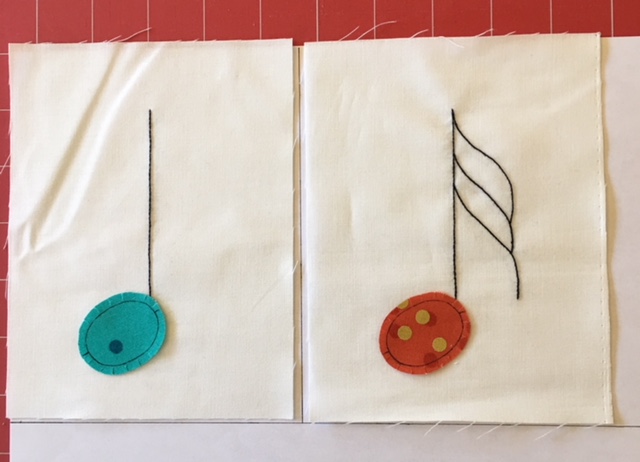 Each note bottom will need a 2" x 2 1/2" cut from Jelly Roll. If you are careful with your cutting you will have whole Jelly Roll pieces to save for another project. For each color used cut 1 - 2" x 2 1/2" for bottom of note. Cut 1 - 2 1/2" x 5" and 1 - 2 1/2" x 6 1/2".
 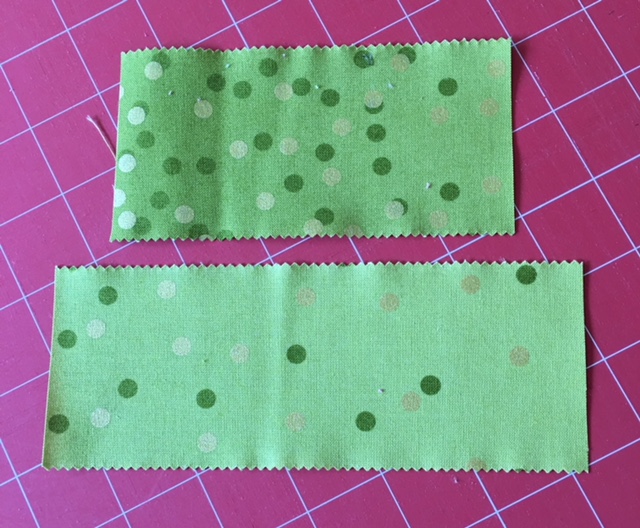 Cut each of the two pieces in half. There measurement will now be 2 - 1 1/4" x 5" and 2 - 1 1/4" x 6.5" NOTE: when measuring the half way point you must include those little points in your measurement.
  Iron each piece in half. Remember to use those tiny points in measuring the half way point.
  Start with the 6 1/2" piece. Line up the outside of each folded piece to the edge of the background block. Applique the folded edge in place. Are you laughing yet?
 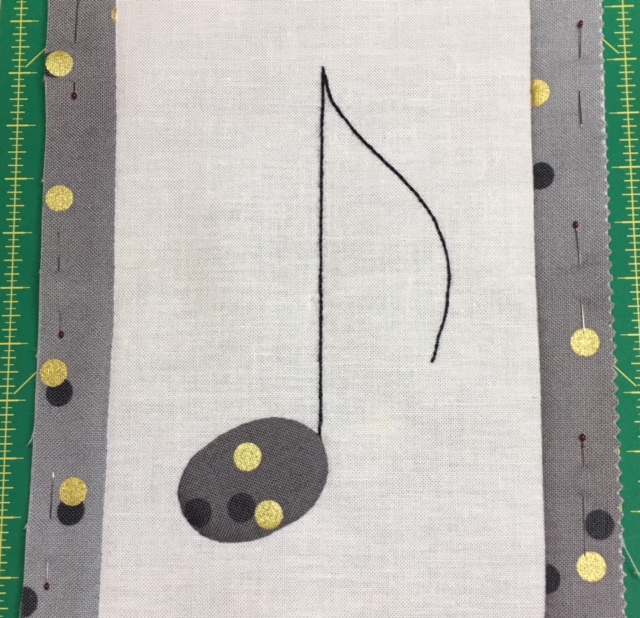 I get it. If you don't want to do all this applique, simply open up the folded piece and machine stitch one or two threads away from the folded line toward the outside edge. Continue with top and bottom of block. Complete all 32 blocks the same way.
  Center block. Applique Treble Clef in center of background fabric. Iron and re-cut background fabric to measure 10" x 13". Cut black Ombre Confetti Metallic side pieces, 1 - 2 1/2" x 13" and top and bottom pieces 1 - 2 1/2" x 10". Re-cut and iron as you did above for note blocks. Attache sides then top and bottom as state above.
 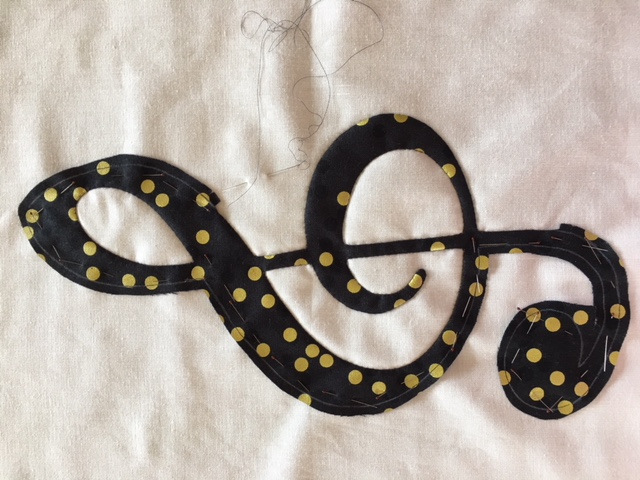 On each block remove center fabric to lesson bulk. NOTE: You may also remove background fabric. Making sure that your outside measurement is 5" x 6 1/2".
 Adding rows together. Place 1 - 1" x 6.5" between each block stitching 6 notes in each row, 4 times. Stitch two rows together using 1" x 30" between rows 1 and 2, and rows 5 and 6.
 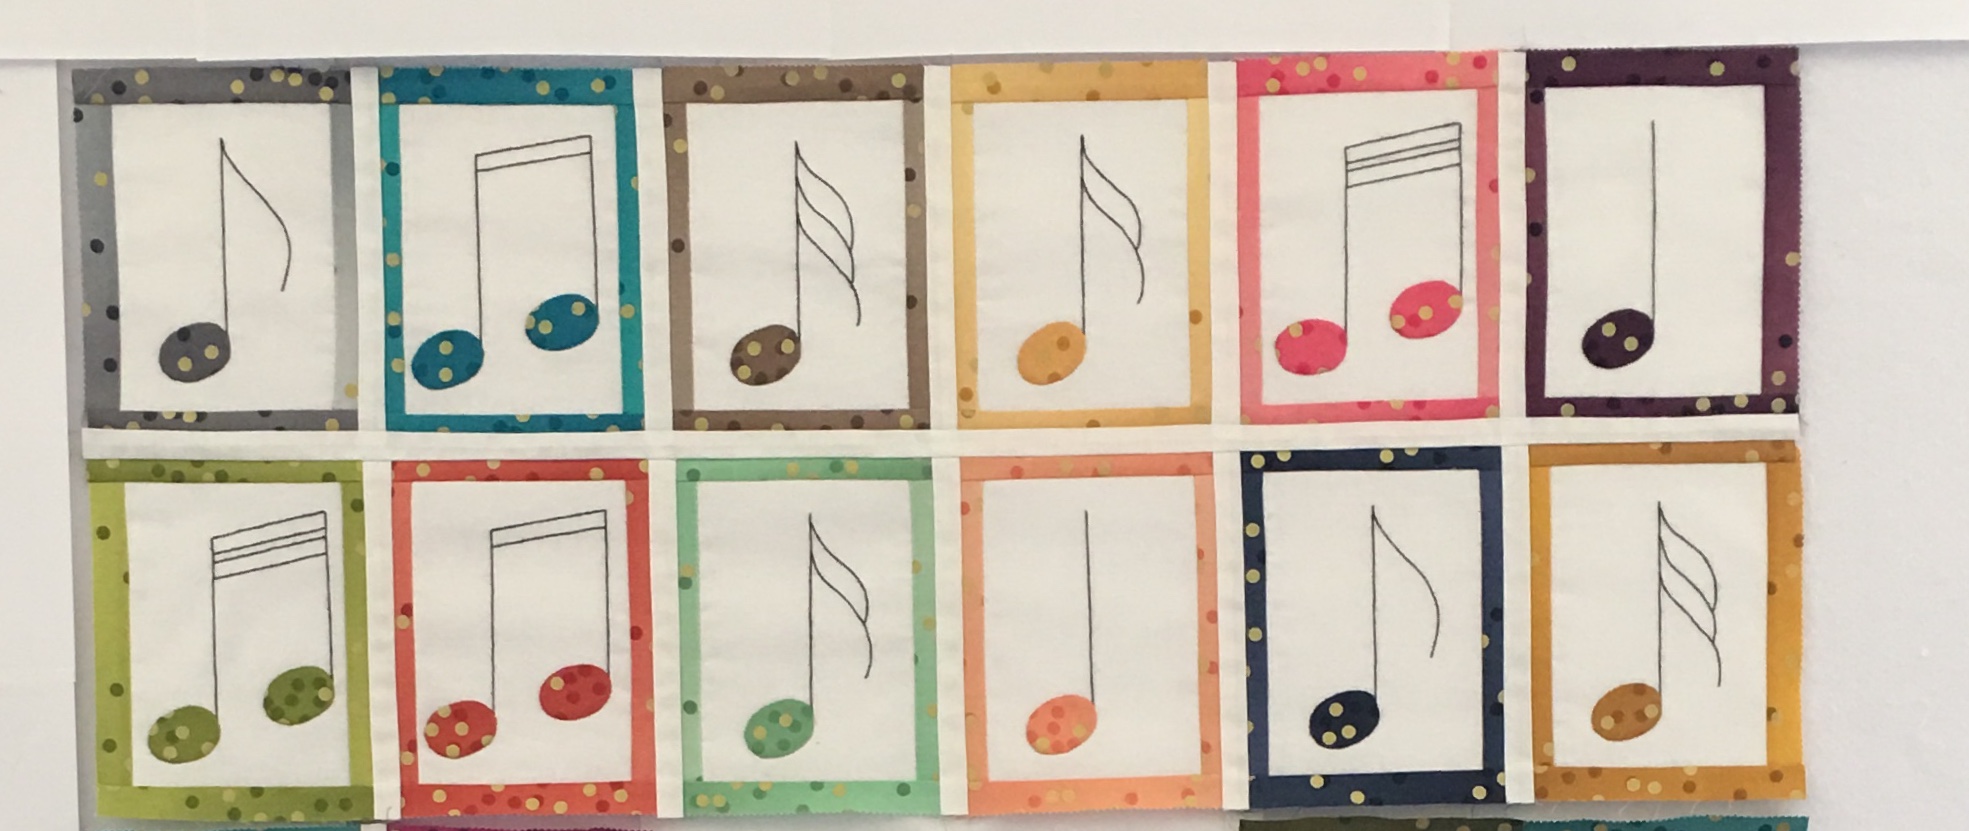 For center group of notes, using background fabric, stitch 1 - 1" x 10" between each row of two musical notes. Stitch 1" x 13" to each side of center block. Stitch all three center sections together. Add 1" x 30" to top and bottom of this center section.
  Sew all three sections together. Add background fabric side sashings 1" x 39.5" and top and bottom sashing 1" x 31.5"
  Piano keys. 5" x 42" Tape 4 patterns of piano keys together. Start and end with two keys. One end will not use the last three keys. NOTE: There is a lot of embroidery on piano keys which may shrink your background fabric. Center the 42" piece of fabric on the taped row of piano keys then start your embroidery tracing lines. This will give you ample space for shrinkage of the outside edges. When you have completed all the embroidery and appliqued the black keys, re-cut to measure 5" x 40". Making sure it will fit your center quilt.
  Attach a 1' x 40" strip of black Ombre to left side of quilt before adding the piano keys. Add piano keys to the left side of quilt. Attach a 2" x 40" strip of black Ombre border to the right side of quilt. Attach a 2" x 36.5" strip of black Ombre to top and bottom.
 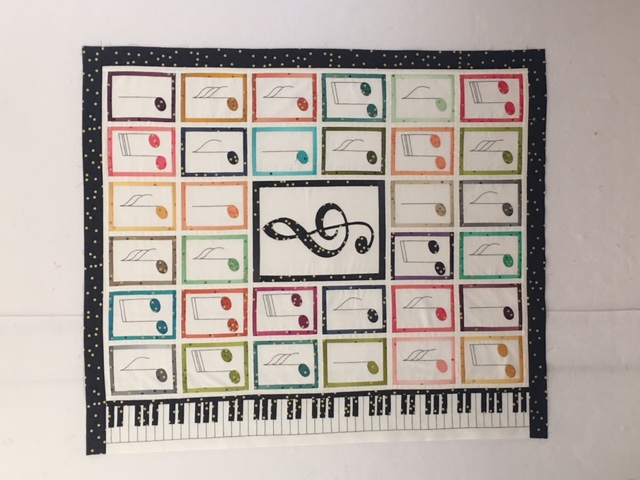 . Add batting, backing. Quilt, bind, add sleeve, hang and your finished.
  This quilt finishes at 36.5" x 42.5" May your quilts sing music from your heart. Mary Andra Holmes sistersquiltingtrunk.blogspot.com
 ![]()
Posted in:
Comments