Welcome to Moda Fabrics!
Ribbon Stars Quilt
Ribbon Stars Quilt
Published:
Apr 1 2019 - 20:54
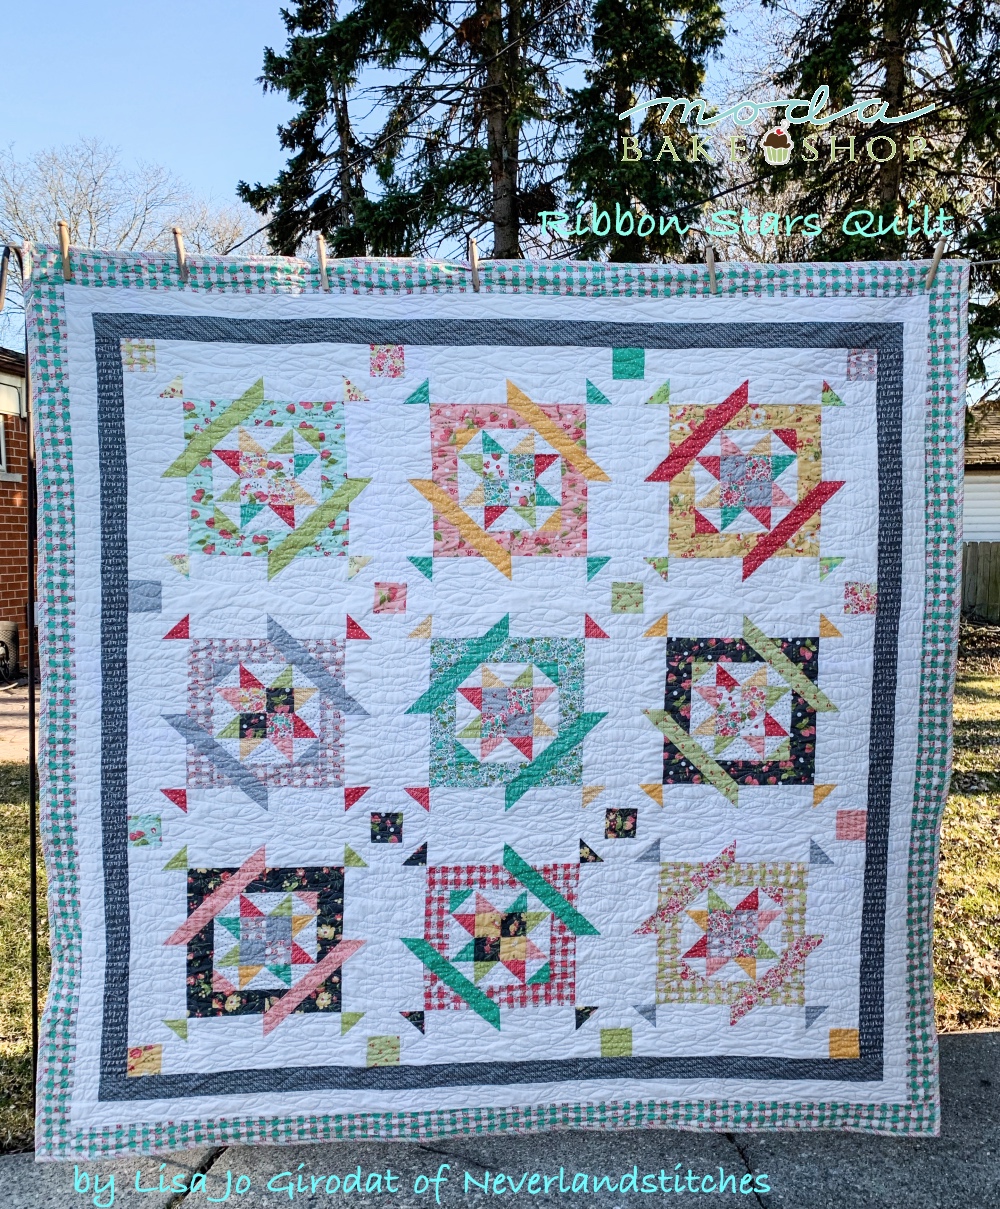

Hi Bakers! I am Lisa Jo Girodat of Neverlandstitches and am so excited to be back on Moda Bakeshop to share another new quilt pattern.
I was absolutely thrilled to be able to make with quilt using Strawberry Jam by Corey Yoder. This fabric line brings so many memories of when my two girls were little. We lived in a small house with a very large back yard. The yard was filled with fruit trees, a large vegetable garden and an even larger strawberry patch. Once the strawberries were ripe I would send the girls out to the strawberry patch to pick berries to make homemade strawberry jam or to use for strawberry short cakes. Most times I think they would eat more strawberries than made it into the bucket.
I am rating this pattern as Easy as the most difficult pieces of the pattern are the flying geese and half square triangles. In this pattern I will show you how to make 4 at a time no waste flying geese, 4 at a time half square triangles and 8 at a time half square triangles. Hopefully you will thank me for these short cuts if you've never tried these methods.
This quilt finishes at 73 inches square.
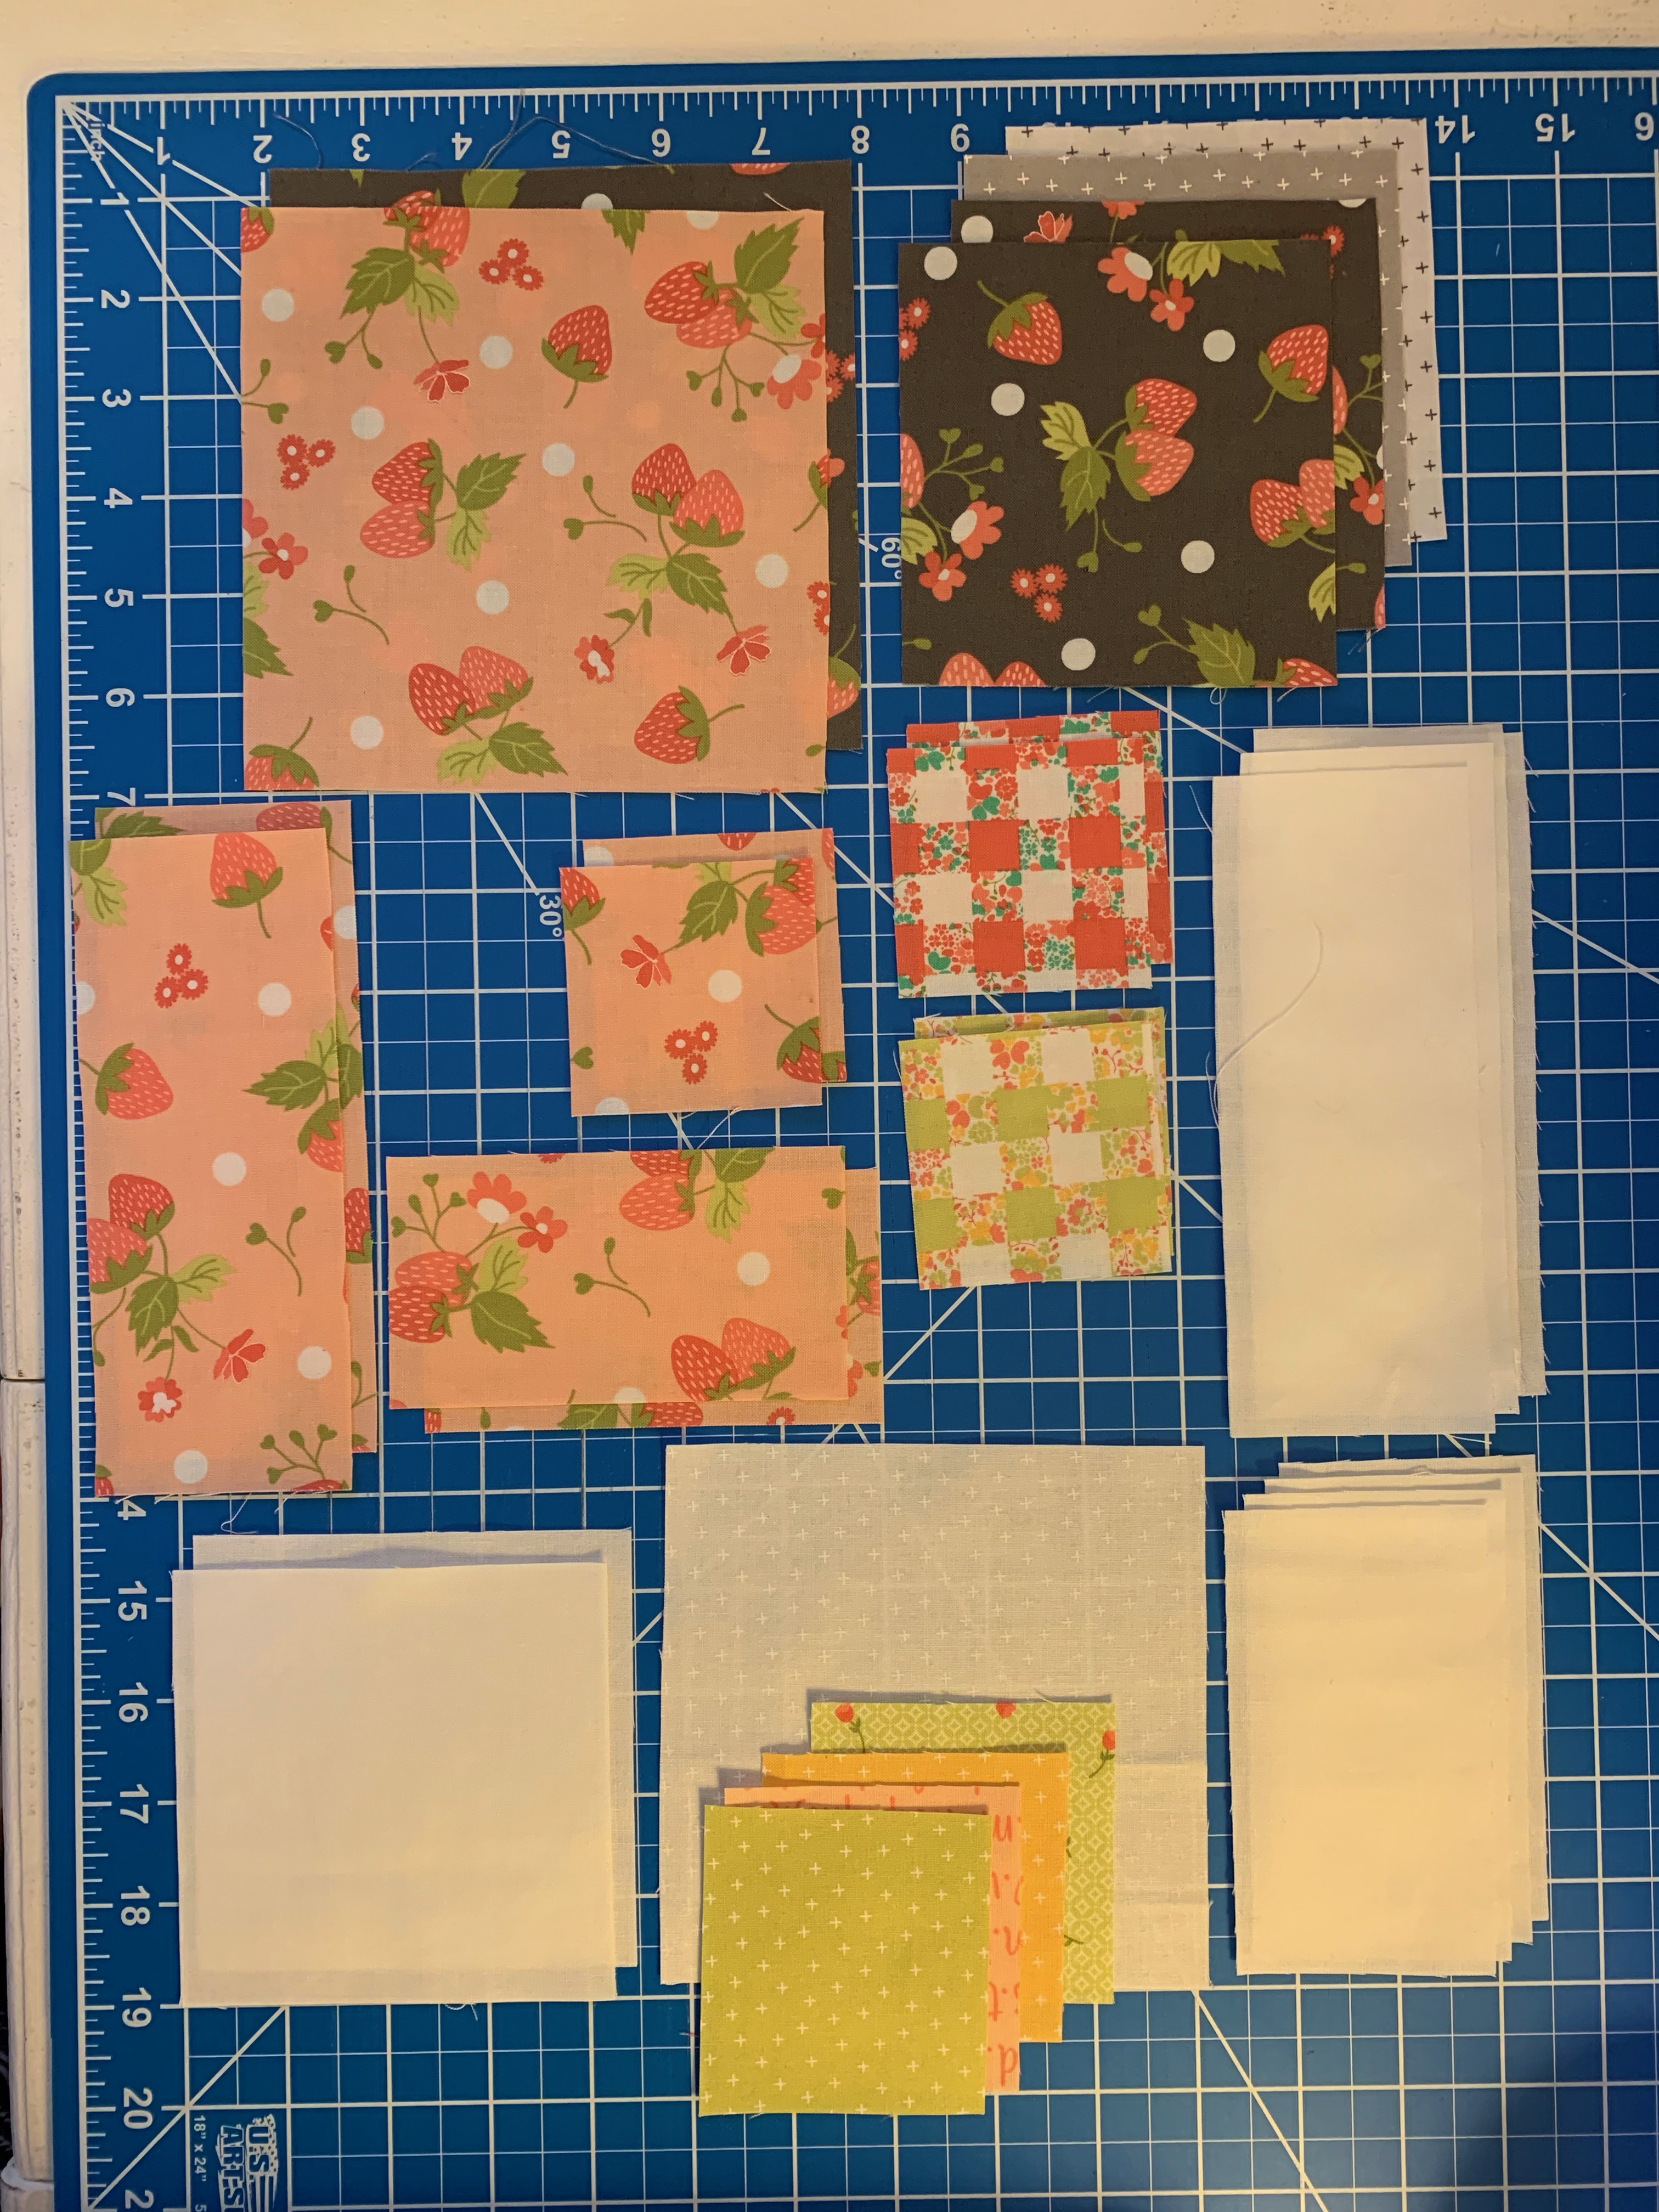
![]()
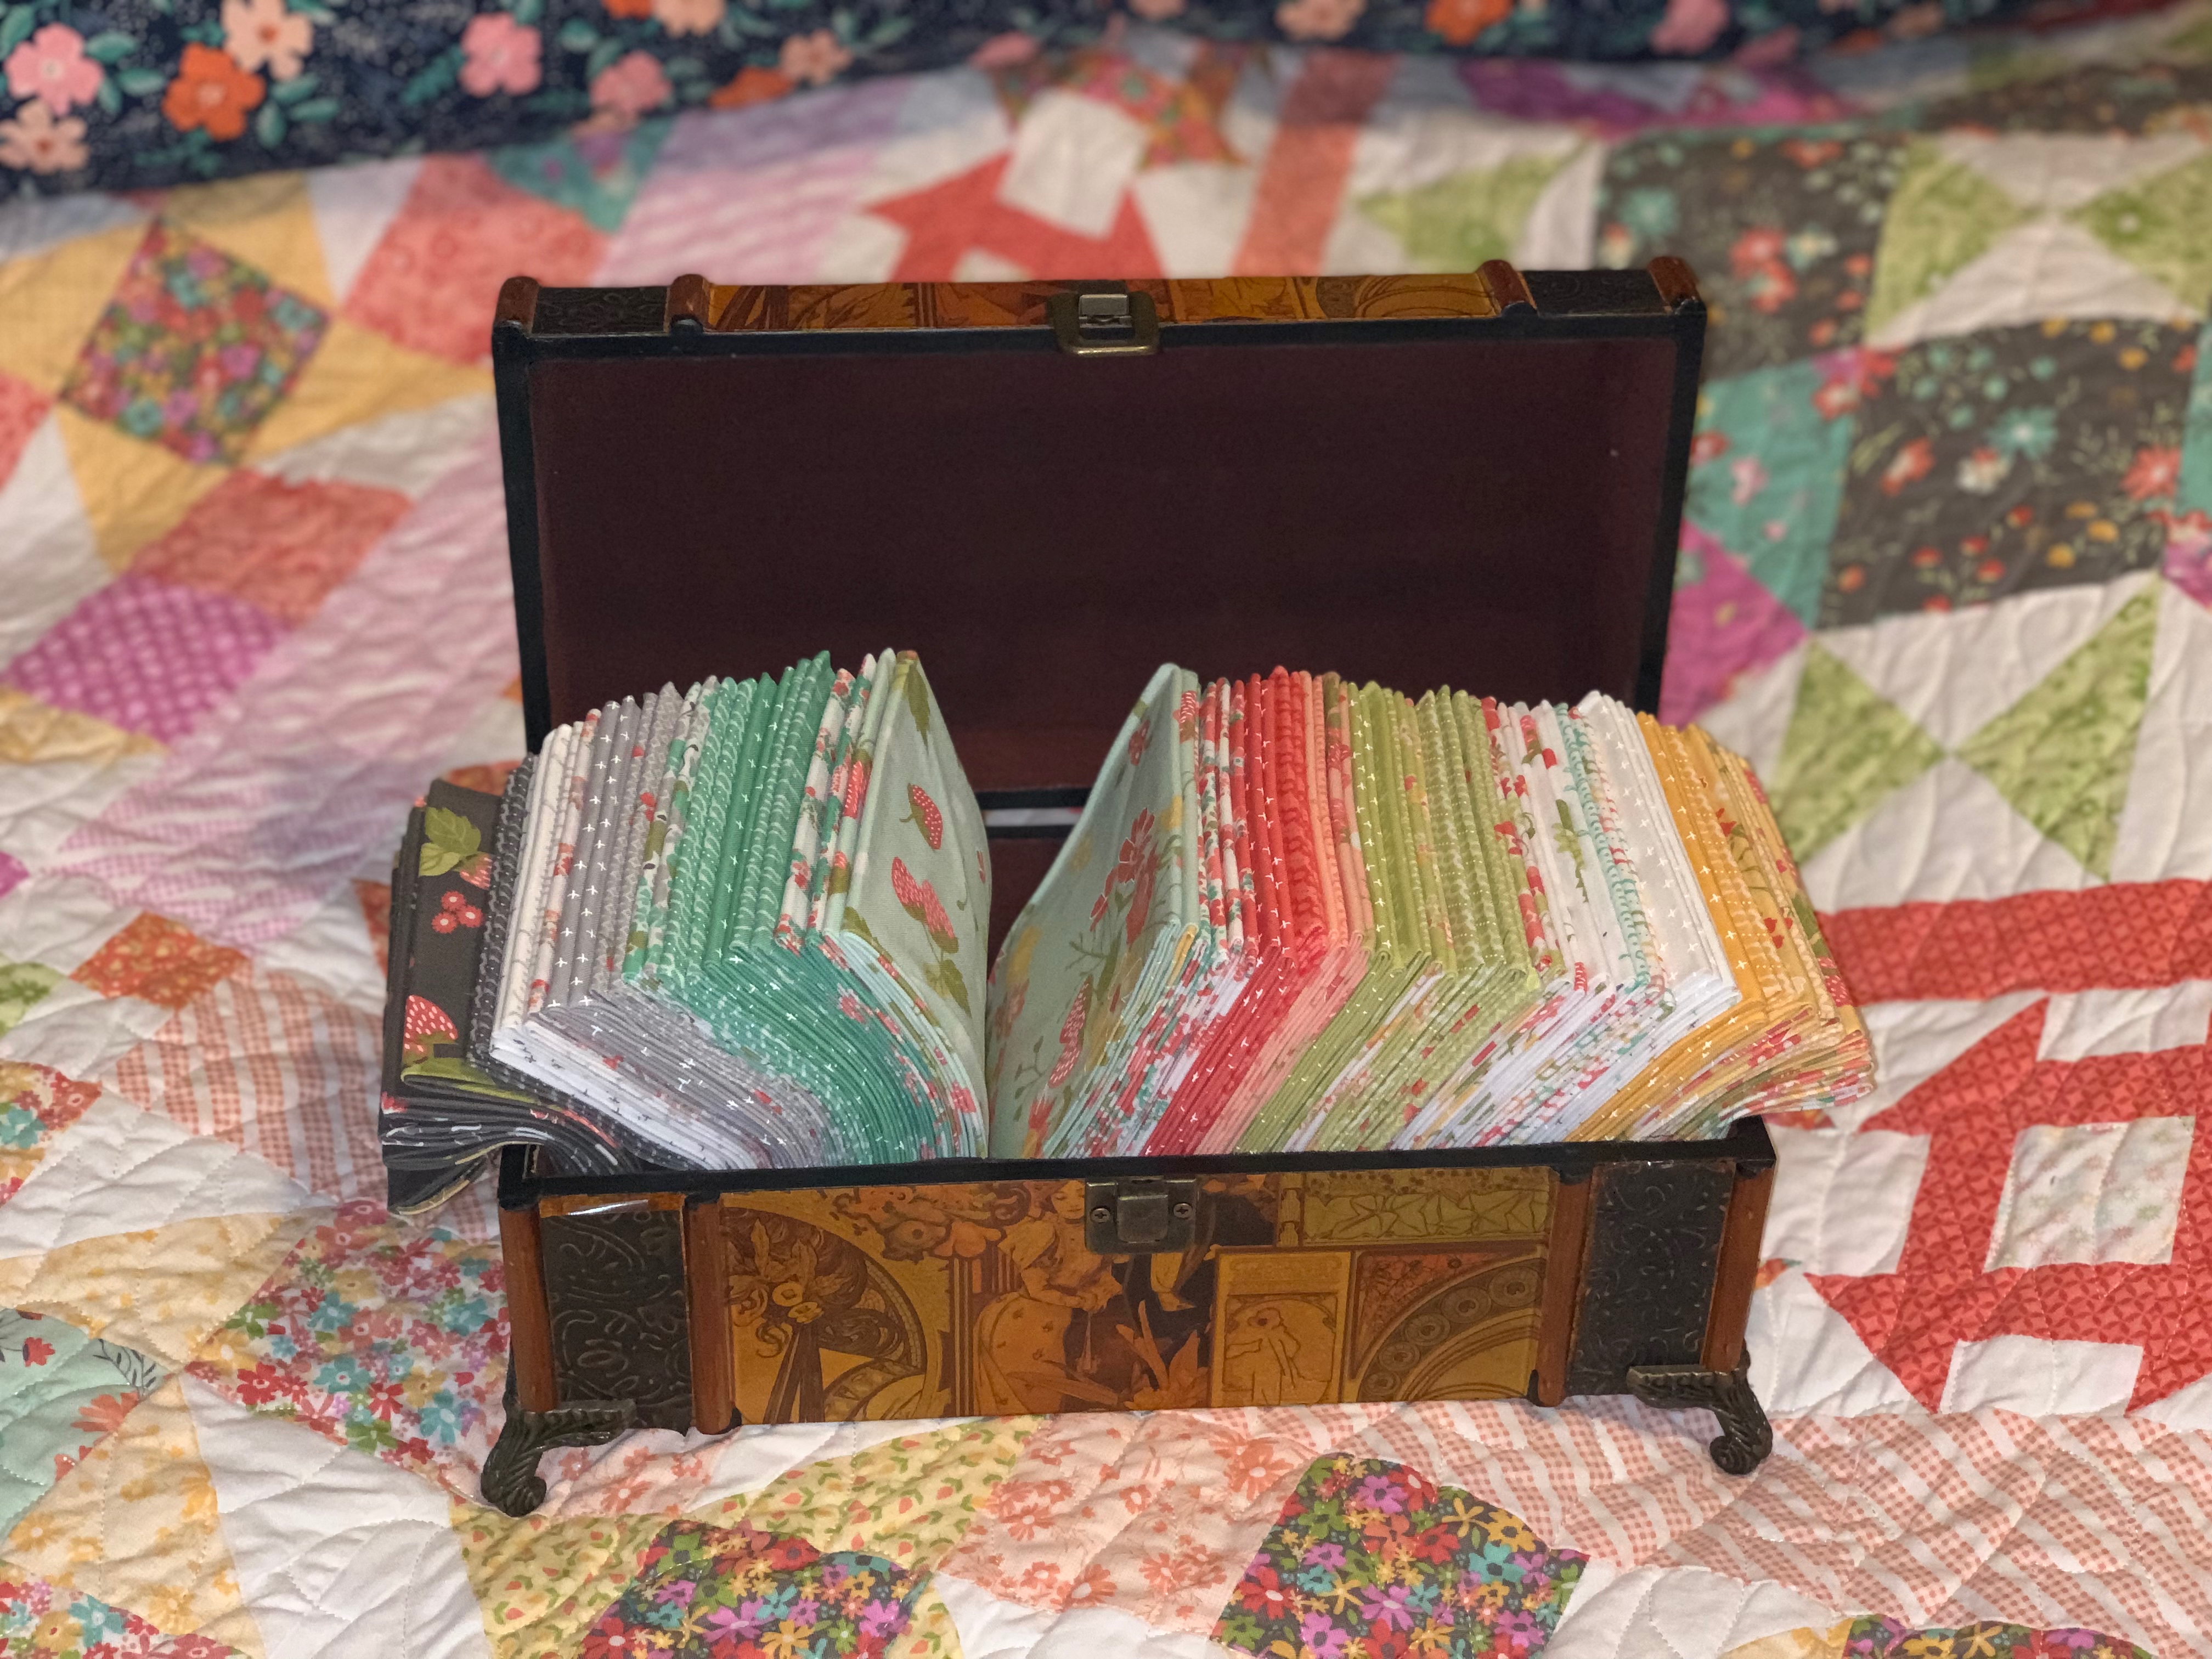
1 - FQB - 29060AB - Strawberry Jam by Corey Yoder
3 1/2 yards of Moda Bella 9900-97 for background and sashing
1 yard 29063-18 for the 2nd boarder
5 yards backing fabric {I used 29067-33 from the Strawberry Jam collection}
1 yards binding fabric {I used 29066-11 from the Strawberry Jam collection)

Your favorite neutral piecing thread
A rotatory cutter, mat and ruler
Your favorite 2 1/2 x 4 ½ inch flying geese ruler
2 1/2 HST rulers
![]()
Before you begin:
Read through the entire pattern before you begin so that you may plan out which fabrics you want to use in the various sections.
- All seams are a true quarter inch
- Fabrics were spray starched before cutting
- Seams were all pressed to the darker fabrics
- Personally, I cut and sew one block at a time to keep order in my messy sewing room and for a sense of accomplishment.
The blocks should be trimmed to 16 1/2 inches so that they finish at16".
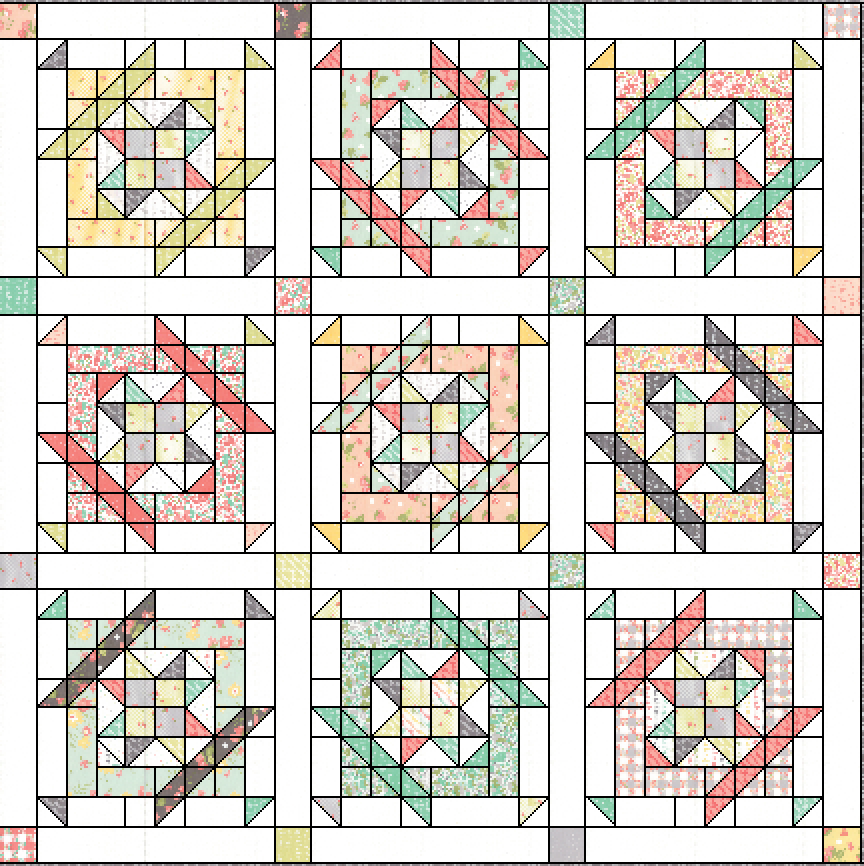
Making a Ribbon Star Blocks (make 9).
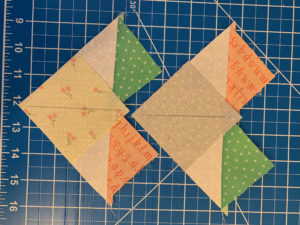
To assemble each Ribbon Star Block cut:
(4) - 2 1/2 inch squares of of various prints to form the center four patch (c)
(4) - 3 inch squares of 4 different prints for the flying geese (a)
(1) – 5 1/4 inch square of a low volume print for the flying geese (e)
(1) - 4 1/4 inch squares of a low volume print for the 4 at a time HSTs
(1) - 4 1/4 inch squares of the fabric you selected for your ribbon print for the 4 at a time HST
(1) - 5 ¾ inch square of of the fabric you selected for your ribbon print for the 8 at a time HSTs
(1) - 5 ¾ inch square of the fabric you selected for your box print for the 8 at a time HSTs
(2) – 2 ½ inch squares of the fabric you selected for your box print
(2) – 2 ½ x 4 ½ inch rectangles of the fabric you selected for your box print
(2) – 2 ½ x 6 ½ inch rectangles of the fabric you selected for your box print
(2) – 4 ¼ inch squares of background fabric for for the two sets of 4 at a time HSTs
(1) – 4 ¼ inch square of the fabric you selected as your ribbon for 4 at a time HSTs
(1) – 4 ¼ inch square of the fabric you selected for your corners 4 at a time HSTs
(4) – 2 ½ x 4 ½ inch rectangles of your background fabric
(4) – 2 ½ x 6 ½ inch rectangles of your background fabric
Block Assembly
Begin by assembling your center 4 patch:
Take 2 different 2 ½ inch squares of fabric and put them right sides together, aligning the edges.
Sew along one edge with a 1/4" seam. Press.
Repeat for your other 2 – 2 ½ inch squares.

Take your two pairs of squares and place them on top of each other RST (the seam should be aligned. Make sure that you do not have the same fabrics facing each other. Sew a 1/4" seam down the right hand side of your squares. Press.
Four at a time flying geese:
Draw a line from one corner to the opposite corner on the reverse side of the four 3 inch squares.
Place two 3 inch squares on the 5 1/4 square of low volume fabric, RST and small squares in opposite corners. The lines on the reverse sides of the 3 inch squares should flow together

Sew ¼ inch on each side of the line.
Cut the piece in half on the drawn lines
Press open.
Place a 3 inch square in the corner of each unit, right sides together, and marked lines positioned as shown in the photo.
Sew a ¼ inch on each side of the line and then repeat for the second unit.
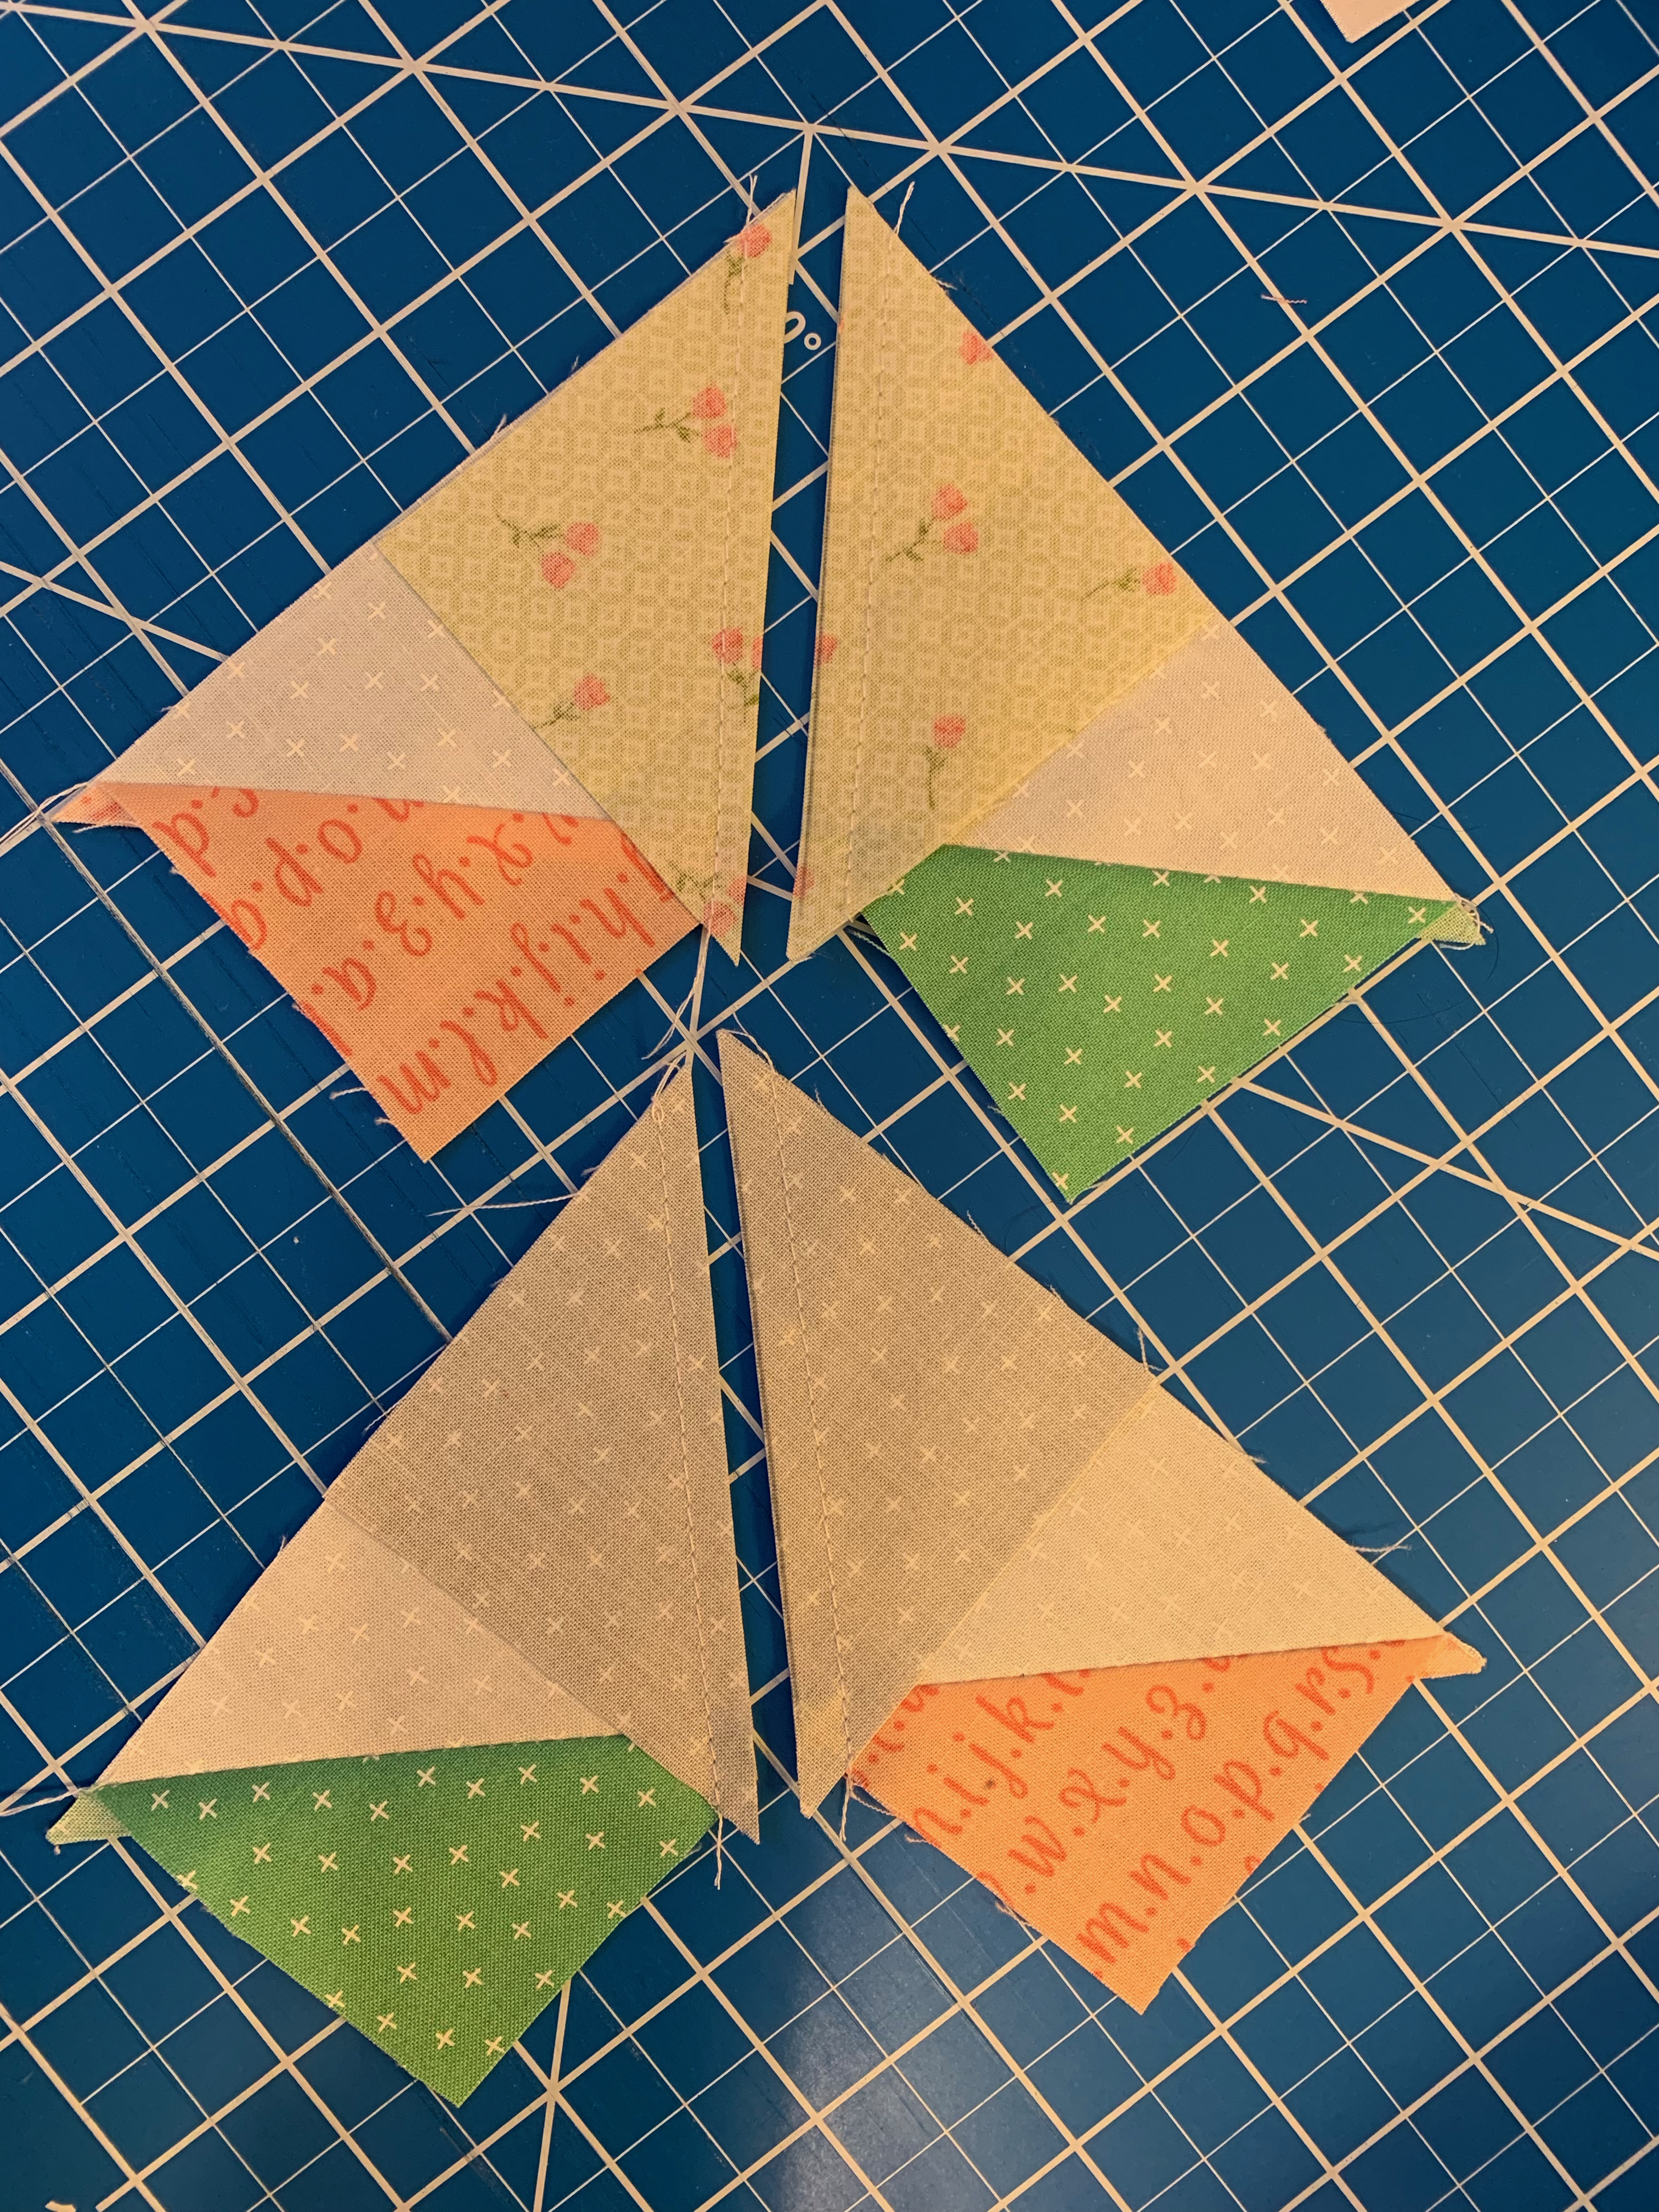
Cut the piece in half on the drawn lines and then press open.
Trim the four flying geese to 2 1/2 x 4 ½ inches.
Four at a time HST
Placing a 4 ¼ inch square of low volume and a 4 ¼ inch square of your ribbon fabric RST.
Sew around the edges of the square at ¼ inch seam.
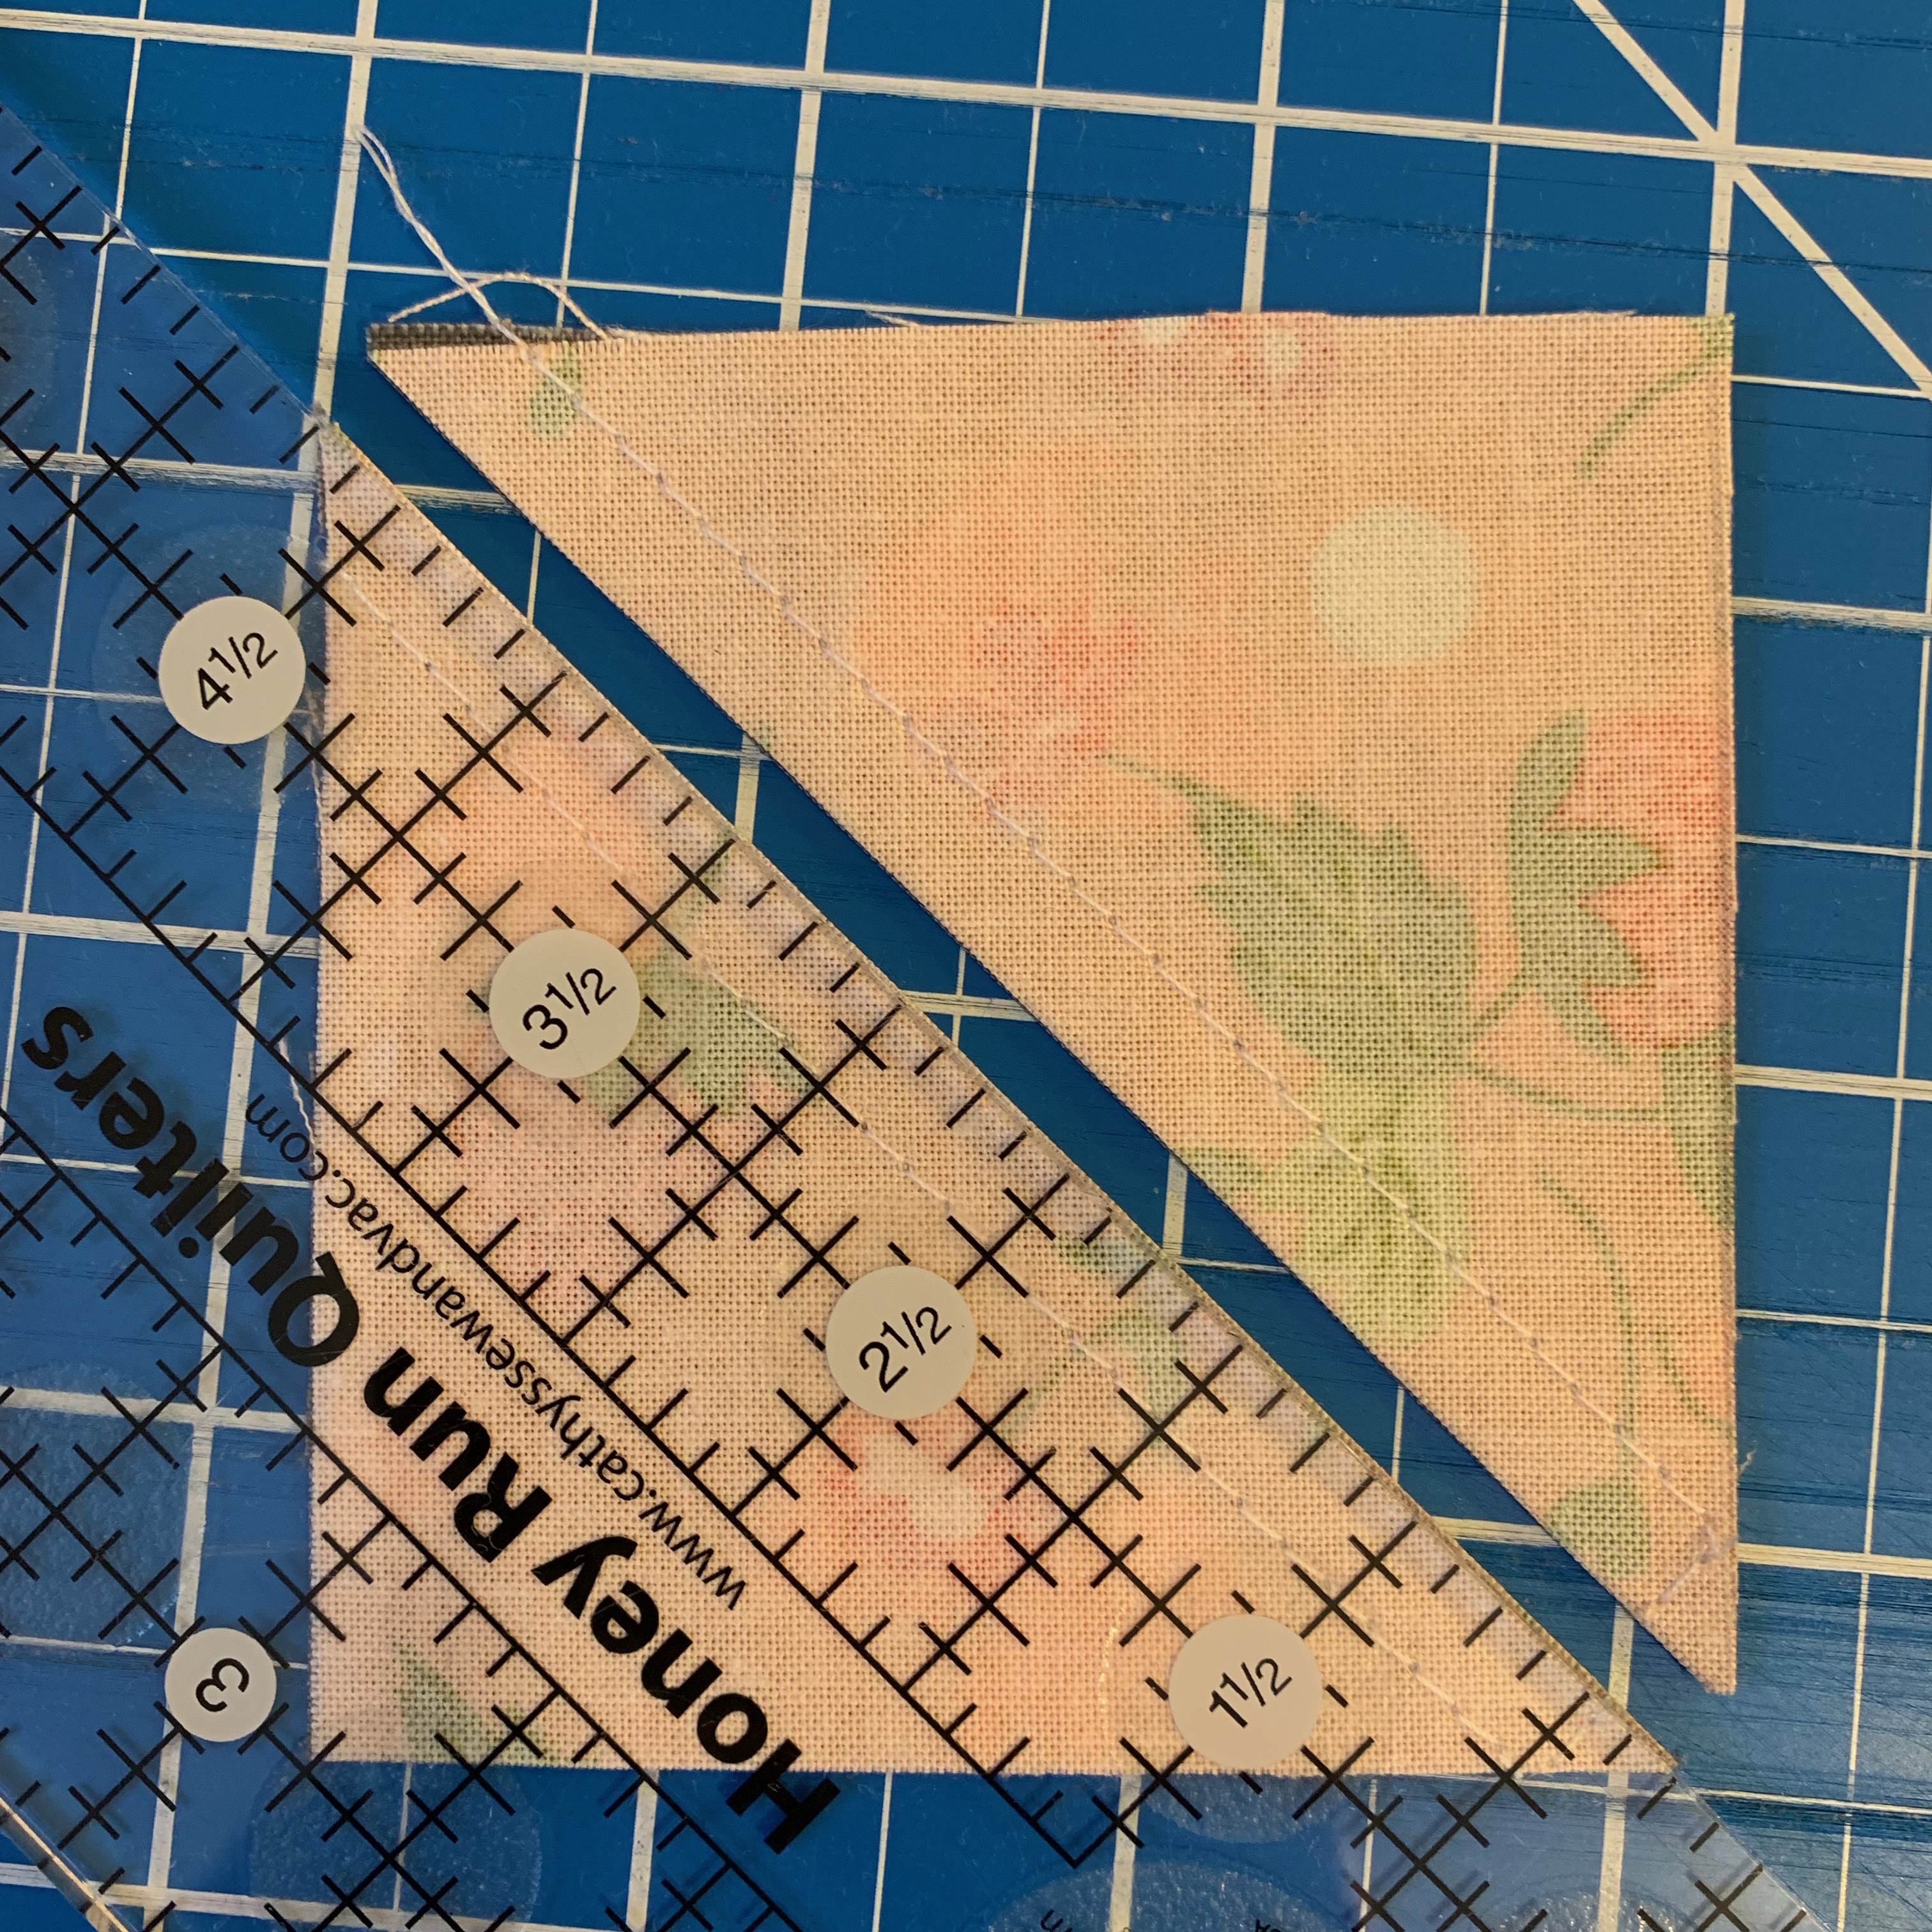
Cut in an X formation, corner to corner. Press towards the darker fabric – now you have 4 HST’s.


Trim to 2 ½ inches square with your favorite HST ruler.
Assembly the center star as shown in the photo below:
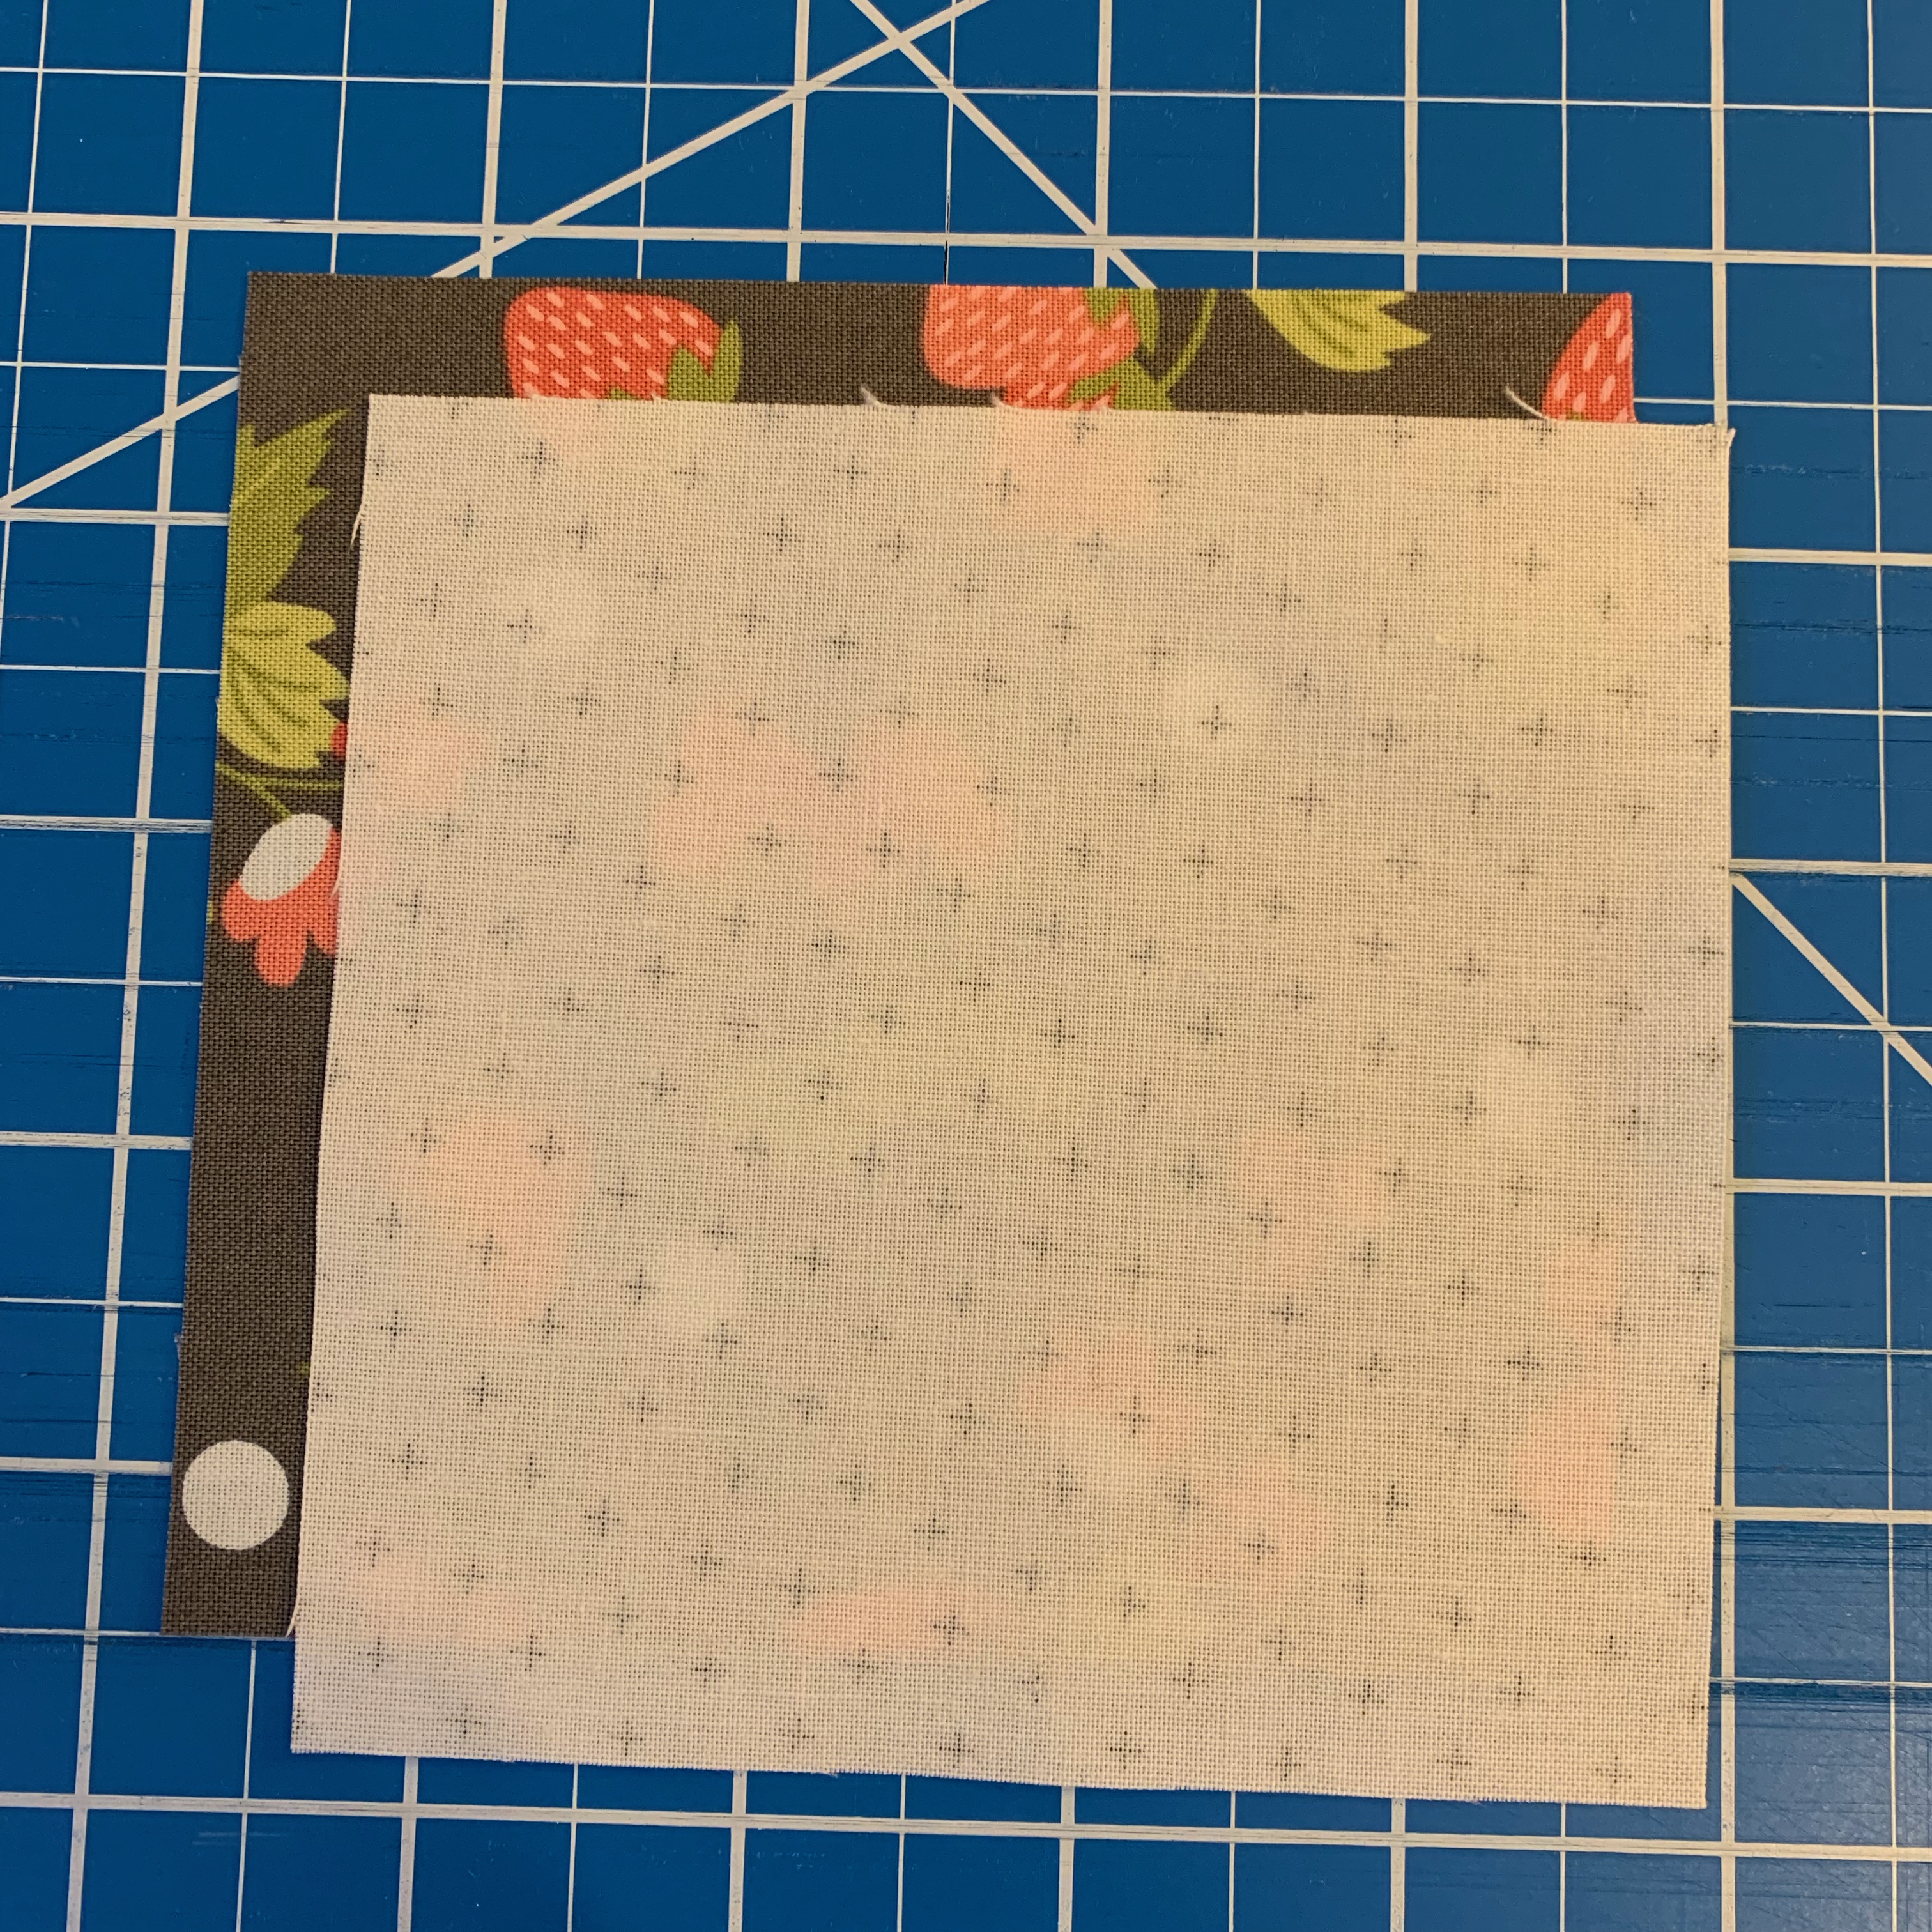
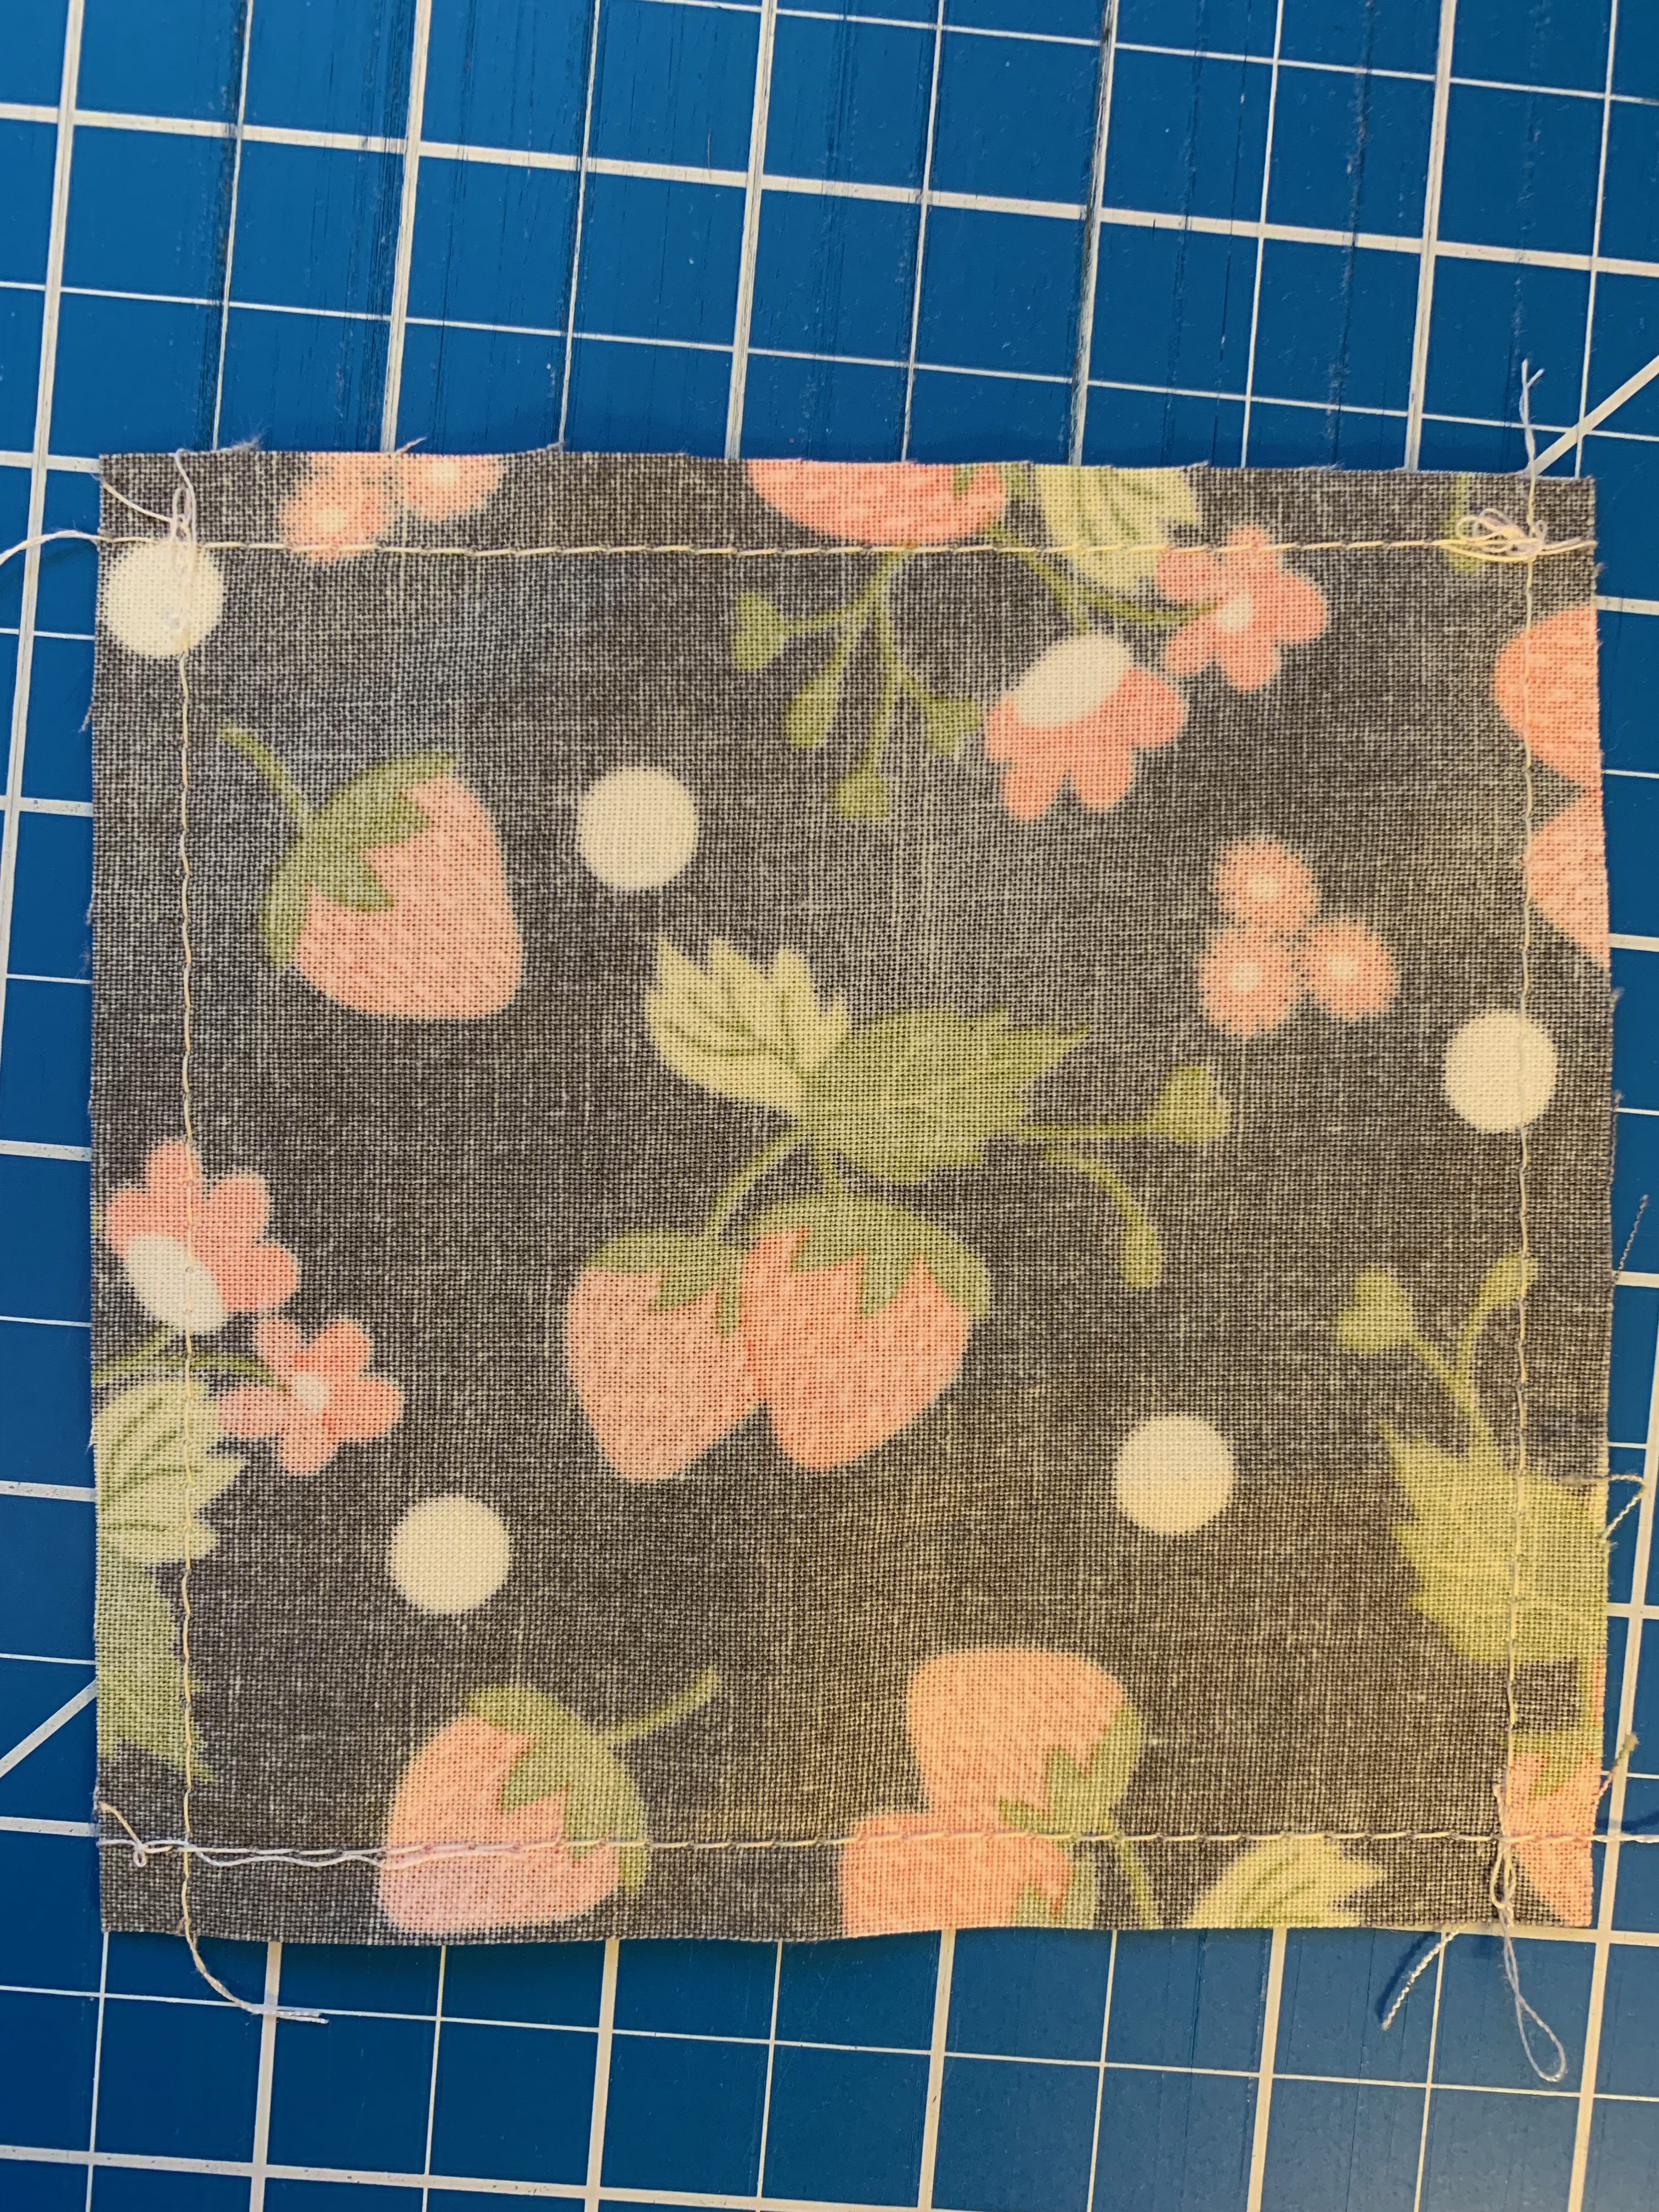
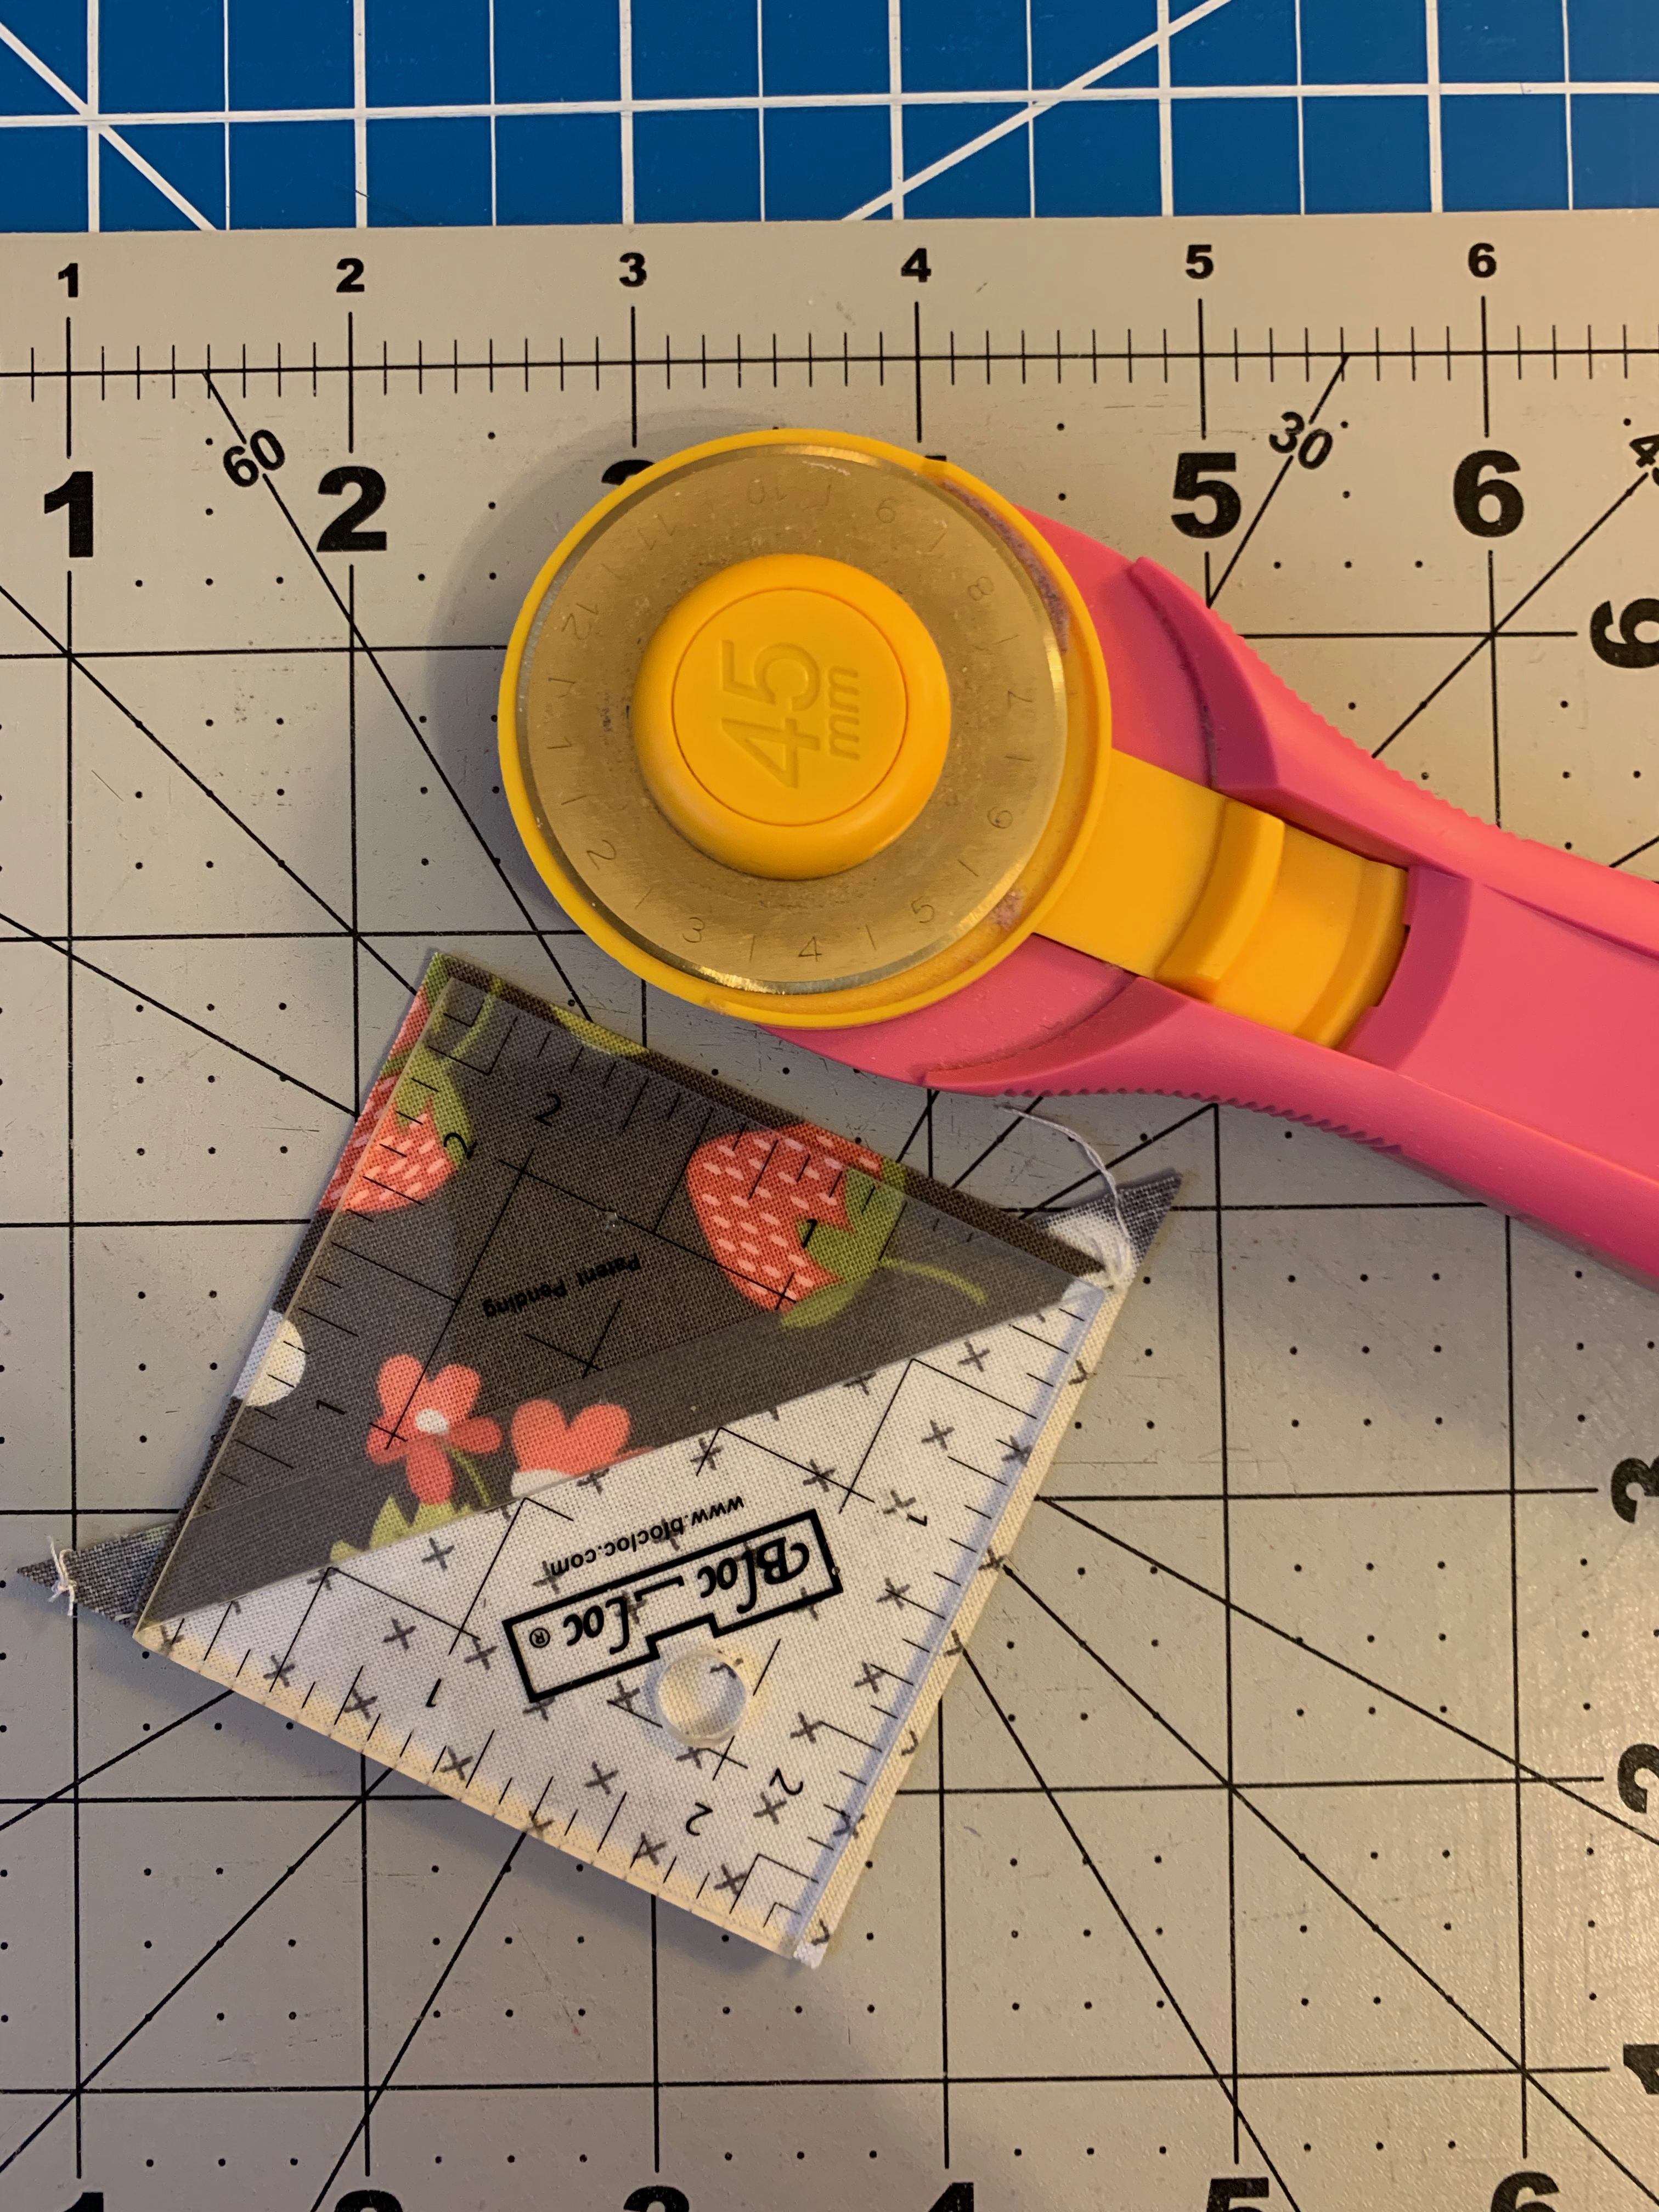
Eight at a time HST
Place a 5 ¾ inch square of the ribbon fabric on top of a 5 ¾ inch square of the the box fabric RST. Draw two lines diagonally corner to corner.

Sew ¼ inch on each side of the drawn lines (basically to form a double X).

Cut the sew together square in half (approximately 2 7/8 inches) both horizontally and vertically.

Cut the four squares in half diagonally. Press the 8 HSTs open and trim to 2 ½ inches.
Add the box around the center star as shown below:

Make two more sets of 4 at a time HST using the directions above to make 4 – 2 ½ inch HSTs using the the background fabric and ribbon fabric and 4 – 2 ½ inch HST using the back ground fabric and the fabric selected for the corners.
Finish assembling the block as shown in the photo below:

Trim you block to 16 1/2 inches.

Sashing:
Cut (24) – 3 x 16 ½ inch strips of background fabric
Cut (16) – 3 inch squares of various prints
Assemble the sashing and blocks as show in the image below:
First Border:
Select 2 fat quarters from the similar color family. ( I used the two dark charcoal prints)
Cut into 2 ½ inch strips and sew into (2) 58 inch strips and (2) 62 inch strips.
Sew the 58 inch strips on each side of the quilt and the 62 inch strips on the top and bottom of the quilt.

Second Border:
Cut (8) 3 inch WOF strips. Sew together to form (2) 67 inch strips and (2) 62 inch strips.
Sew the 62 inch strips along each side of the quilt and the 67 inch strips along the top and bottom of the quilt.
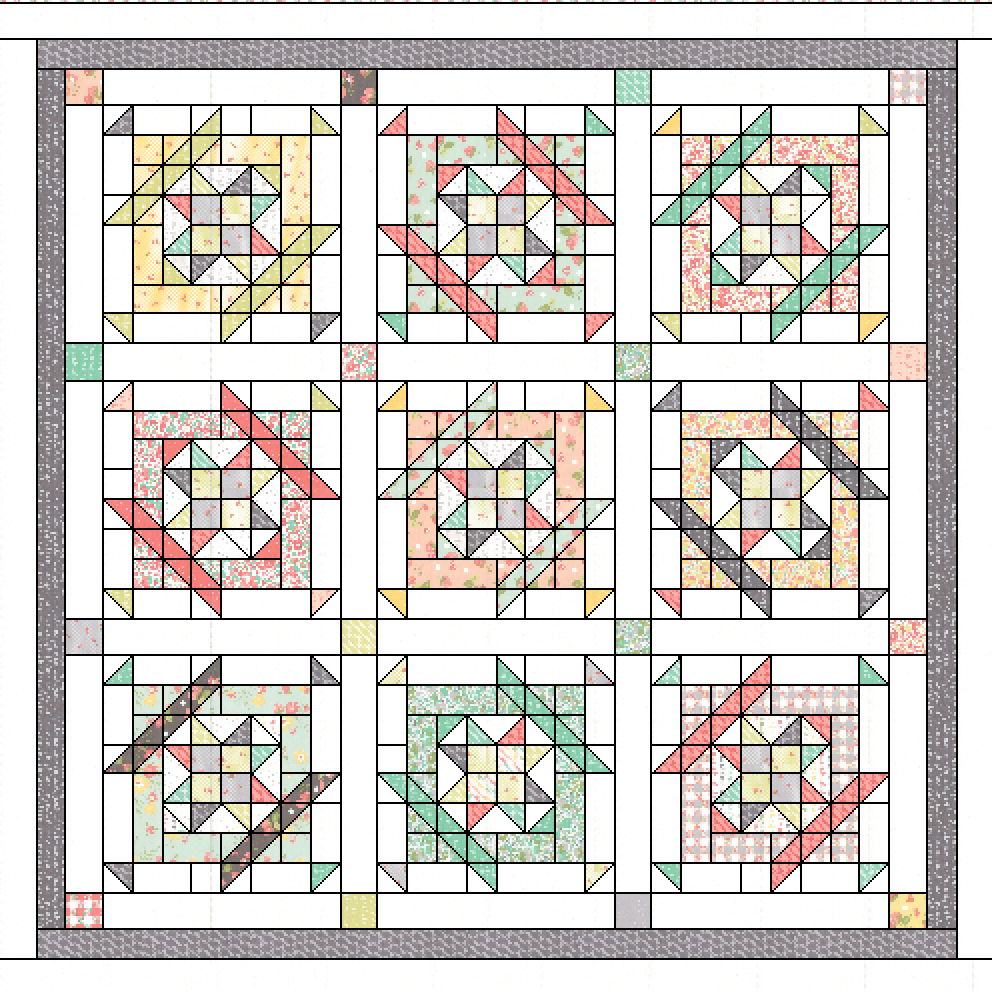
Third Border:
Cut (8) 3 inch WOF strips. Sew together to form (2) 67 inch strips and (2) 73 inch strips.
Sew the 67 inch strips along each side of the quilt and the 73 inch strips along the top and bottom of the quilt.

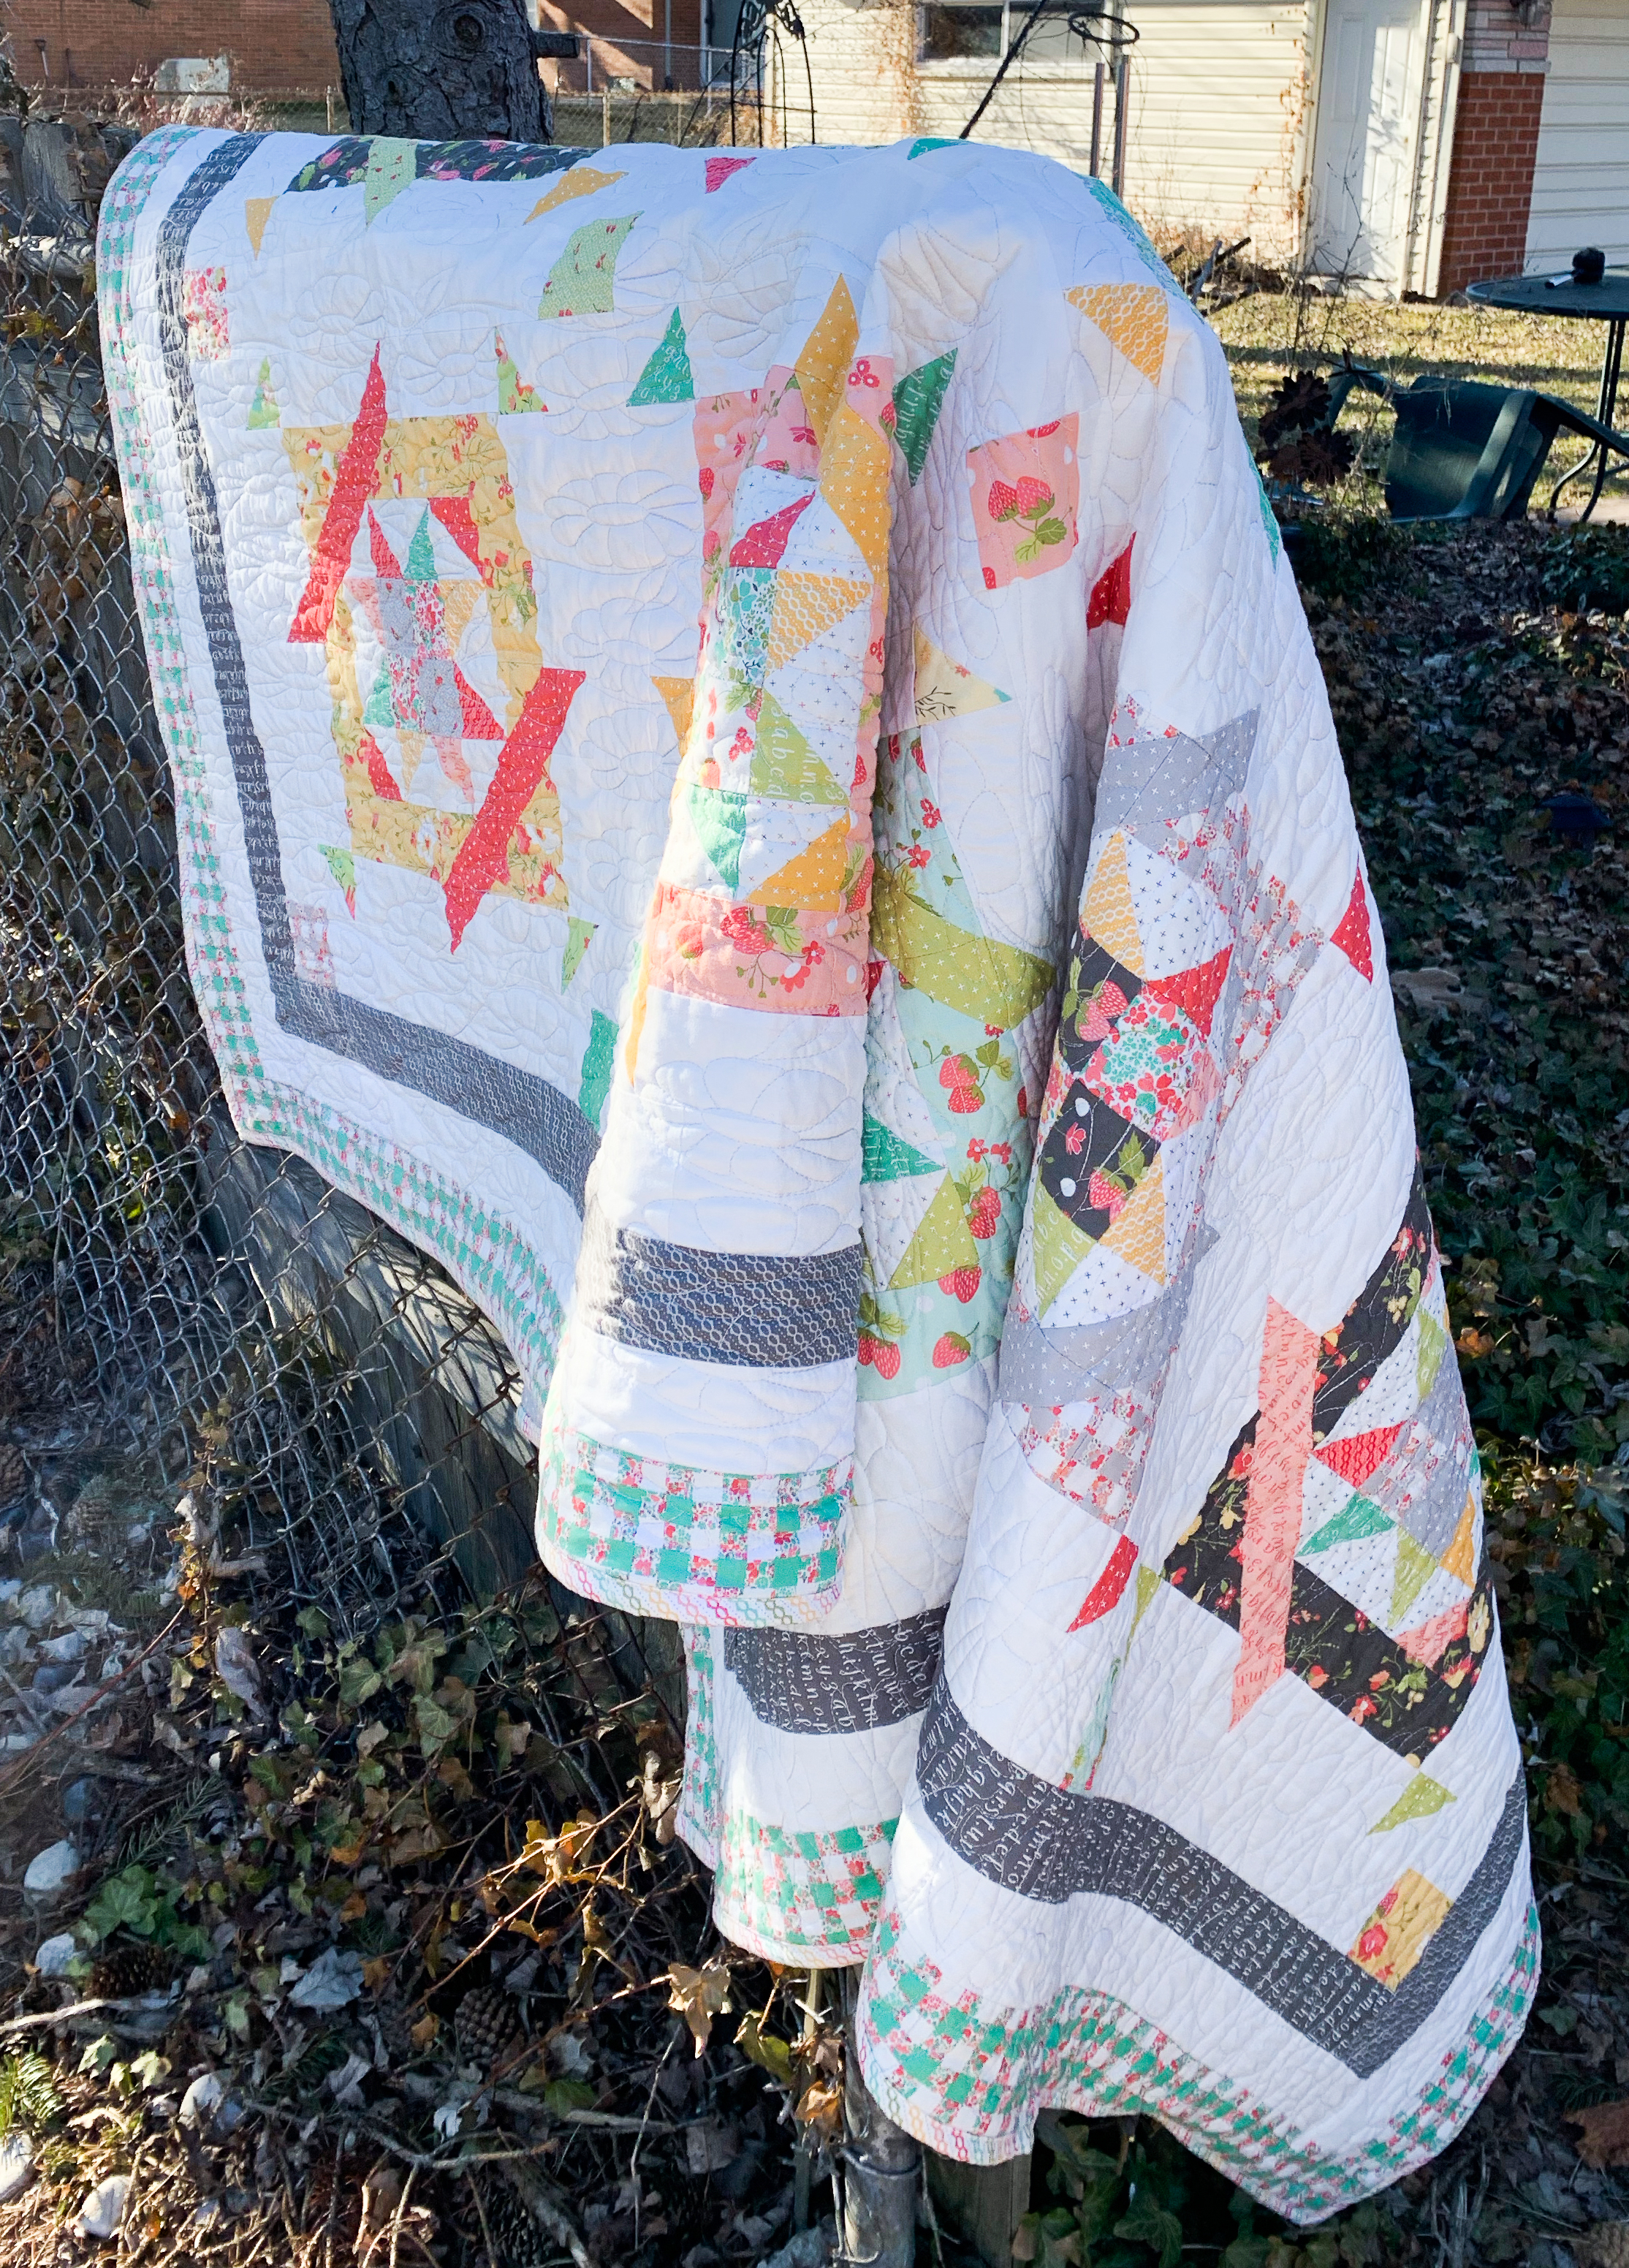
Quilt using your favorite quilting and bind. Wash, dry and it's ready to snuggle!
![]()
The quilt finishes at 73 inches square.
If you make this quilt please tag me on Instagram as I would love to see your version!
Until next time ... Happy Sewing!
Lisa Jo Girodat
blog: neverlandstitches.blogspot.com
instagram: neverlandstitches
![]()
Posted in:
Comments