Welcome to Moda Fabrics!
Different Directions
Different Directions
Published:
Jul 31 2020 - 06:11
True story... I'm not very good at reading instructions. For the microwave, installing a shower head, quilt instructions, and ruler instructions. I'd skim, get a few highlights and figure the rest out.
So it probably shouldn't have come as a surprise that the method for piecing geese that came with the BlocLoc ruler was different than what I'd been doing. I was using a different method, probably from a different ruler. Oops. Except "my way" was more efficient, and it was better for the kind of look I like.
So let's talk about a different way to piece flying geese for BlocLoc rulers and any trim-down method.
The method included in the BlocLoc instructions from a few years ago was a variation of the no-waste method - four small squares and one big square. The difference is that the squares were cut larger than needed to make the units a little larger than necessary, with a very generous seam allowance at the top.
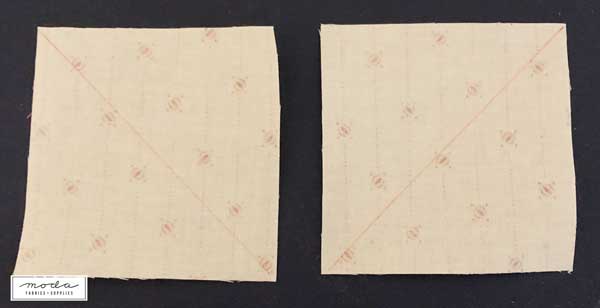
The first step is to mark diagonal lines on the wrong side of the small squares. They are then placed in opposing corners of the large square, with right sides together. The squares overlap in the center.
Stitch 1/4" seam allowance on both sides of the lines. Then cut the square apart on the line, and press the seams to the small triangle.
Layer one small square in the corner.
Stitch. Cut apart. Press to the small triangle. And presto - four flying geese!
Now, about the stripes. I purposedly used a stripe for the background fabric for two reasons. First, to show one of the reasons why I prefer piecing the Geese differently. Second, this question always came up in classes - how do I get the stripes to go in the same direction? Using the layered-square method for piecing geese and deliberate placement of the stripes, you'll get two geese with vertical stripes and two geese with horizontal stripes.
To get the stripes aligned this way, the lines need to marked going in opposing directions. Two squares for each.
If you go back and look at the direction of the stripes in the first couple of pictures, the squares are aligned differently. The first step has the two squares with vertical stripes, the second step has the squares with the stripes aligned horizontally.
The key is that the lines on the squares must go in different directions - the stripes are aligned differently when the squares are placed in each step.
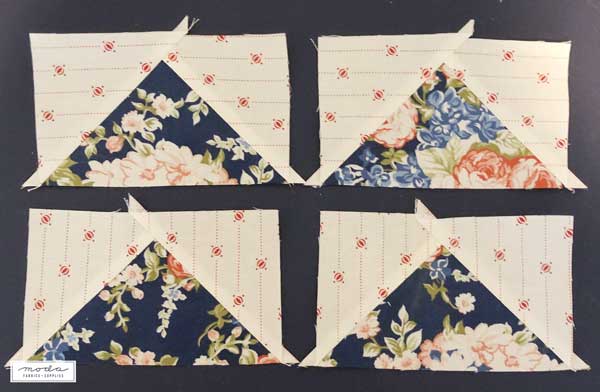
The finished geese are trimmed to size. Easy, right? Definitely.
But I think my way is easier. And it gives me a few more options.
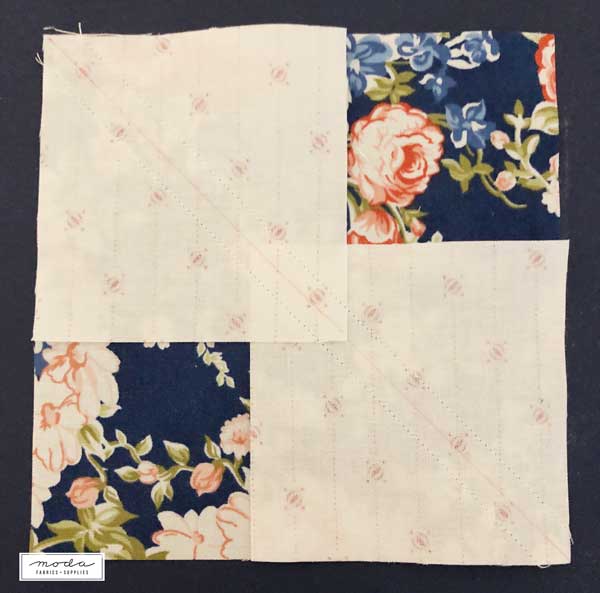
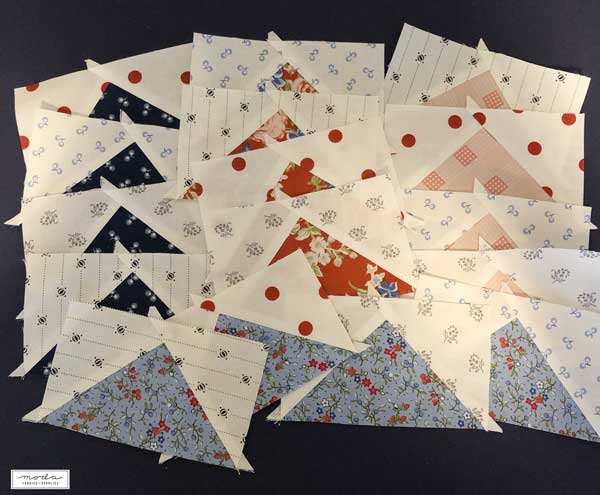
Instead of drawing lines, the squares are cut into triangles.
With stripes - or any directional print - the key is to cut the small squares differently. Just as with the marked lines, the cuts must be going in opposite directions.

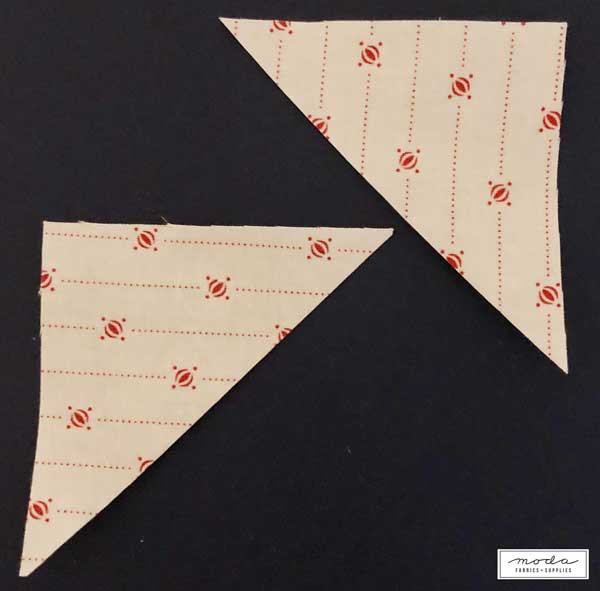
Cutting the squares in just one direction results in triangles like this.
There are two ways to cut stripe squares to get the necessary triangles.
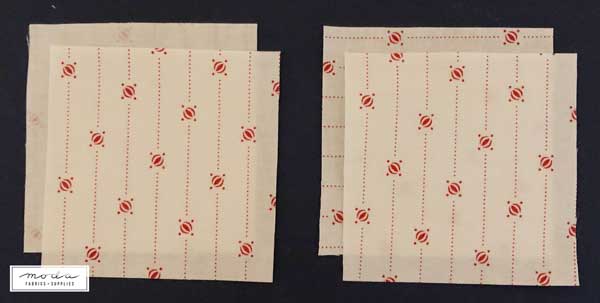
First, if you've cut squares from strips that had wrong-sides-together, there's no need to do anything. Just cut the squares in half on the diagonal and the resulting triangles will be opposing. (It sounds crazy but it works.) The second way is to turn half of the stripe squares side-ways, then just cut in half on the diagonal.
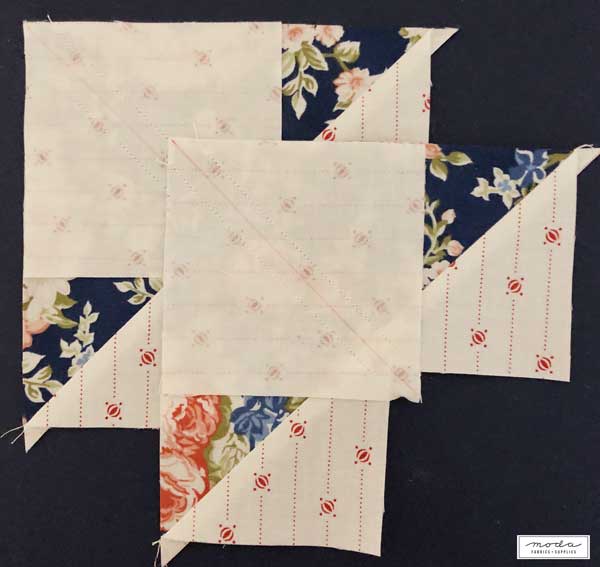
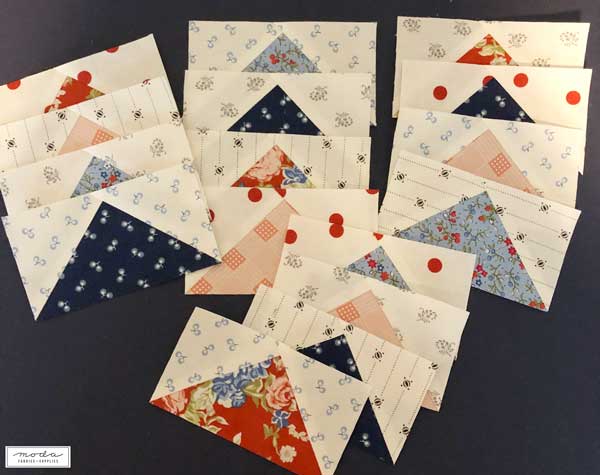
Now to the piecing.
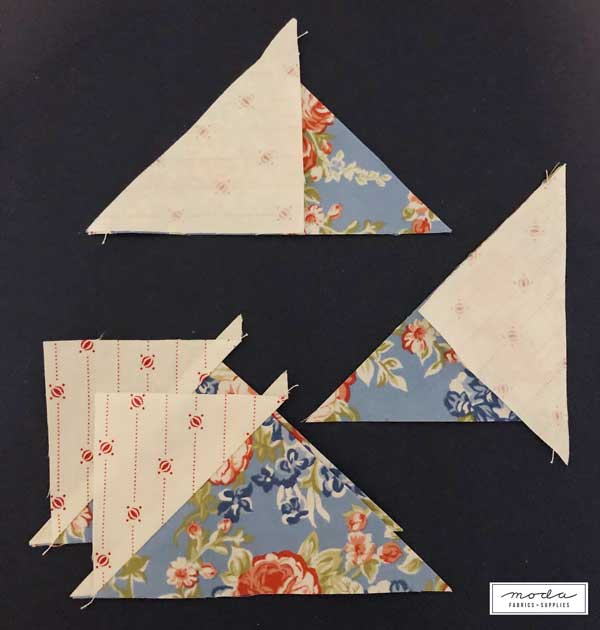
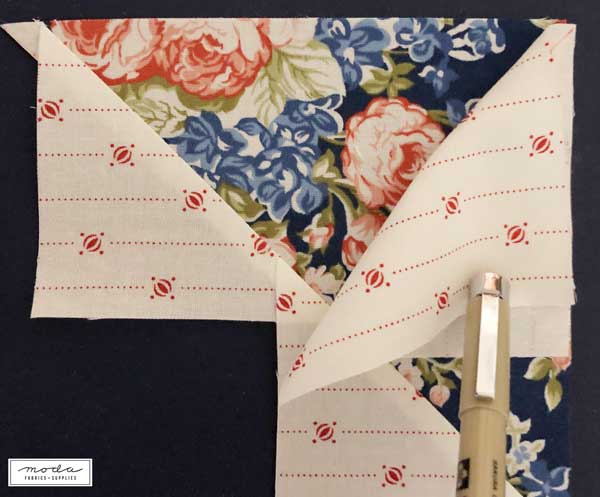
Align the triangles in as shown at the top. The triangles are then stitched in the direction shown with the middle goose.
One thing to note - can you see how the stripe is horizontal on the small triangle? It aligns with the bottom edge of the large triangle. When the stripes are aligned that way, they will be vertical after piecing. For horizontal stripes, just put the triangles on the opposing side so that the stripe is going vertically.
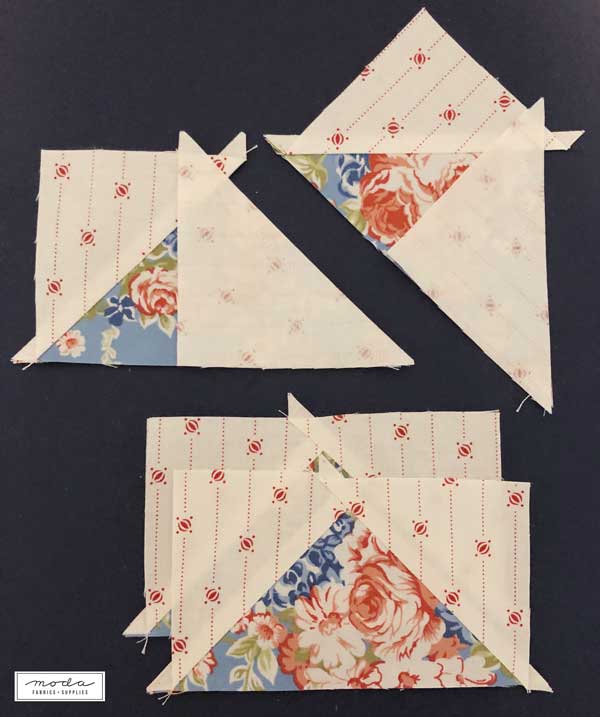
The second triangle is placed as shown on the upper left, and stitched as shown on the upper right. Remember to trim that little "ear" before pressing.
Do you think I remembered to take a picture of my four finished geese? Nope.
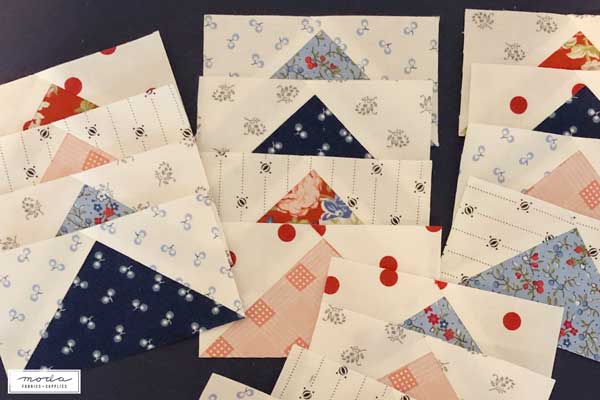
I was too excited to show you the real reason I love piecing geese this way... variety.
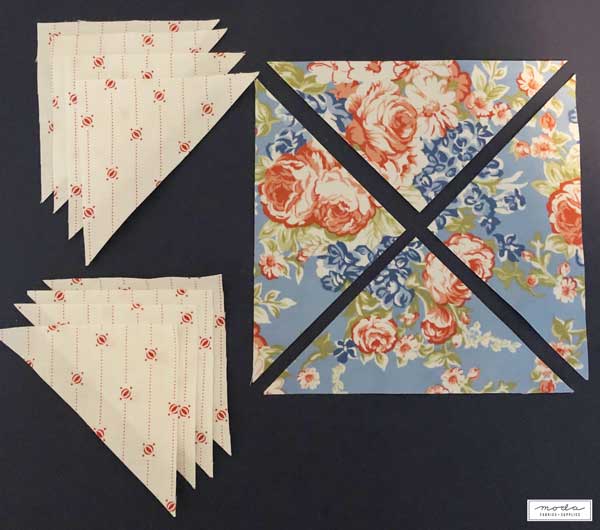
If I have four background fabrics and four big-square fabrics, and I use the layered-squares, no-waste method, I'll get four sets of four matching geese. That's great if I'm making stars. But what if I'm making scrappy geese for a flying geese quilt? With my triangles, I can get this.
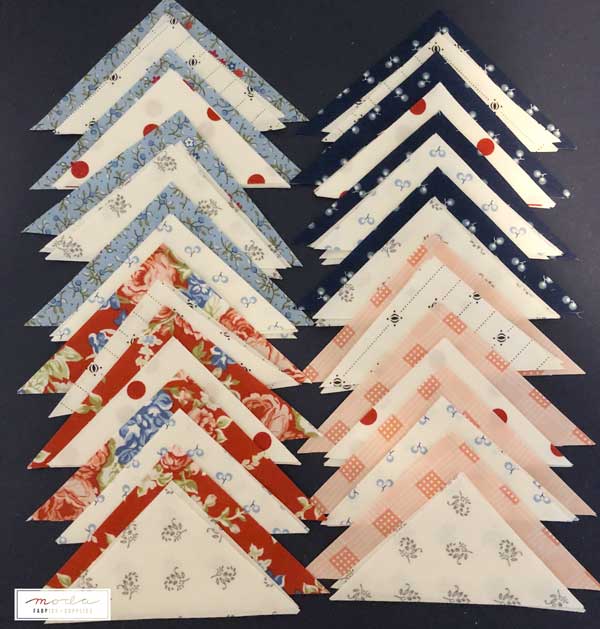
Sixteen different combinations.
Be still my heart.
I can also play with the direction of stripes on just one goose.
Using just eight fabrics, I can wind up with four sets of four geese that are just different enough.
Two last things to mention.
Chain piecing works well for this triangle method. I will sit down with a stack of triangles and chain-piece the first triangle. Then they're pressed. And the second triangle is attached. Trim the "ear" and press. I can piece and press a hundred geese in an hour or so. Then I get a cup of tea or coffee and trim the stack of geese. It's meditative, and a bit mindless. It's not that I don't like marking lines, or that I couldn't use a seam guide, it's simply that this is a nice process. It's also very forgiving because of the trimming.
The second thing to mention is trimming down. Using pieced-to-size methods, my results were "pretty good". That means that two geese were 95% accurate, one goose was anywhere from 50% to 75% accurate, and the last goose... I was the only witness to the accident. It might have even been called "the scene of the crime." So I happily, willingly, embrace trim-down methods for making flying geese.
I get that it wastes some fabric, and that those fabric scraps are an expense. For me, the accuracy of the flying geese units makes assembling blocks and long strips of geese more enjoyable because my results are better. I once calculated how much additional yardage was needed for a quilt made entirely of flying geese. It amounted to about 3/4-yard, but for argument's sake, I rounded that up to 1 yard. So the question for me was simple - was I willing to spend $12.00 to $14.00 for better results?
Alright, there were three last things... the best method for piecing anything is the way that works best for you. My hope is that this is simply another "tool for your toolbox", a trick to add to your repetoire.
Have a safe, happy Friday.
Your way.
Comments