Welcome to Moda!
Midnight Moon QAL - Week 1
Midnight Moon QAL - Week 1
Published:
Apr 9 2022 - 06:40
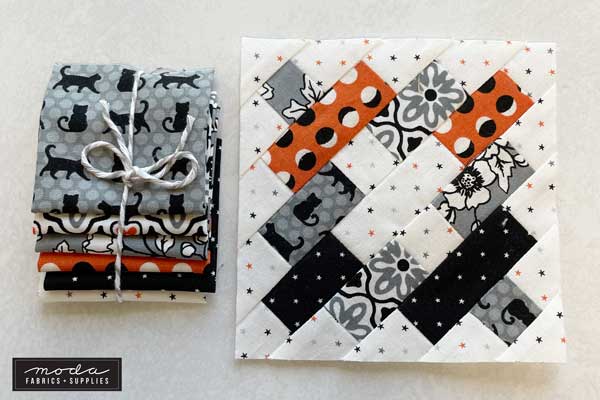
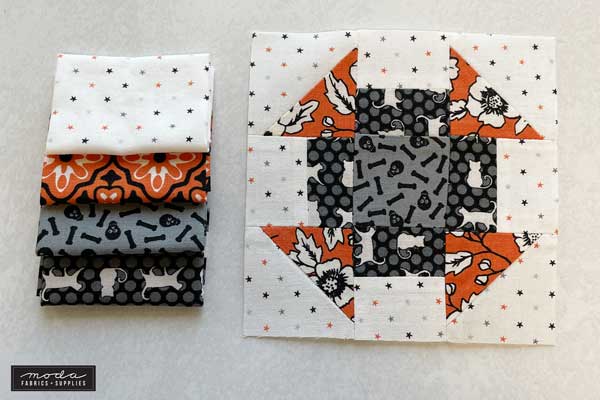
It seems fitting that this "quilty brew" begins with a churn.
And an Album.
There is plenty to get to this week so let's get started.
Fabric Requirements. If you're using Midnight Magic II by April Rosenthal, and you want your quilt to look like this one - Midnight Moon QAL Fabric Requirements.
And don't forget the Summer Moon book! (ISE 927.) We're sharing tips, but the cutting and piecing instructions for the blocks are in the book.
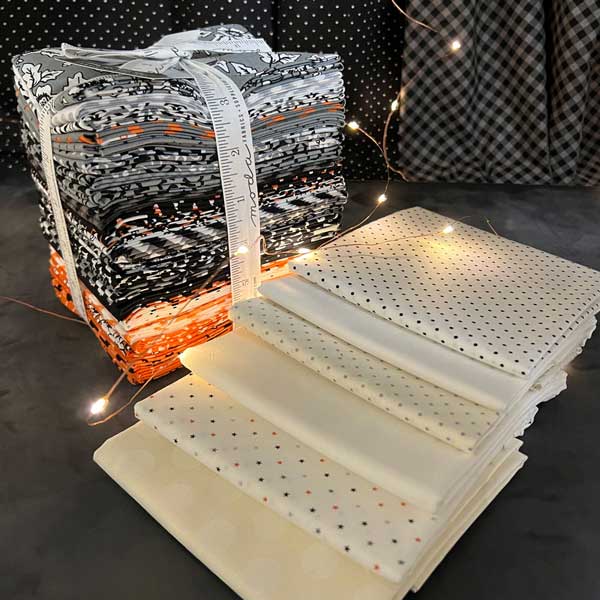
The collection is in shops now, and quite a few shops have made kits for this quilt. So ask at your favorite quilt shop or try an online search. (Be sure that you're not getting the Fig Tree Moda Kit for Midnight Moon - it's a beautiful quilt, but it's not this one.)
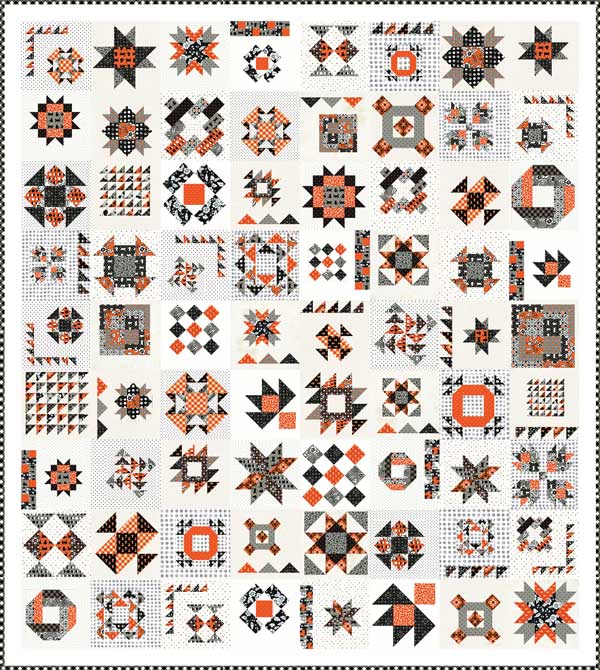
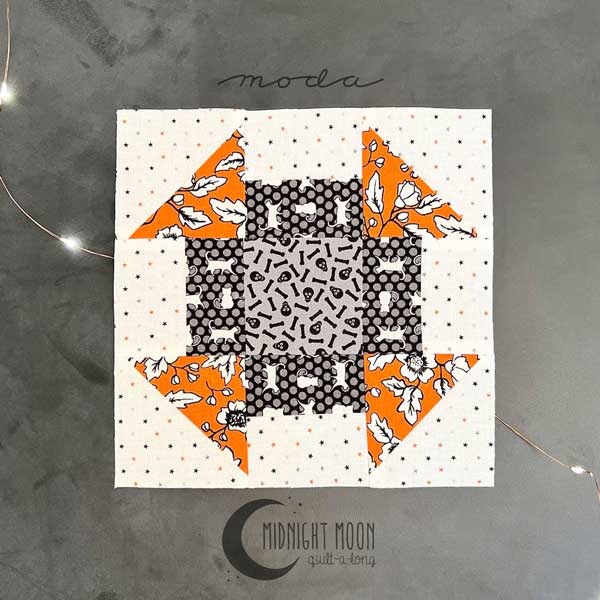
This is the quilt we're making. While we loved this quilt idea from the start, Sarah Price from It's Sew Emma still managed to WOW us when she created this digital version of the quilt. Thank you, Sarah! (You rock!)
Fabrics for each block. To make the blocks using the same fabrics as we are, we have a print-out for the weekly blocks that shows the fabrics used for each block - Weekly Block Breakdown.
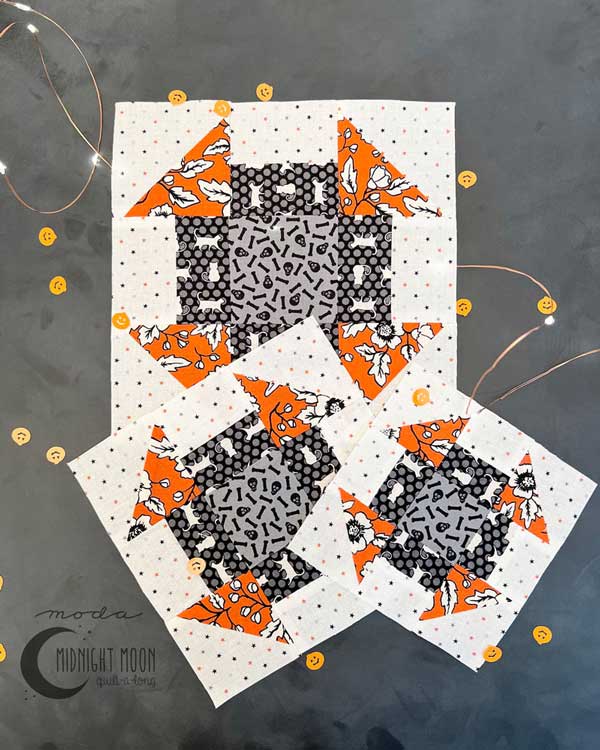
The 4½" finished Album Block and fabrics.
Making the blocks. Each block is made in three sizes, and the small blocks are... well, small. They're pieced the same way as the bigger blocks, but smaller requires a bit more accuracy. So before we start, we usually double-check our seam allowance to make sure it's a scant ¼".
There is a difference between a perfect ¼” seam, and one that is just a little bit less than that, one or two threads width smaller - a scant ¼". Accurate piecing requires a scant ¼", so this is how to test for that.
Making a Test Strip.
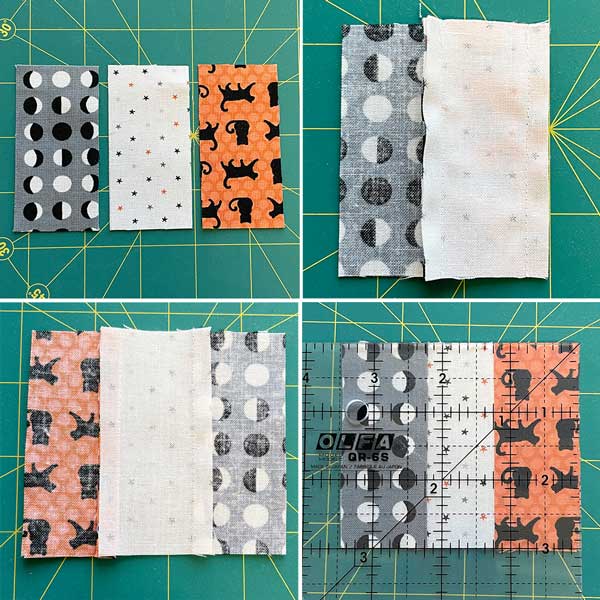
- Cut 3 strips of fabric - 1½” x 3”.
- Join the three strips as shown.
- Press the seams to one side.
- Measure the finished piece - it should measure 3½” x 3”.
- If it’s less than 3½”, the seam allowance is too big. If it’s more than 3½”, the seam allowance is too small.
Organization. Cutting and piecing six blocks each week will be more fun with a little bit of planning. Everybody has the method that works best for them, but this is what works for a few of us.
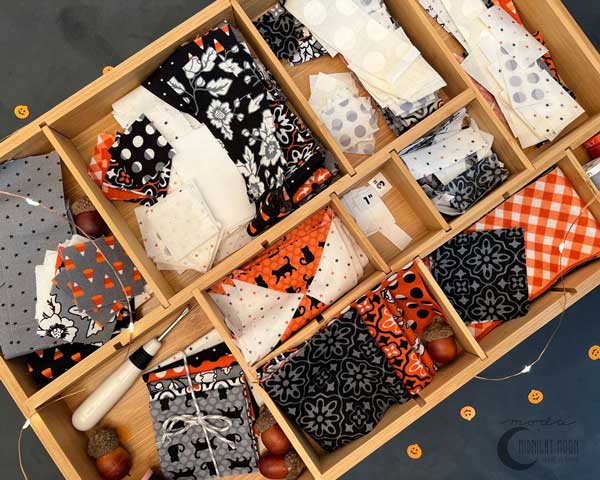
Tammy loves using these bamboo drawer organizer trays. Some of the compartments can be adjusted for size, there are other, smaller trays, and they're all stackable.
We cut the pieces for all three sizes of one block at the same time. We do this when we're using the same fabrics for each block, and for when we're making scrappy blocks. The parts for each size can be clipped together, stored in a Ziploc bag, or in it's own tray. Leftover pieces are sorted by size in bins, trays or baggies, and labeled.
Once the blocks are cut, finding even a few minutes to sew results in visible progress in piecing the blocks. That process is also personal preference - make one block at a time, or piece all the HTSs, flying geese, etc.
The trick is having a plan, and sticking to it.
Album Block. This block is trimmed down to size after piecing. It will have bias on the outer edges, but don't worry about that because we will be adding a straight of grain border to the blocks later. Just don't handle the block any more than necessary.
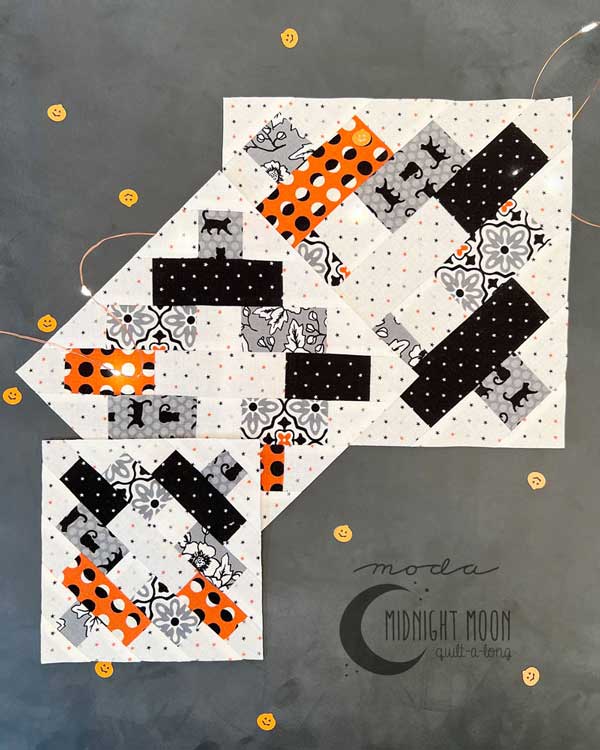
Tammy's Pro Tip No. 1: Piece the biggest block first, then work down to the smallest. That's how we work out any kinks, and find the way that works best for us to piece that particular block.
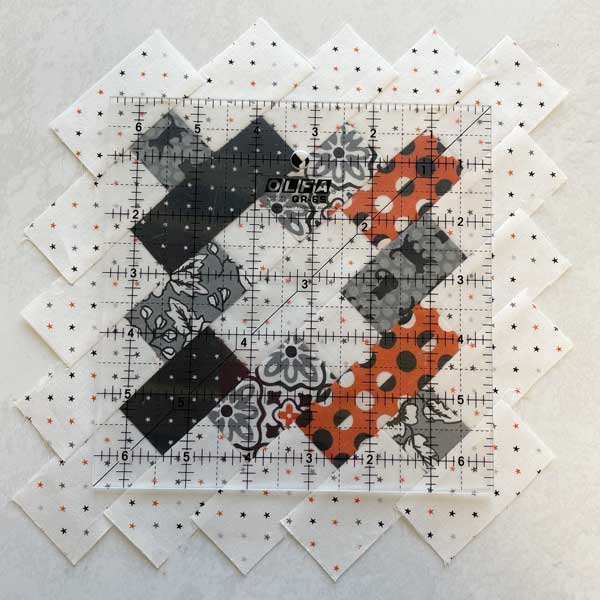
This is the 6" finished block, it will be trimmed to 6½".
There are a couple of tips to share for trimming the block.
- Use a square ruler large enough to cover the entire block - and use a ruler with a 45° diagonal line.
- Determine the mid-measurement for the trimmed size of the block. E.g., - 2½" for the small block, 3¼" for the medium block, and 4" for the large block.
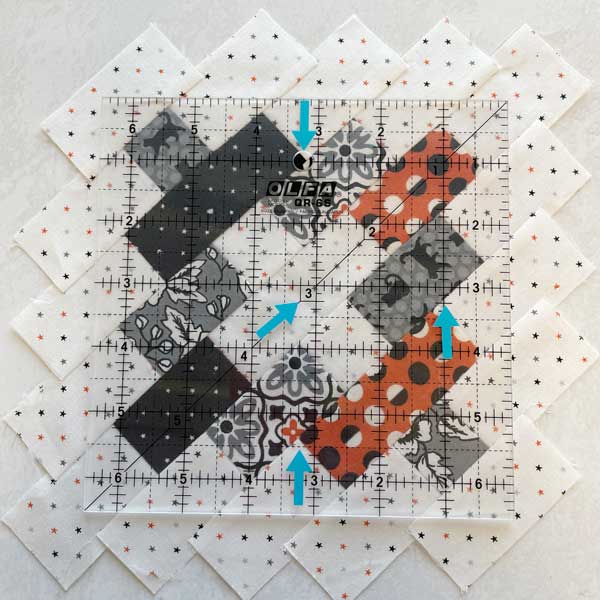
- Add stickers or tape to your ruler to mark those points on the ruler. They are for alignment. (We love these Ruler Stickers by Gudrun Erla of GE Designs.)
- Don't worry if every point is not exactly perfect - split the difference so it's close-enough if needed.
- Before you cut - make sure there is at least a ¼" seam allowance on all four sides.
So yes, this ruler needs to be skooched up a bit before the block is trimmed. (It slipped while I was taking the picture...)
Churn Dash.
Making the half-square triangles a bit bigger, then trimming them to size is a popular method for a reason. The results make it worth the time. Over-sizing is easily done, just look for the squares being cut for half-square triangles and add 1/8" to ¼". E.g., instead of 2-7/8", cut the squares at 3" or 3-1/8".
If you're on Instagram and/or Facebook, we'll be sharing blocks using the hashtag - #modamidnightmoonqal.
We'll see you next Saturday!
------------------------------------
If you missed any posts about the Midnight Moon Quilt-along:
Posted in:
Comments