Welcome to Moda Fabrics!
Scrapbook of Quilts PAL
Scrapbook of Quilts PAL
Published:
Jun 29 2021 - 04:09
Yes. Pillow-along. We're making pillows together!
Who is "we"? Joanna Figueroa - you know her as Fig Tree & Co., and Kimberly Jolly of It's Sew Emma. And lots of pillow-loving friends.
Porquoi? Joanna and I did a book, it's titled Scrapbook of Quilts. To introduce it, we wanted to share something a little bit different. I'm not sure how pillows came up as an option, but as soon as it was mentioned, we knew that's what we wanted to do. We both love making pillows, they're essentially mini-quilts for those of us who don't have a lot of wall space. They're also a great way to "scratch an itch" to make something different, try something new, or just make something without it taking days and days.

This is the book. It's in shops now.
What do you need to know now?
How many weeks? Six. Seven if you count the wrap-up.
There are six chapters in the book, each chapter is about one quilt. Or design. Since a couple of the quilts have more than one block, there are variations coming. Here's the wrinkle... while there are eleven pillows in the book, they only come from four of the chapters. For this pillow-along, we're going to add a few new ideas, and new versions. You'll need the book for the blocks, and for a few of the pillows.
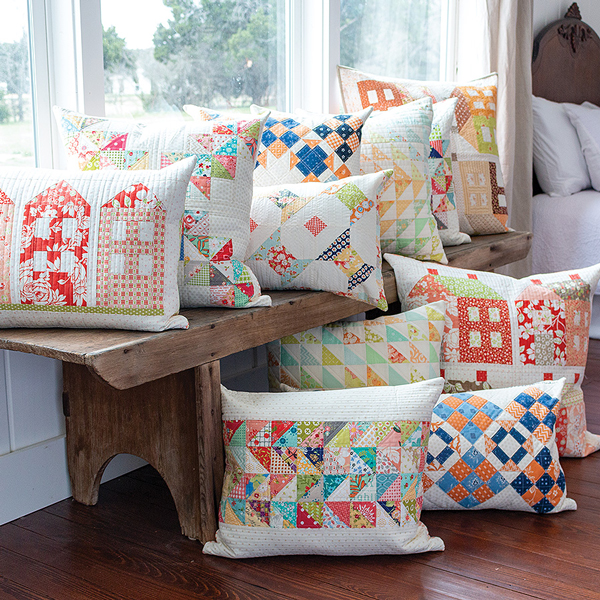
I know. We might have gone a bit overboard with the pillows.
What do I need? The book. While there might be an addition or two, some little tweak that requires a bit more detail, the blocks are in the book. And some of the pillow patterns are in the book.
Did I see something about themes? Yes! To challenge ourselves, and make digging through our scraps a bit easier, we came up with six themes. They are Patriotic, Neutrals, Two-Color, Classic Autumn, Halloween and Christmas.
Tips and techniques? Yes to that too!
The next six weeks, Joanna and I are going to share our preferences for making pillows. What we like, how we do it, and a bit of what we've learned over the years.
This is that schedule:
- Quilting the Pillow
- Pillow Sizes - what we use and how to adjust.
- Back of the Pillow - favorite fabrics, quilted or not, options.
- Closures & Zippers - I'll share how I put in zippers. (I have two weeks to figure out how to do a quick video... ack!)
- Finishing Touches - ruffles, prairie points, buttons and labels.
- Assembly - putting the parts together.
This is one of the Nine-Across pillows from the book.
Batting. I like a thin cotton batting for pillows for two reasons. First, I like the look and the feel of it, especially after it's been washed. And I want to do what I can to minimize the bulk in the seams assembling the pillow. I use Hobbs Tuscany Cotton batting, and Moda's Luna batting is also really nice. But my favorite is Quilter's Dream Request weight.
I have also used wool batting - Tuscany Wool is a favorite, as is Hobbs Heirloom Wool. They wash up beautifully, though they do shrink a bit more than cotton. (Especially if you put the pillow cover in the dryer with heat.)
Joanna is a fan of fleece, and I've used it, and heartily endorse it as an option. The fleece I've used is Pellon's Fusible Fleece. I've made a few pillows that weren't going to get much quilting, but would need to be washed, and I found the fusible fleece worked perfectly. The rest of the time, I simply prefer cotton batting.
Pillows are also the ideal time to experiment with a new-to-you batting. Get a Craft or Crib size batting to see how it quilts, washes, and wears.
Lining. The fabric that goes on the other side of the batting or fleece, what will be on the inside of the pillow. As it is with the batting, I use the lightest-weight fabric I have, or can find. I have used leftover pieces of silky woven cottons, and Moda's premium extra-wide muslins work beautifully. I also use a 100% cotton lawn in white.
The one thing to watch for here is "shadowing", especially if you're using a lightweight batting. Using leftover pieces from backings, or fabrics you have on hand, is good, so long as they aren't darker than the front of the pillow. That's why the muslin is an easy choice for me. It's also not expensive.
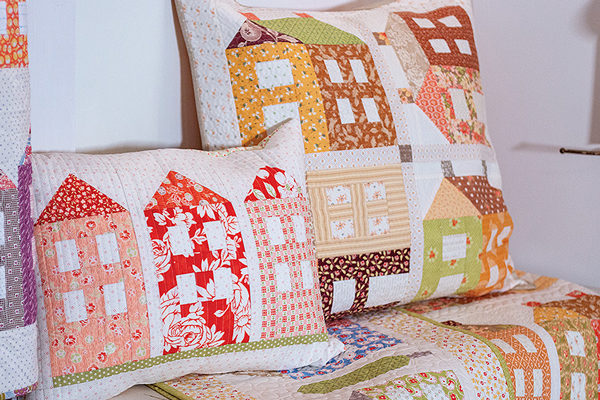
Two of the Neighborhood pillows in the book - Joanna's Autumn-inspired pillow is so yummy.
Marking. My go-to is a Hera marker, followed by chalk, and then masking tape. If you're not familiar with it, a Hera marker is a plastic or wood tool with a curved edge that has a v-shape. Using gentle pressure, it creates a temporary crease in the fabric that serves as a line. My favorite is this Point 2 Point Turner by Clover - No. 7803. I also use the point-turning end for corners on pillows, pincushions and zipper bags. (As in, I have more than one of these.)
One thing to note - when I'm quilting, sometimes it's hard to see the crease-line after it's been marked. Turning off the light on the sewing machine always helps with that! Go figure.
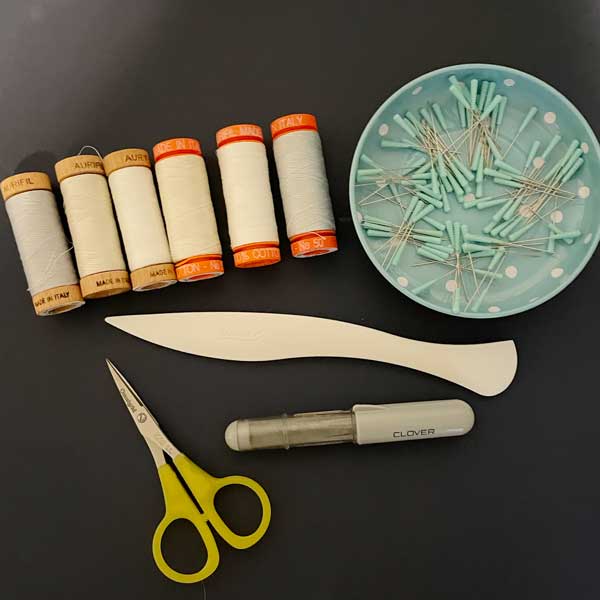
My go-to tools for the quilting part of pillow-making.
- Aurifil threads in 50wt. and 80wt.
- Magic Pins - Quilting Fine (I also have the Extra Long but couldn't find those for the picture.)
- Clover Point 2 Point Turner
- Clover Chaco Chalk Marker
- Omnigrid 4" scissors - for trimming threads
Basting. I pin-baste the layers, usually with a dozen or so straight pins. I also use safety pins, and I've used these Clover Wonder Pins - they're really nice. With the straight pins, as soon as an area has some quilting and is stable, I start removing the pins. They're also easier for me to move if I've managed to put one right in my stitching line.
I know many people are fans of spray-basting with different products. They're terrific, they do the job, and some of the "dire warnings" about glue in the machine are probably exaggerated. But for a personal health-issue, I avoid aerosols, chemicals and glue whenever possible, so I use pins.
And sometimes I get wrinkles in the backing.
A close-up of my Mini Side Spool pillow... more about it in a moment.
Quilting. I wish I was a better machine-quilter. But machine quilting is like most other things, you get good at it by practicing it, and by doing it a lot. Since I've done neither one of those things, I accept my machine-quilting shortcomings. Some days, the results are pretty good. Other days... not so much. But it's a pillow, and I'm going to be using and washing it.
So I like straight-line quilting... make that "organic wavy lines". When I'm in a rush - usually because I've put something off to the last minute - the lines get wavier. For some pillows, I will do edge-stitching.
Here are a couple of things I will still share here - a non-expert opinion.
- Walking foot - it's absolutely necessary for me to use one here.
- Back-stitching - if you're worried about how it will look on the back of your quilt... it's the inside of the pillow. I do it when I'm going to jump a mini-sashing strip and need to clip my threads. (Like for the pillow above.)
- Traveling - there are times when I want to edge-stitch a block - usually 1/8" away from the seam - and I need to get from here to there. If the space is a ¼", or I'm stitching the other side of the seam, I will stitch in the ditch to get to where I need to be. It's a pillow - those stitches are on the inside, and I'm not entering this in a World Pillow Challenge.
- It's okay to change your mind about the quilting a couple of lines in... been there, done that. I have un-stitched a dozen lines of match-stick quilting because it didn't work for the pillow.
- Check your tension! Frequently. If there is a problem, re-thread your machine completely. Change the needle. Do that before you start fiddling with the tension button. With very few exceptions, that "fixes" the problem for me.
Be sure to check out what Joanna has to write about this, she uses a zig-zag stitch on her machine that looks really good.
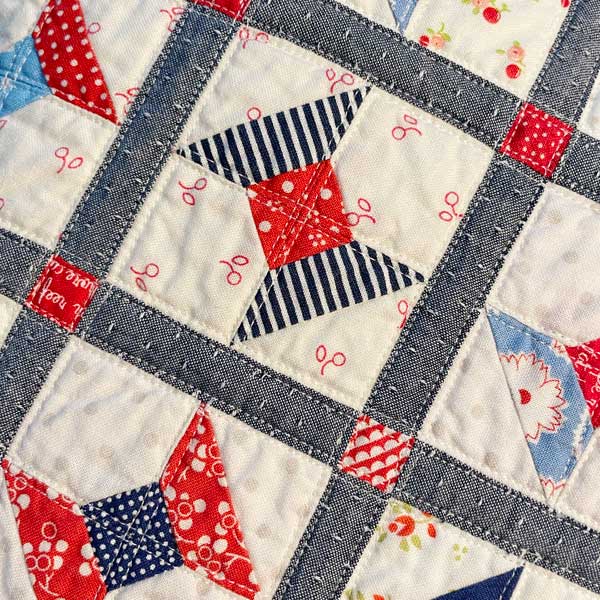
A close-up of the Nine Across pillow shared earlier - this is an example of where I stitched in the ditch to get to the place I needed to be.
Thread. I use Aurifil thread in the 50wt. and the 80wt., in neutral colors. While I have quilted a few pillows with colored threads, the scrappy nature of most of the colors and fabrics I use mean that most are quilted with threads in shades of gray, taupe, tan and ivory.
The weight of the thread varies depending on how much quilting I think I'm going to be doing, and what suits the pillow. While the difference between the two weights isn't that noticeable - not like a 50wt. to a 28wt. - there are times when I want a thread that almost melts into the fabric. The 80wt. does that beautifully.
I use a 50wt. thread in the bobbin, usually in white or ivory so that the quilting lines don't show on the inside of the pillow. I do check the tension frequently to make sure that I don't have threads pulling through to the top, especially if I'm using a darker color.
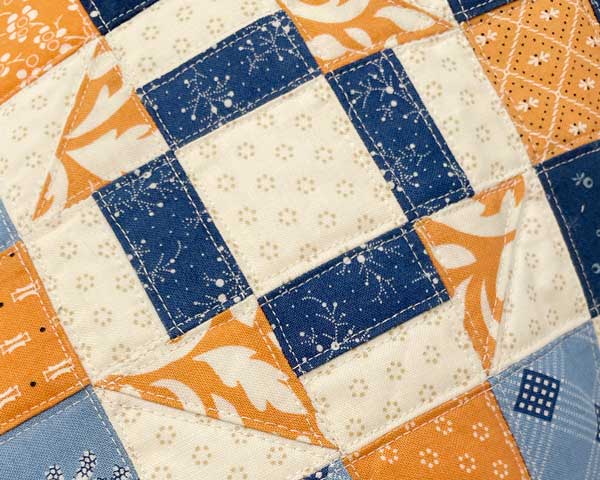
So what did I make this week? This week's chapter is Vintage Spools. Joanna created two spool blocks for the quilt, and then drafted a mini-version of the Side Spool block for a couple of seriously gorgeous pincushions.
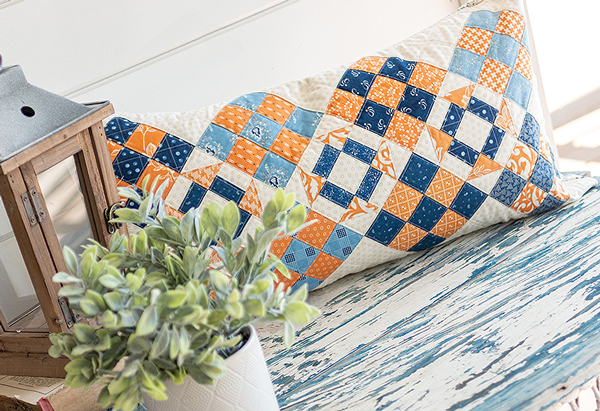
Vintage Spools - Patriotic.
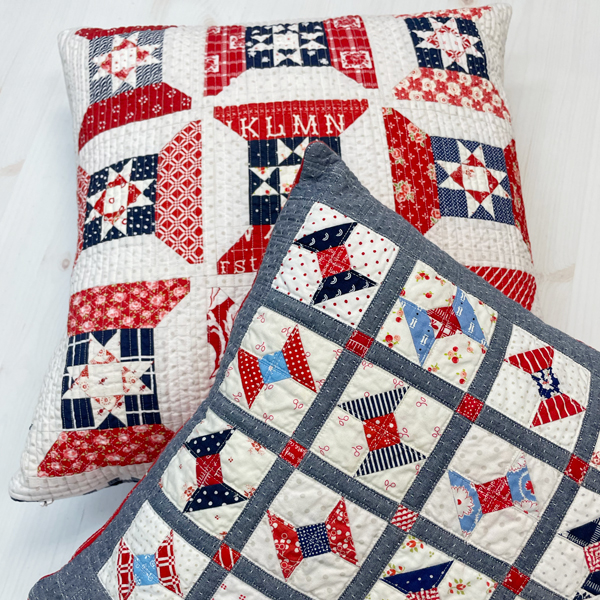
Back to front. The pillow in back is made with nine Straight Spool Blocks in a straight setting of three rows of three blocks each. But there is a little tweak in the center of the spool - those are 3" finished Ohio Star blocks. There are 2" cut borders on the four sides of the top - 2" x 18½" and 2" x 21½". The quilted top is trimmed after quilting to measure 20½" x 20½".
For the mini Ohio Star in the center of the spool, you'll need the following:
- Navy - 4 squares - 1½" x 1½"
- Navy - 1 or 2 squares - 2½" x 2½"
- White/Cream - 2 squares - 2½" x 2½"
- Red - optional - 1 square - 2½" x 2½"
- White/Cream - 1 square - - 1½" x 1½"
Use the 2½" x 2½" squares to make four matching quarter-triangle squares. Match the squares - 1 Navy/1 White - make 2. Or match the squares - 1 Navy/1 White and 1 Red/1 White. Trim the pieced QTS to measure - 1½" x 1½". Assemble the parts to make an Ohio Star block that measures 3½" x 3½". Make nine Ohio Star blocks - then follow the instructions in the book to make nine Straight Spool Blocks with the Ohio Star in place of the plain 3½" x 3½" squares.
The pillow in front uses the Mini Side Vintage Spool Block - twenty-four of them set in four rows of six blocks each. They are separated by sashing strips cut at 1" wide, finishing at ½" wide. The pieced top will measure 18" x 12". The side borders measure 2" x 12", and the top/bottom borders were cut at 3" x 21". The pillow was trimmed to measure 16½" x 20½" after quilting.
To see what Joanna is sharing about quilting pillows - Scrapbook of Quilts: Week #2.
If you missed this last week - Scrapbook of Quilts Pillow-Along Week 1. (Intro.) Kimberly and her crew at Fat Quarter Shop and it's Sew Emma shared - Join Us For A Scrapbook of Quilts Pillow-Along!
If you're on Instagram, be sure to check out #scrapbookofquilts and #pillowalong.
And don't miss Joanna - @figtreeandco / Kimberly - @itssewemma - and this week's friend/guest Greg - @greydogwoodstudio.
That's it for this week.
(If you have questions - please leave a Comment. They're Moderated so it will take a day or so for them to show up on The Cutting Table.)
Posted in:
Comments